

Step by Step Everlasting Sweet pea botanical illustration

Sweet peas are beautiful flowers, and a joy to paint. This blog is a step by step guide to painting the Two-flowered Everlasting Sweet Pea Lathyrus grandiflorus.
About Sweet peas
Members of the legume family; Sweet peas are classed alongside peas, gorse, beans and lupins. Lots of food crops are members of this family; alfalfa, chick peas, and soybeans spring to mind.
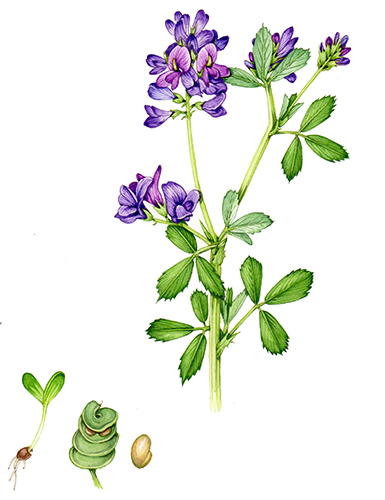
Alfalfa Medicago sativa
The sweet pea flower has 5 sepals and 5 petals, and their leaves are hairless. Each leaflet consists of two pairs of leaves and a terminal tendril which helps the plant to cling as it climbs upwards. Sweet peas have winged stems and the leaves carry distinct veins.
There are lots of different species and cultivars of these pretty flower; some smell amazing and come in a wonderful range of colours. These flowers can be found in gardens around the world.
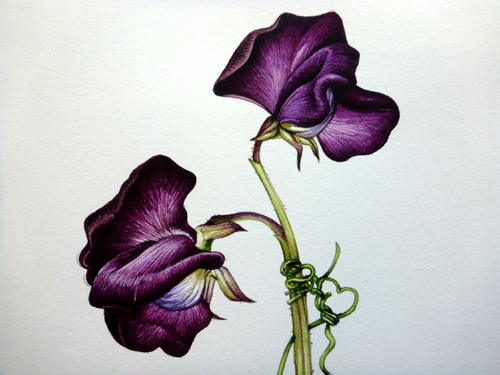
Garden Sweet Pea Lathyrus odoratus
The species I’m illustrating today is the Two-flowered Everlasting Pea Lathyrus grandiflorus. This plant grows as a thick hedge in my garden every year, so there’s no trouble finding good specimens! (For a step by step guide to illustrating the Garden sweet pea (above) check out my earlier blog.)
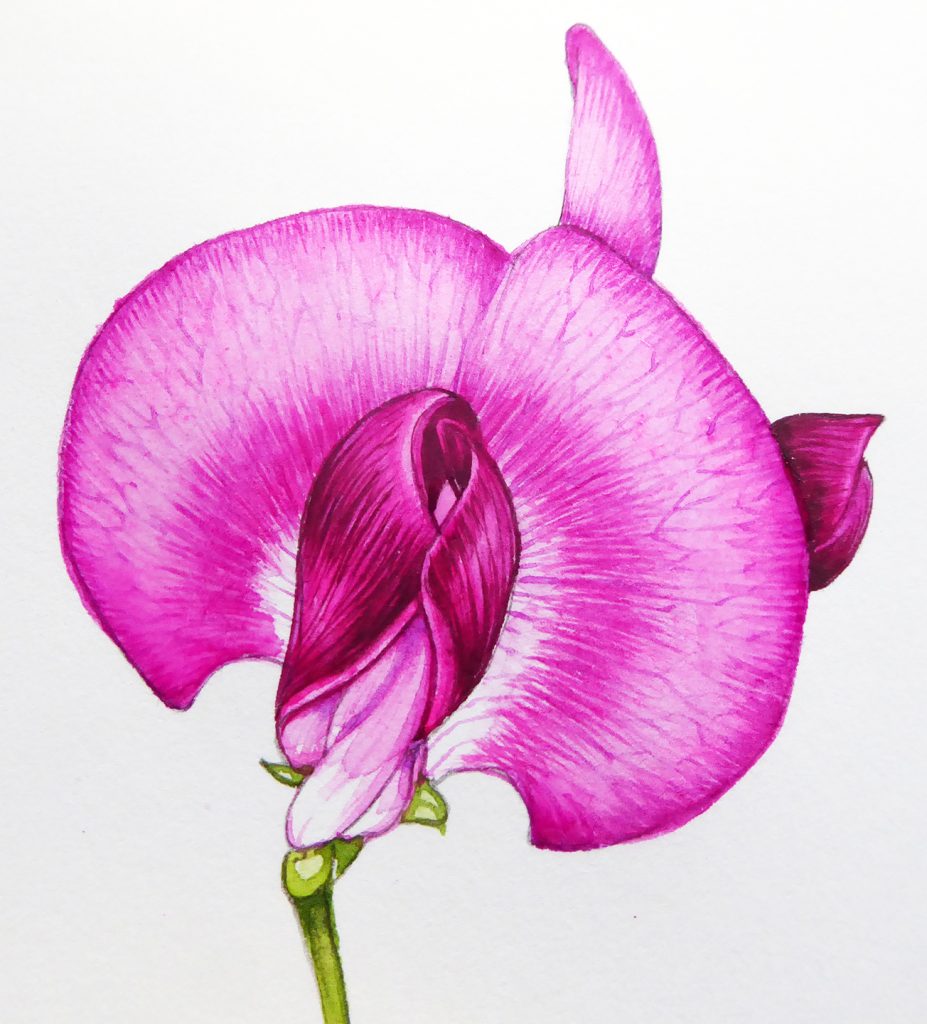
It’s worth looking at the structure of the sweet pea before painting it. This may involve dissecting it, or taking it apart. Each flower consists of a standard petal, which stands upright. Two wing petals are in the middle of the flower (in this species these are a darker pink), and then there’s a claw petal below these which consists of two fused petals. For more on the biology of this species, have a look at the Wild Flower Finder site.
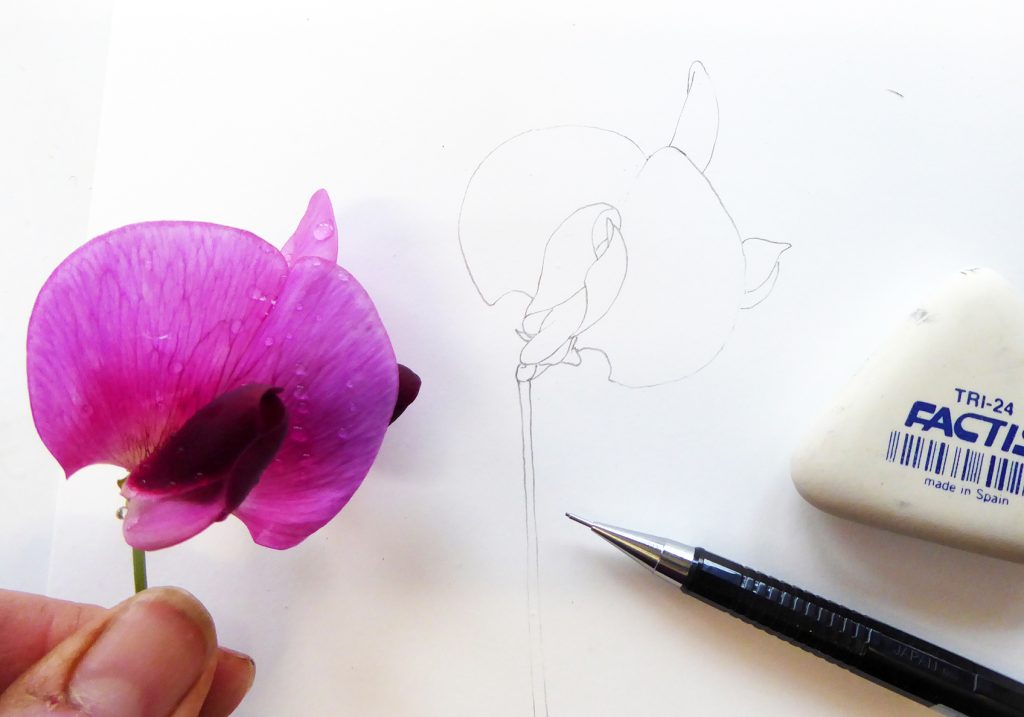
Step 1: Draw up your flower in pencil
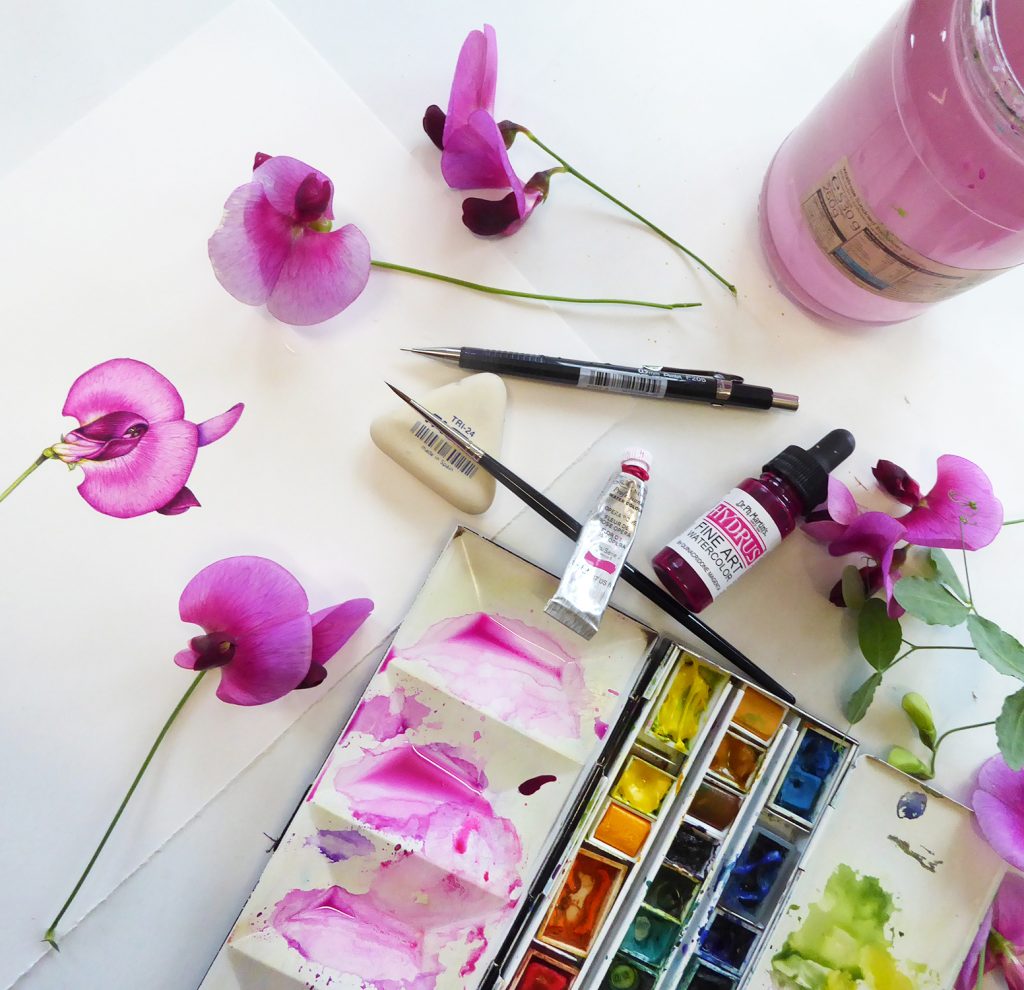
Decide if you want to focus on the flower, or want to include leaves and tendrils too. It’s worth concentrating on the flower first as they can wither fast. You can extend their lives a little by putting a twist of wet tissue at the base of the stem. It’s wise to take a photo of the everlasting sweet pea flower early on for future reference. Make sure you have several flowers on hand before you start.
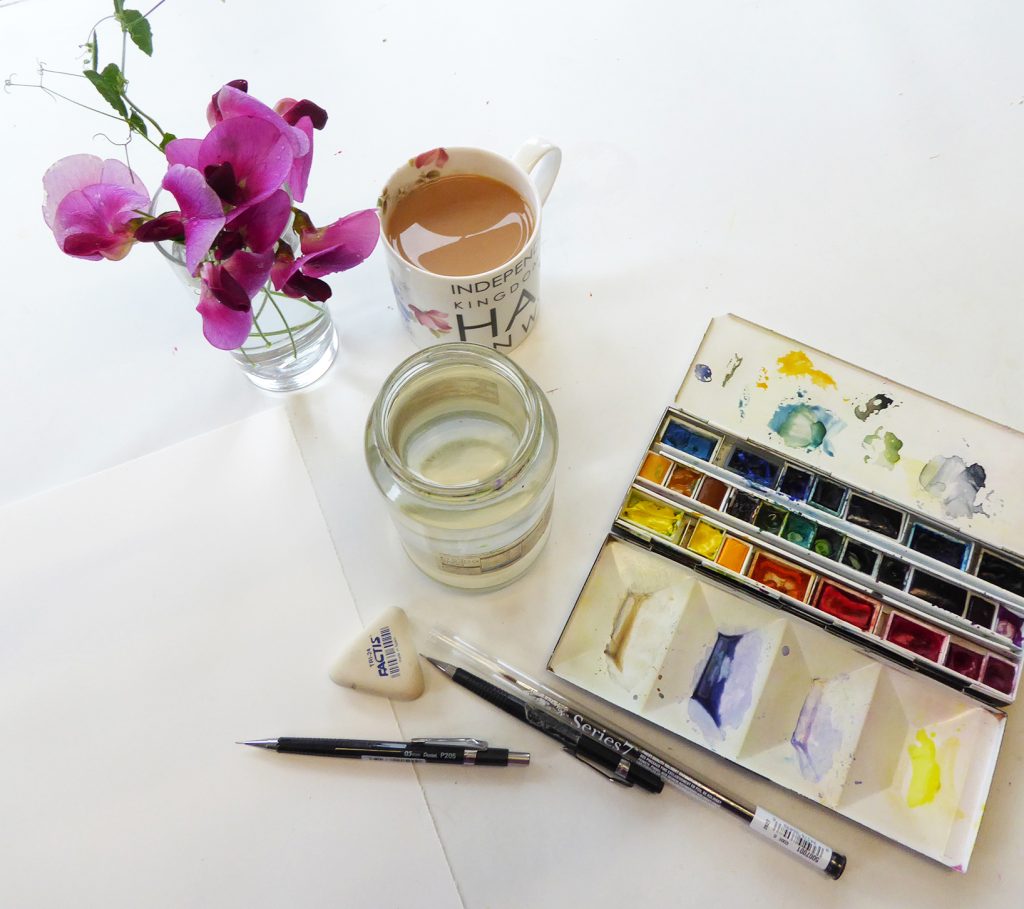
Think about the composition, and how your illustration will sit on the page. Be sure to leave plenty of paper around the edge of the illustration. Have a cup of tea.
Using a pencil, and drawing direct onto your watercolour paper, draw the flower. I like to use the Pentel P205 mechanical pencil, and my current favourite hot press watercolour paper is Global Arts Fluid 100.
2. Add the veins
Now plot in the network of veins you can see within the petals. Concentrate on getting the pattern correct, and anchor the veins at the edge of the petal with extra little brush marks.
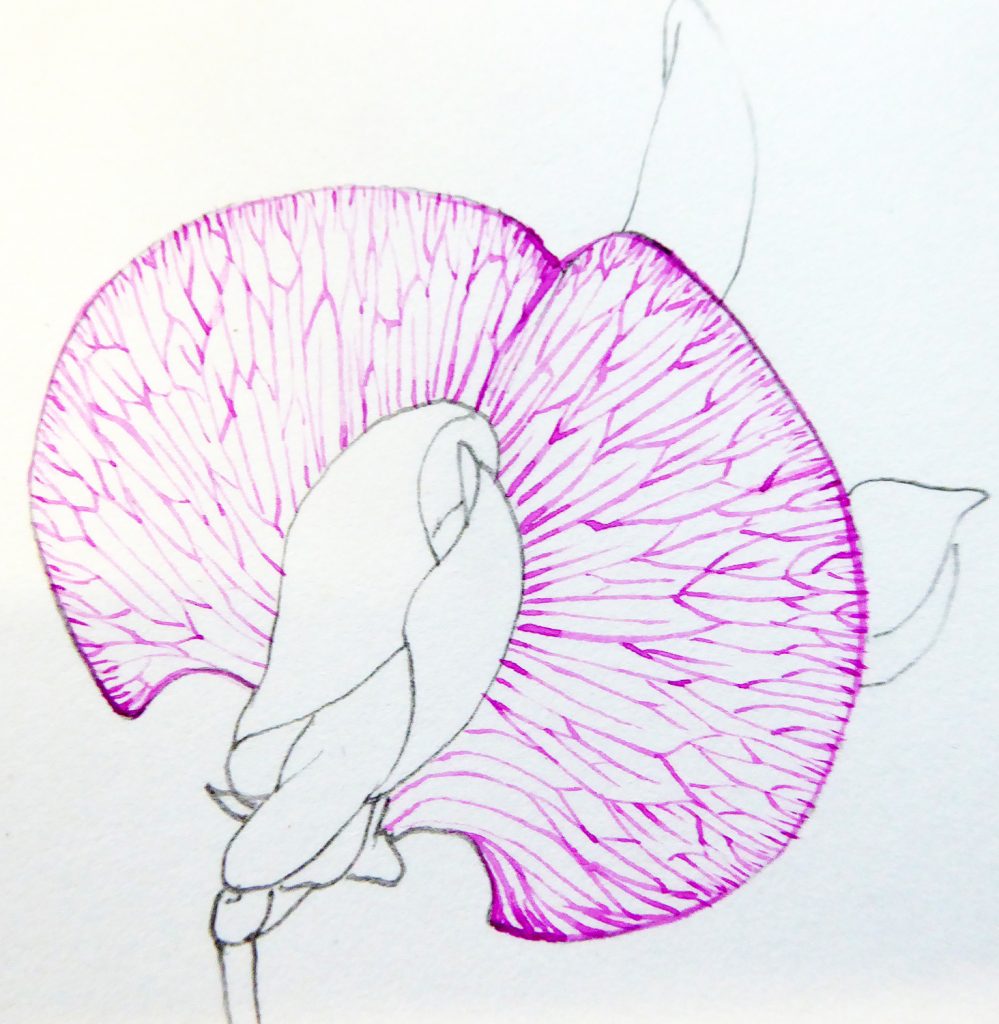
I use Winsor & Newton watercolours, and work quite dry. This mix is Opera rose with a touch of Cobalt blue. I always use a Winsor & Newton series 7 paintbrush, normally a number 1.
Now do the same for the veins in the central winged area of the flower too. The colour mix here is the same as before, but with some purple added.
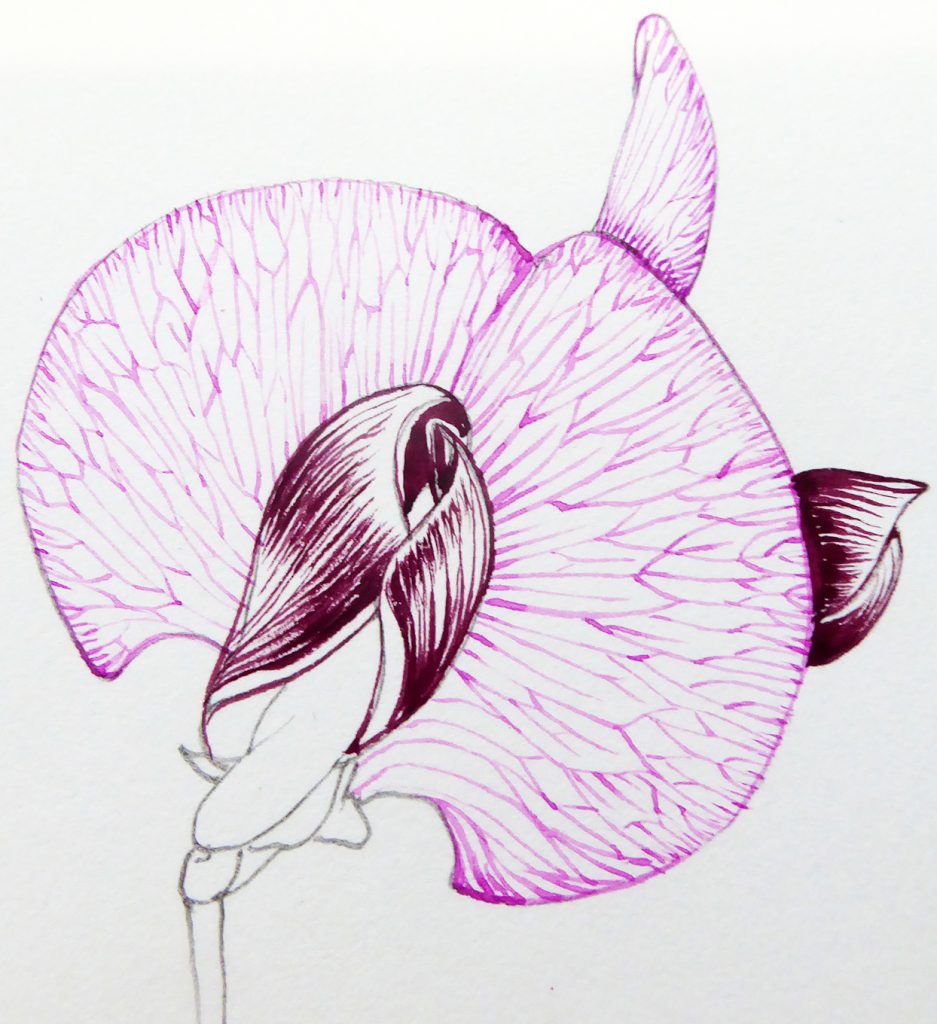
Step 3. First wash
You’re going to be putting a layer of pale pink on the flower next. Mix up a very pale tint of pink, and be sure you make it paler with clean water rather than with white paint.
Apply this to the outer edges of the flower, and the darker zone at the centre of the flower. Be sure to follow the lines of growth with your paint brush, and don’t be heavy handed. You can always make watercolour darker, but you can’t lighten it!
Mix a darker pink for the central petals. I used purple lake, Alizarin crimson and opera rose; but be informed by the colour of your own specimen.
Make sure you leave the white of the page to act as a highlight; you’ll knock it back later on.
While you’re waiting for the wash to dry, plot in the green of the stem. A good trick is to outline either side of the stem, then put a paler green wash across the top. It adds a touch of depth.
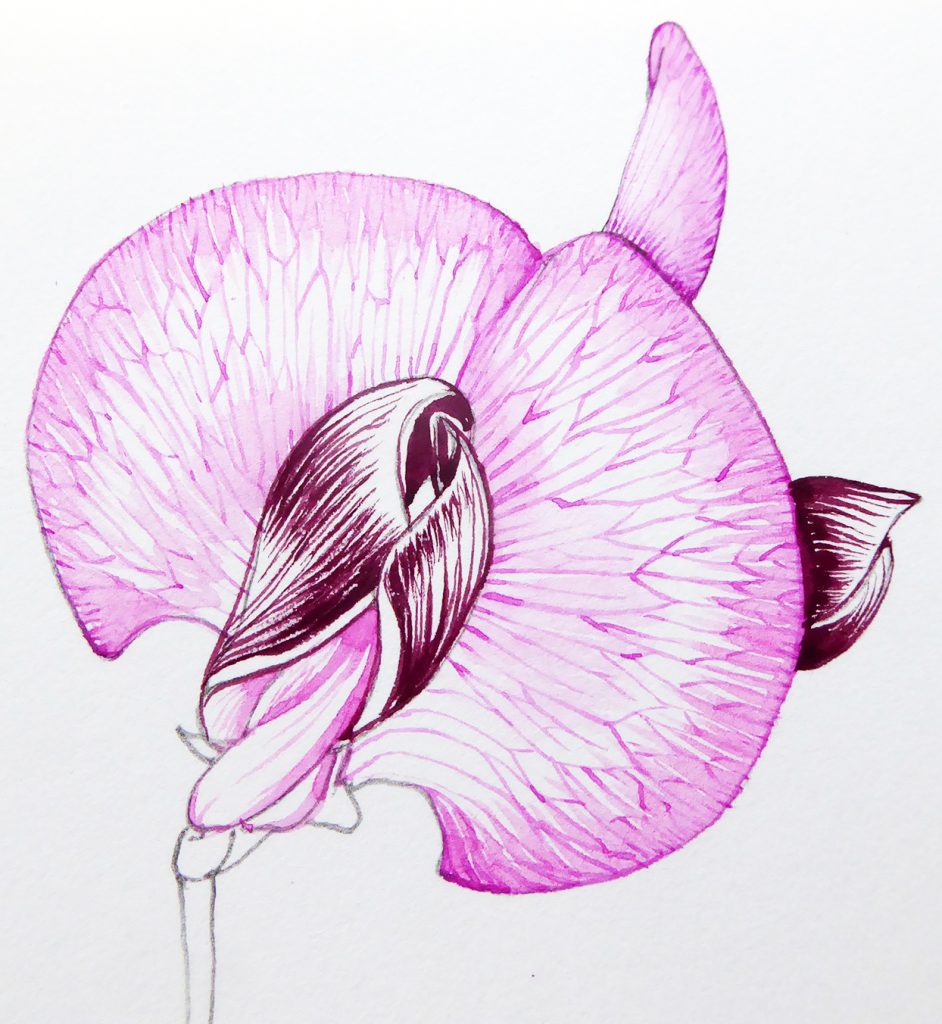
4. Work into the detail and go for a second wash
Once your botanical illustration has dried, work into the inner petals a bit more. Add some detail, and balance the different parts of the flower by adding pinks to this central zone.
Mix up an ever paler and wetter tint of pink. Apply this wash across almost the entire flower (including the parts which got the first layer of colour). Leave the palest areas as white paper, right next to the stem of the flower.

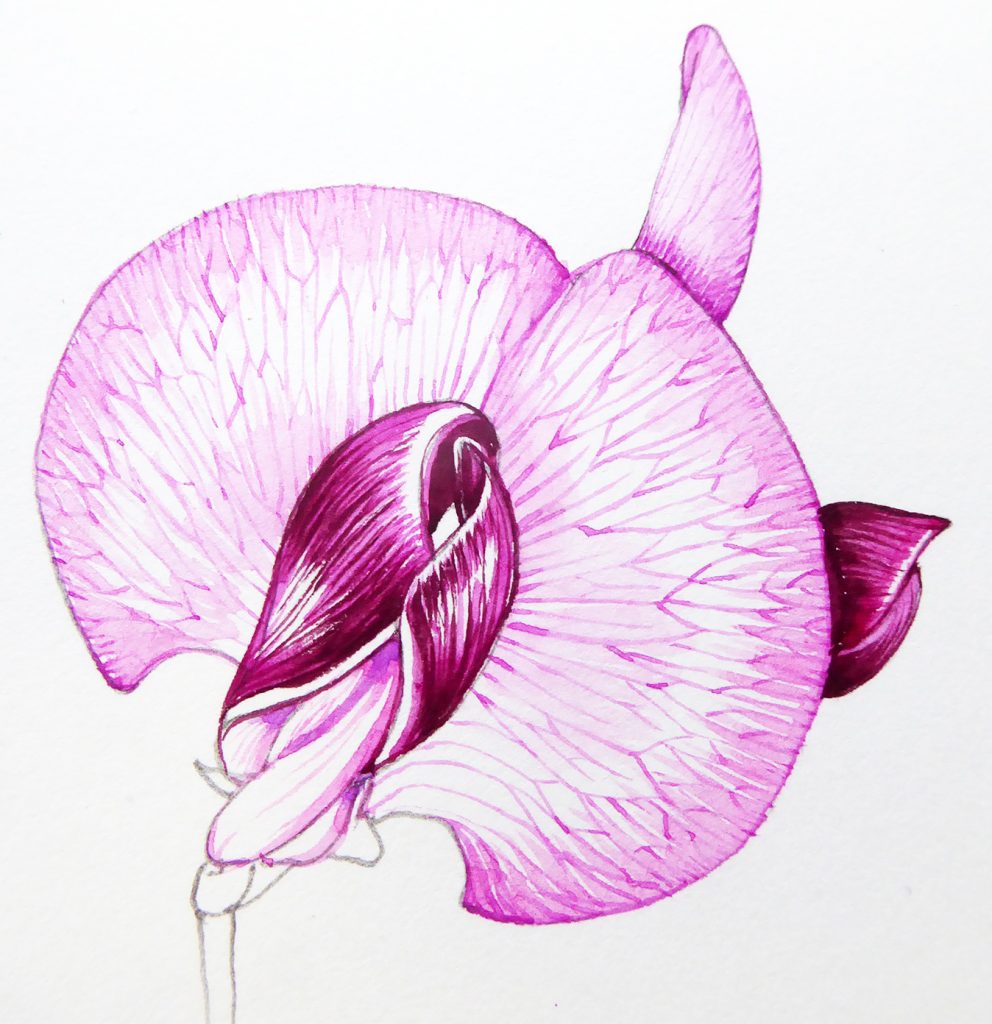
5. Adding depth to the colour
Once dry, work into the petals some more.
Use your paint pretty dry, and build up layers of tiny brush marks. These should echo the areas of light and dark on the flower. Be sure to follow the line of growth, and adding some extra paint marks at the outside edge is a wise move. Your eye likes to feel anchored at the edge of a petal.
I used Opera pink and a touch of the purple used for the flower veins. Go slowly and make sure you don’t take everything too dark too swiftly.
I add another wash of pink to the centre of the flower. You’re trying to keep the lights and darks in tact, but also want to unite the different areas of the flower. It’s something of a balancing act.
Doctor Martins PH Hydrous inks come in a lovely array of jewel-like colours, and I often add a tiny drop of these vivid hues to my watercolour washes. In this case it’s the turn of Quinacridone Magenta.
Step 6: Add darks and shadows
Work into your darkest areas with a blue purple mix. Be brave and don’t dilute it too much. I love the colour you get when you mix Cobalt blue with purple lake and often use this mix to add dark areas.
I then add the tiniest dashes of yellow to the inside regions of the claw petal. This not only echoes the colouration of the flower, but adds something of a “pop” where the dark central zone abuts the yellow.
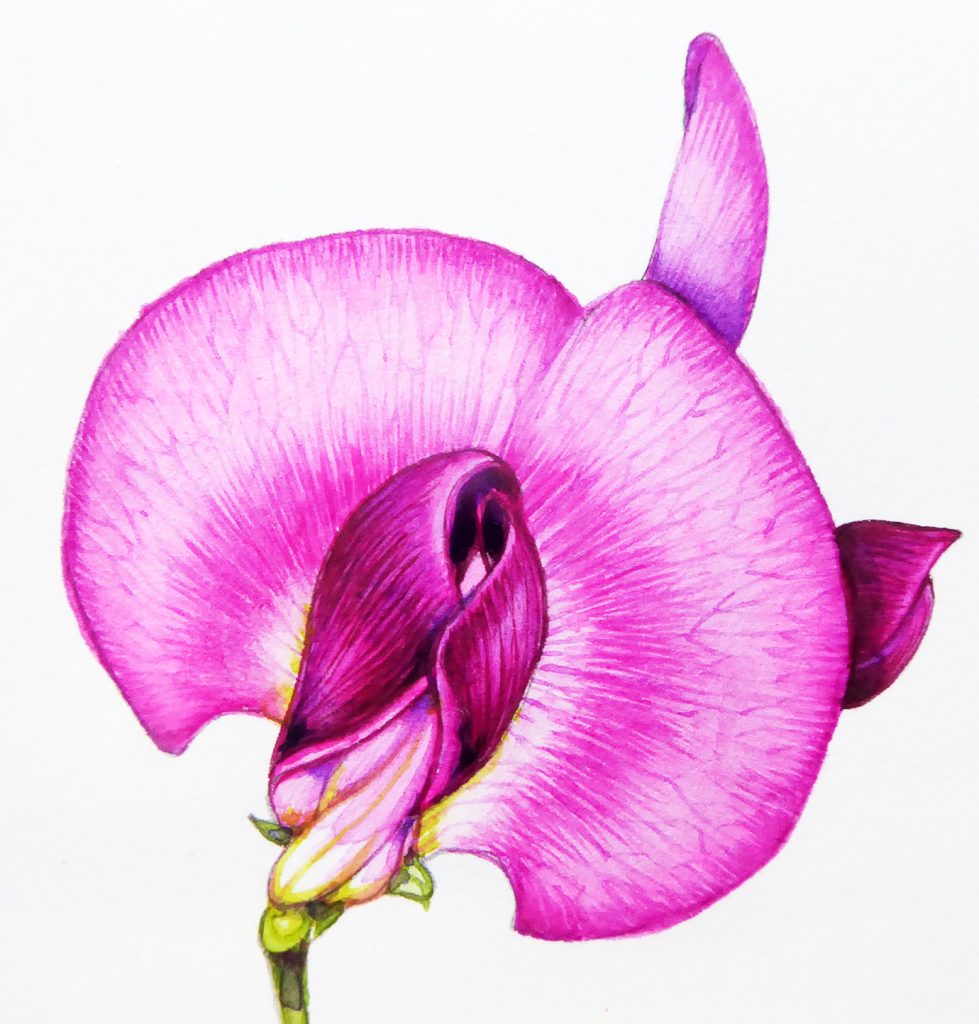
Last thing to do is to check it all looks right. Look closely at your illustration and at your everlasting sweet pea flower. Do you need to add a pale blue wash on top? Are your shadows dark enough?
Excellent! You’ve finished. Now you can go and have a well-earned cup of tea.
Below is a real-time video of me painting this everlasting sweet pea. It’s a very long film, over an hour, but I discuss every process in detail as I go along.
If you’d like to print off a summary of this blog as a step-by-step handout, please visit my Pinterest site.
Merci beaucoup pour cet excellent step by step
C’est mon plaisir, j’suis heureuse que vous aimez mon blog et merci pour votre message.
Liz, a Great step by step. Sweet Peas, are Beautiful.
Thanks,Lois
Cheers Lois, Im glad you think they’re beautiful too, and that the step by step was helpful!
Yours
Lizzie
I love sweet peas, thank you for this tutorial!
Glad to be of use! x Lizzie
I’m so glad I came across your site, thanks for sharing your technique. I’ve just recently joined a natural history illustration course and am hoping to learn as much as I can. Your work is beautiful.
Hello Emily, How exciting to have a whole course to look forward to! Do be aware that the way I work is often seen as a little unconventional (working from darks to lights not the other way round), but the way I see it, if it works, do it! Enjoy your course, I hope it’s wonderful. Yours
Lizzie. PS Thanks for the compliments!
I love the way you work from darks to light. To me it helps to see where your going more easily. Your paintings are beautiful.
Hi Margaret…exactly! Lots of traditional botanical illustrators build up layers, working from light to dark and I admroe them enormously. But I get so lost doing that! Plotting in those darks to begin with gives you a real road map to work from. Your comment is really perceptive. Thanks, and also many thanks for the compliment on my work! Yours x Lizzie
Thank you for such a detailed and very helpful guide. There’s nothing better than seeing painting in action!
Pat x
Ah, lovely Pat! Thanks for the comment, and Im glad it didnt bore you to tears! x
Thank you so much for this! A friend gave me a beautiful set of polychromos pencils in exchange for a sweet pea drawing. I’ve been trying for months but am terrified of the shape of the flower and how delicate it is + it’s winter so practically impossible to find a live reference. This has helped me so much in deconstructing the basic shape and outline of this beautiful flower
I love that sort of exchange. I have a very gifted dress-making friend who exchanged a couple of my illustrations for 2 hand made skirts. We were both VERY pleased. Im really glad you found my sweet pea blog helpful; you’re right to feel intimidated by the flowers, they’re not nearly as straight forward as I thought before I drew them! (To be honest, most plants are rather that way inclined…) And you’re also right in thinking that having live ref makes things soooooo much easier, I couldnt agree more. Hope your friend is suitably grateful for your hard work, and thanks for leaving a comment. x
Lizzie thank you! Your generous sharing of your stunning work and methods, together with your wonderfully relaxing humour Is truly a treasure that I have stumbled upon!!!
Hi Linda
Thanks so much! I really think it’s so easy to share what you do, and I do try to make it accessible by adding a bit of silliness. I truly believe anyone can do decent illustrations if they just put the hours in, and I’m keen to dispel any barriers that make people not want to start drawing and painting. I’m so glad my mix works for you, and many thanks for taking the time to leave a comment. x