

Step by step Salmonberry watercolour painting
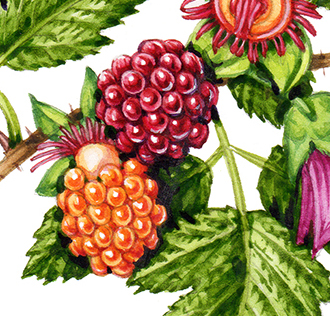
One of the loveliest plants I had to paint for FSC Publications latest chart on invasive species is the Salmonberry, Rubus spectabliis.
I’d not seen this plant before, and was amazed by the big pink flowers, and the striking similarity to blackberry and raspberry.
Not surprisingly, I tackled painting the berries in a similar way.
Pencil Rough
First, I drew up the Salmonberry in pencil. I like mechanical pencils like the Pentel P205, H or HB leads. My favourite watercolour paper these days is Global Art’s Fluid 100 . I draw directly onto the hot press watercolour paper, hoping that any alterations to the rough will be minor. I feel some immediacy and dynamism gets lost if I draw up a rough, then re-draw the same image for the final.
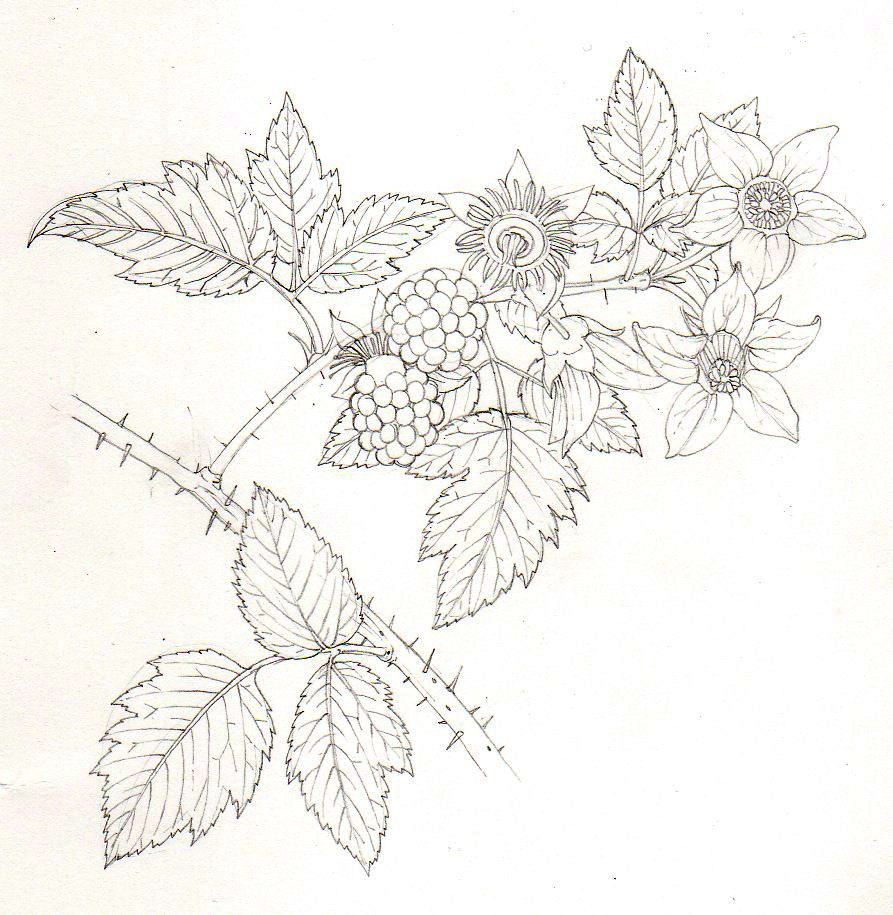
Luckily, the illustration got the go-ahead with no alterations.
Leaves
The most exciting part of this plant is definitely the berries and the flowers. I like to leave the best til last, so painted in the stem and leaves before tackling the fruits and berries. (For more on how I paint leaves, check out: step-by-step painting of leaves-leaves/, Tips on painting leaves, and step-by-step painting of an autumn leaf )
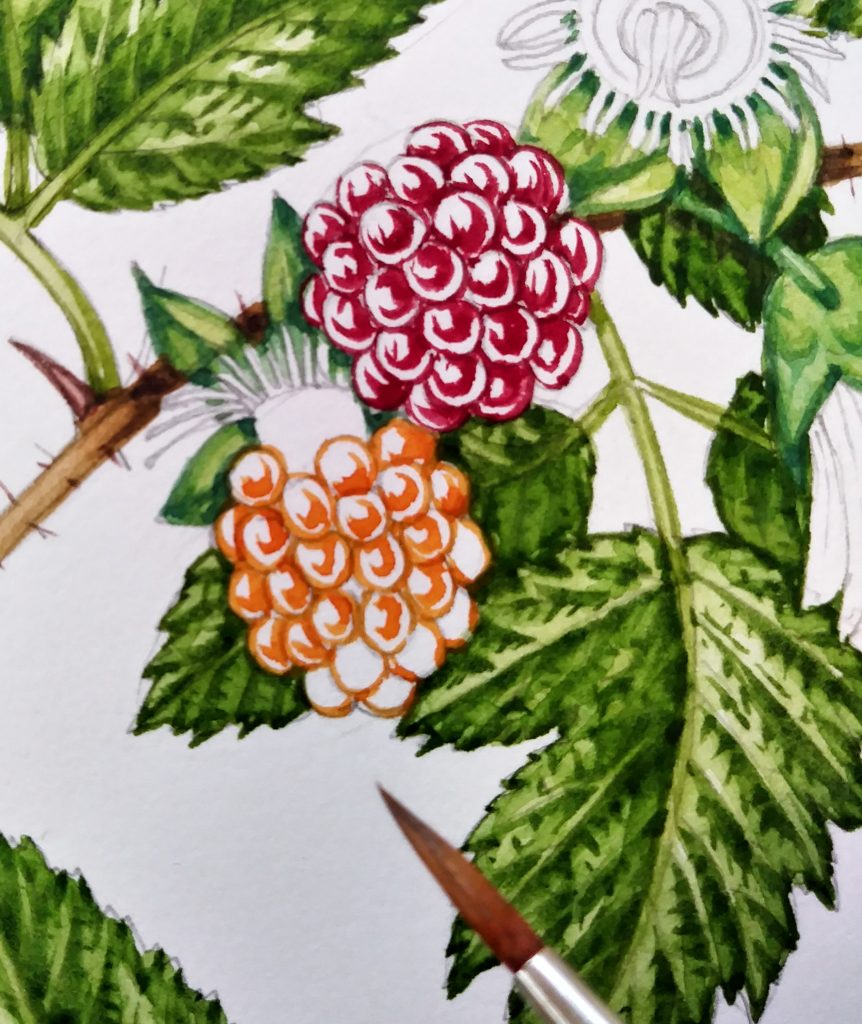
First step of the Berry
The first thing I do is figure out where my light source is. Traditionally, this is top left. Knowing where the light is informs the placement of highlights and shadows. Without these, the berry will never look three dimensional or juicy.
Next, I mix up a good solid crimson. This one is a mix of Winsor and Newton watercolour pans: Alizarin crimson, Cadmium orange dark, and a touch of cobalt blue. I use this on the berry, leaving the areas which are touched with highlights white. In practise this means putting a thin paint line around each drupelet (raspberries, blackberries and salmonberries are made of lots of individual druplets). Within each druplet, a hook-like shape, or backwards “C” shape is plotted in.
I adore Winsor and Newton series 7 sable brushes; they hold their tip and make detailed work much easier. I’m afraid it’s worth splashing out on a high quality brush despite the cost!
The unripe yellow berries are picked out with a mix of Cadmium orange light and Cadmium yellow light.
Plotting in the mid-tones
The mid tones are the areas which aren’t lit up with shine but are paler than the shadows. It’s simple to mix colour here; it’s the same as your first mix but diluted to a paler tint with clean water. You can take this mix up to the dark areas, and also down on the underside of each druplete.
Be sure to leave your brightest areas of highlight as white paper.
Darkening the shadows
The next step is to darken the shadows. I mix up a darker and more purple colour for this. Unless I’m using a watery wash, or a pale tint of a colour, I like to use my watercolour paint pretty dry. The consistency of my paint is similar to that of blood (sorry!).
With the red berry this involves adding a touch of purple and of cobalt blue. With the yellow berry, I emphasize its pinky tones by adding a touch of crimson.
Don’t overdo it, and keep the darks to the central area of the regions you painted to start with. Once that’s done, you can pick out the shadows between drupelets.
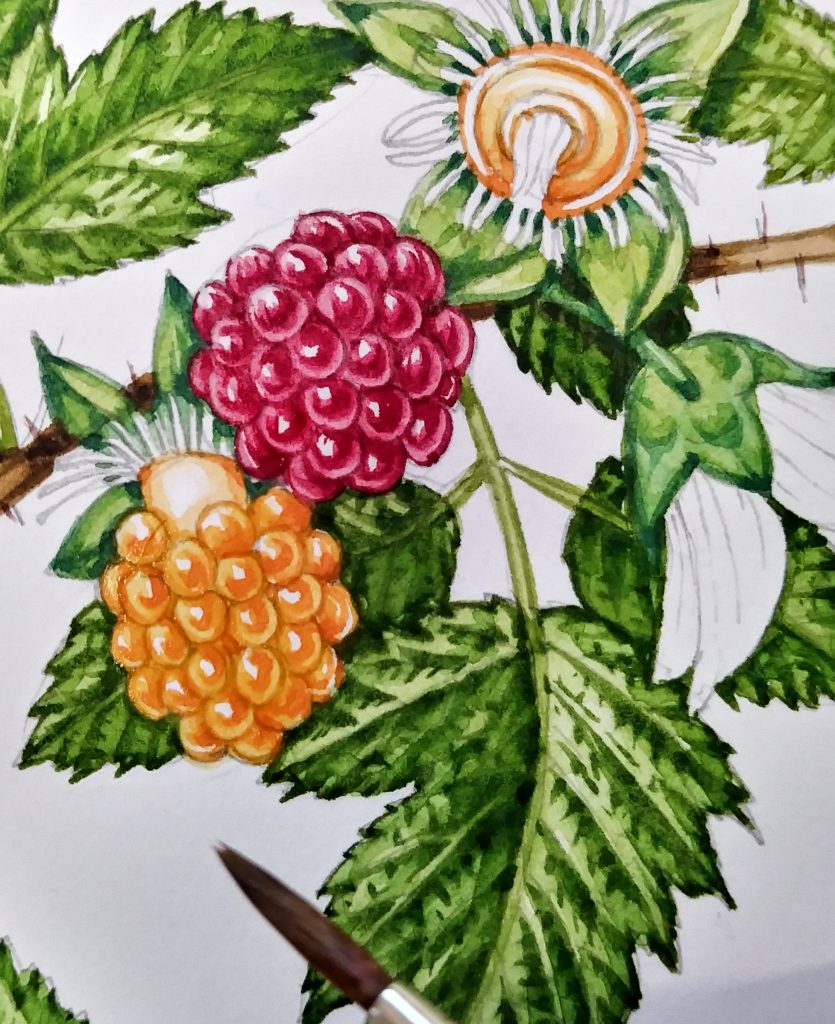
Finishing touches
The last thing to do is to pick out the darkest areas of all, again with a slightly deeper colour. Be really careful here, you don’t want to swamp the berry with shadow.
I also crack open the white gouache, and put a tiny white line on the underside of each drupelet. This helps make each part of the berry look shiny and juicy.
The last thing to do is to pop in some shadows behind the fruit, so I use a mix of purple and cobalt blue.
Conclusion
Now the fruits are painted in, I move onto the wild pink flowers. Once they’re done it’s a matter of sharpening up the shadows across the entire illustration. Finished!
For more on painting berries please look at my earlier blogs: Step by step Blackberry, Step by step hawthorn, and step by step rowan berry. In general, this technique works well for a wide variety of fruit, give it a go!
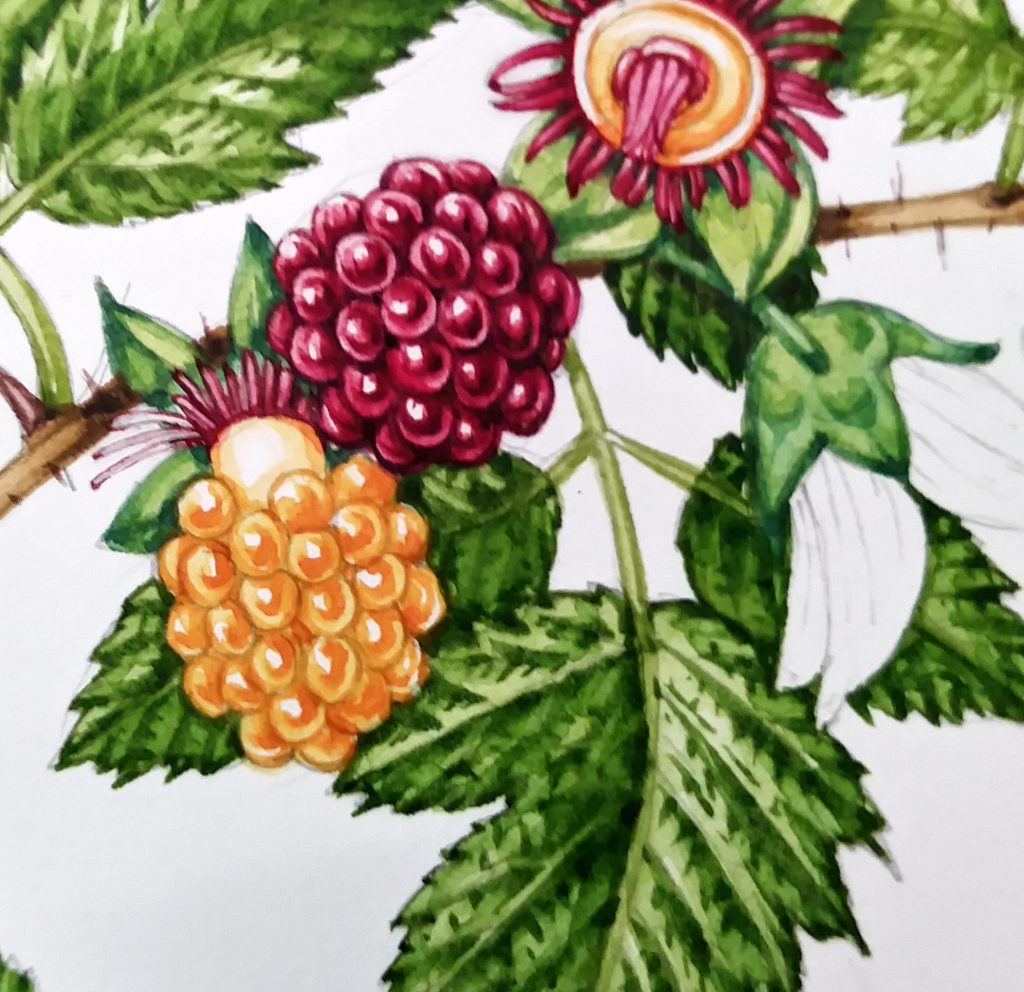
Here’s the finished berry and the residual sepals and structures left once a ripe berry has fallen; and below it is the entire illustration.
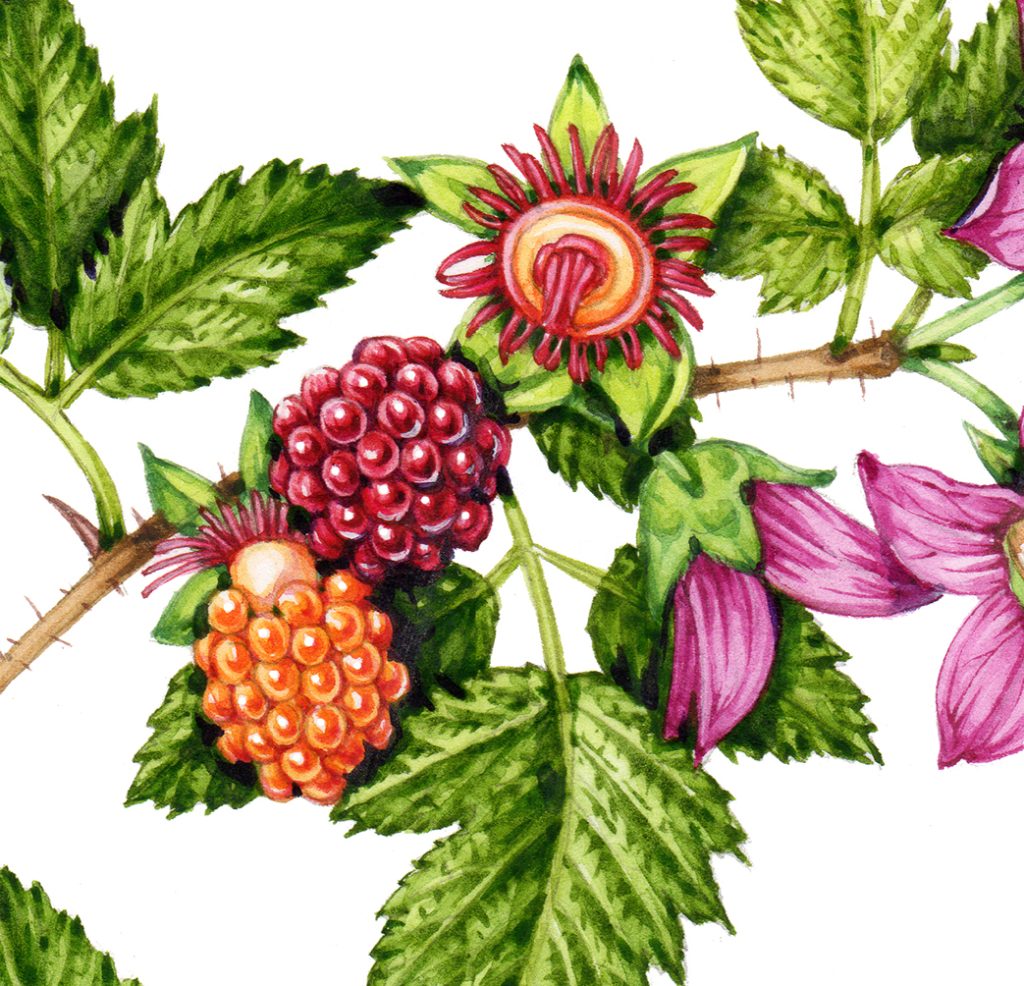
The finished Salmonberry illustration:

Thank you. This is beautiful.
Thank you Audrey, I’m glad you like it.
Loved this! Thank you!
Hi Dorothy, I’m really glad you enjoyed the blog, and thanks for taking the time to leave a comment!
Wow you make it look so easy thank you for sharing x it was amazing
Hi Lesley
Ah, its one of those things I suppose; when you do something a lot it DOES get much easier, it’s all down to practice and getting used to things. More you do it the easier it gets! Thanks for your positive feedback! x Lizzie