

Step by step: Blackberry
I love doing botanical illustrations of blackberries. So I was thrilled when Jersey Post commissioned an illustration of the Jersey Bramble Rubus caesarius as one of the postage stamps on their “Fruits and Berries” issue. I thought I’d break down the steps involved in painting a ripe juicy blackberry in watercolour, and write a step by step blog.
All illustrations in this blog are copyright Jersey Post (www.jerseystamps.com) 2017 and must not be reproduced without the express permission of Jersey Post.
For other step by step botanical illustration blogs, click here.
First draw your blackberry
First, make sure your drawing of the blackberry is botanically correct, and you’re clear as to the size and shape of each of the druplets. A druplet is one individual part of an aggregate fruit such as a blackberry or raspberry. (For more on fruit definitions, check out my blog.)
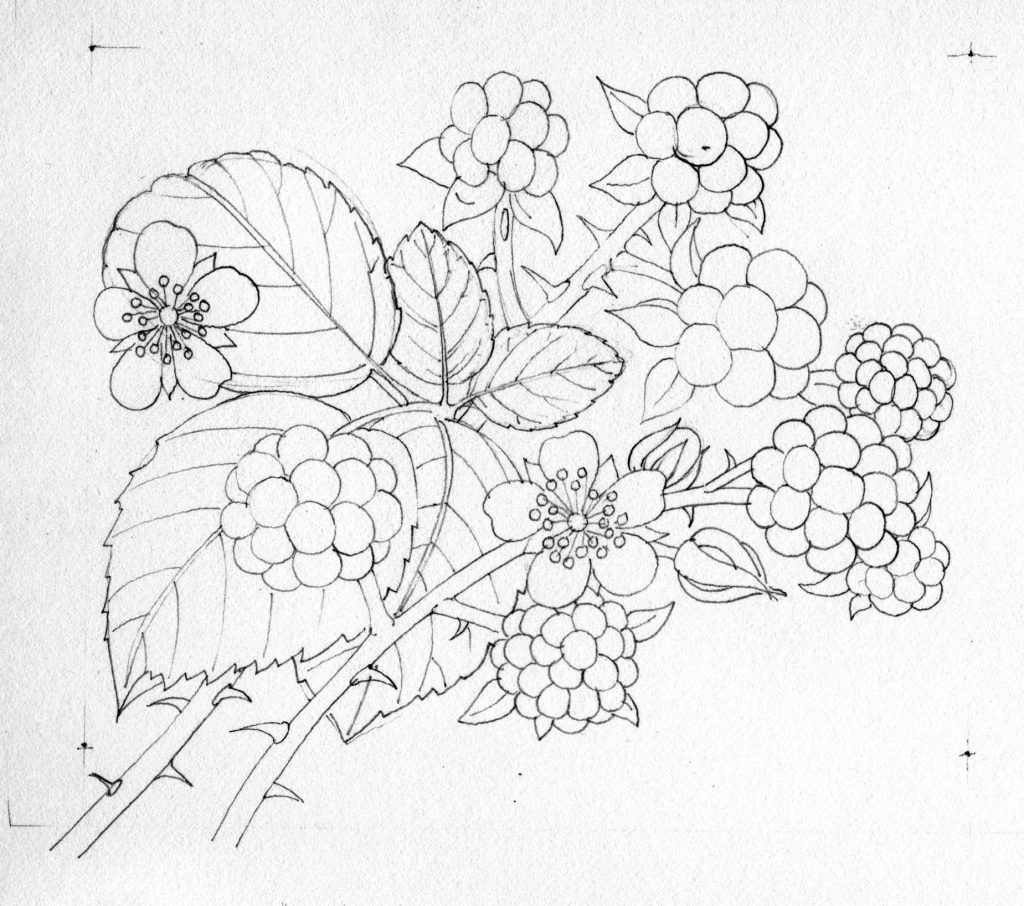
Pencil rough of the Jersey bramble Rubus caesarius. Copyright Jersey Post (www.jerseystamps.com) 2017
I draw up my subjects with a mechanical pencil. I like the Pentel P205 with an H or HB lead. In this case I’ve painted on Fabriano Artistico.
Adding the leaves, stems, and background
First, I needed to put in a pale blue background wash. I used Cereulean blue Winsor and Newton watercolour diluted with water, then allow this to dry fully.
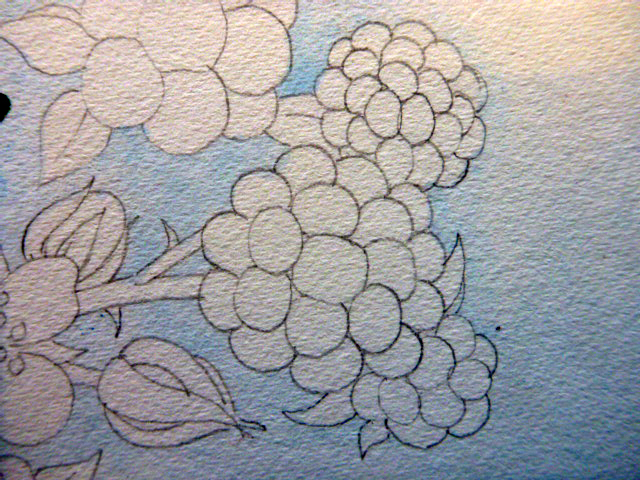
Blackberry with background painted in copyright Jersey Post (www.jerseystamps.com) 2017
I like to paint leaves and stems first, and to save the fun part of an illustration til the end, in this case it means painting the berry comes last.
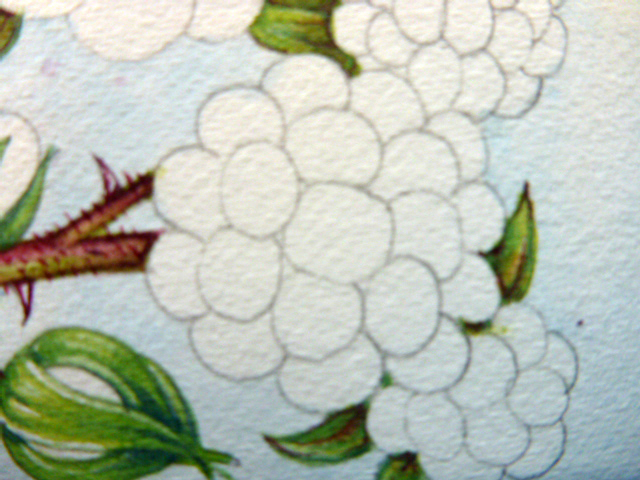
Blackberry with buds and leaves completed. copyright Jersey Post (www.jerseystamps.com) 2017
Painting the Berries
The first step is to mix a good dark purple, and using a very fine tipped brush (this is my trusty Winsor and Newton Series 7 (number 1) paintbrush, outline the edge of each drupelet. This colour is a mix of purple, Alizarin crimson, and Winsor blue. I tend to favour Winsor and Newton watercolours, from pans.

Outlining each drupelet of the blackberry copyright Jersey Post (www.jerseystamps.com) 2017
Next, have a look to see where the light falls on the fruit, and plot in the shape of that highlight on each individual drupelet. Be sure to leave the highlighted areas free of paint; your whites (and highlights) are the untouched paper. Look for the distinct shapes of these bright areas, outline them with your paintbrush.
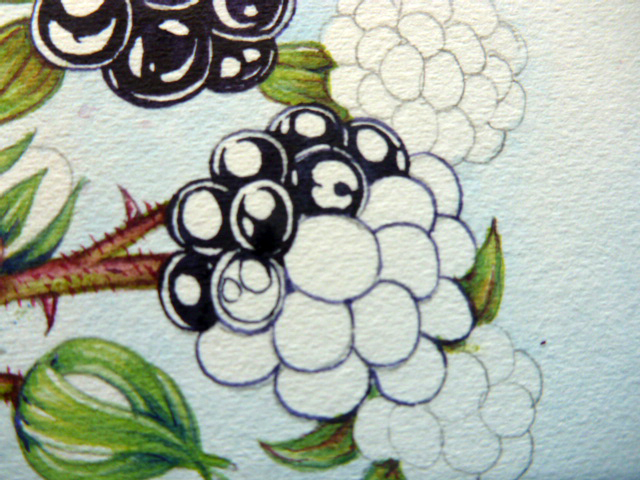
Drawing the shapes of the highlights on each drupelet copyright Jersey Post (www.jerseystamps.com) 2017
Colour in the areas which are NOT your highlights with the same purple black as before. Remember to leave a thin crescent of white paper around the edge of each drupelet, this makes each part look ripe and round.
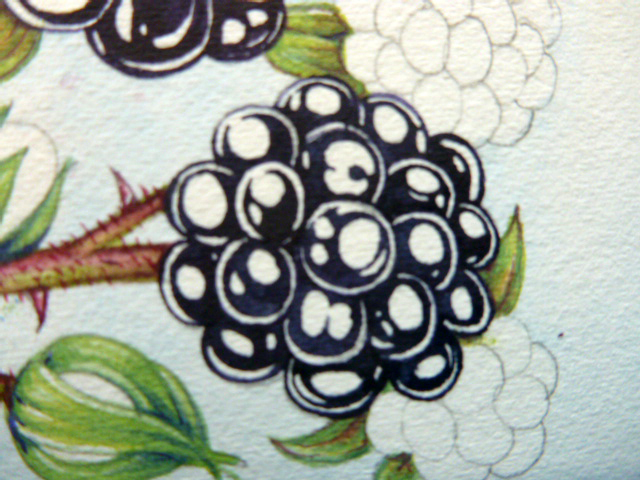
The dark areas of each drupelet are coloured in with a rich purple-black copyright Jersey Post (www.jerseystamps.com) 2017
Adding colours to the berries
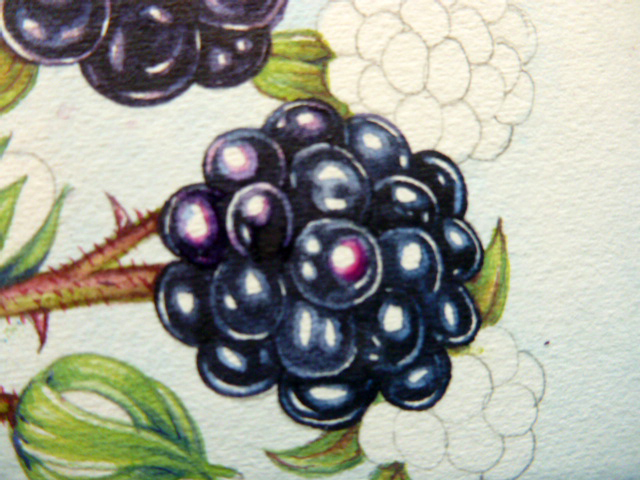
Mix up a pale Cobalt blue, perhaps with a touch of black or purple in. Making sure you don’t consume the areas of white, paint a margin of this next to each area of dark paint. This makes the gradation between dark shadow and bright highlight look more realistic.
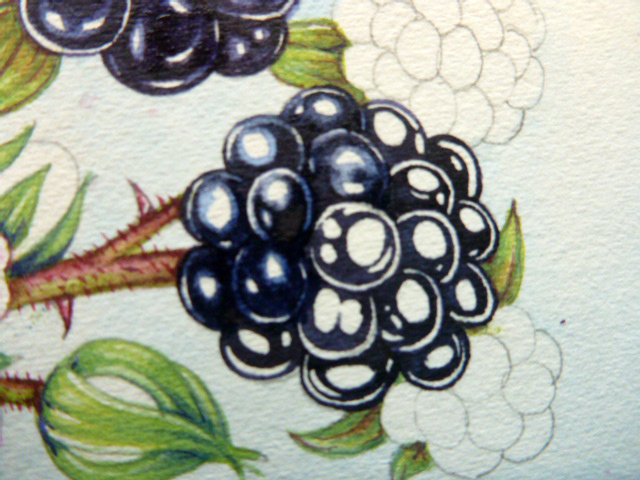
Put a margin of pale Cobalt blue around each highlight copyright Jersey Post (www.jerseystamps.com) 2017
Do this for each drupelet, and remember that on the shadowed side of the berry there’ll be less white gleaming in the light, so make the margin colour a touch darker.
Each drupelet now has a blue sheen copyright Jersey Post (www.jerseystamps.com) 2017
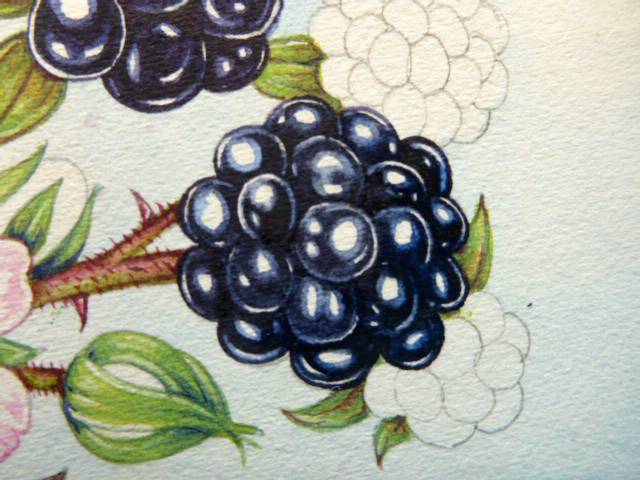
Mix up a wet magenta; I used Cobalt violet and Opera rose. Using it in different levels of dilution, pop a thin margin of this pink on the right hand side of the central shine of each drupelet in the berry.
Add magenta, very wet, to the fruit copyright Jersey Post (www.jerseystamps.com) 2017
This adds the warm red to the blackberry without compromising the shiny black of the fruit.
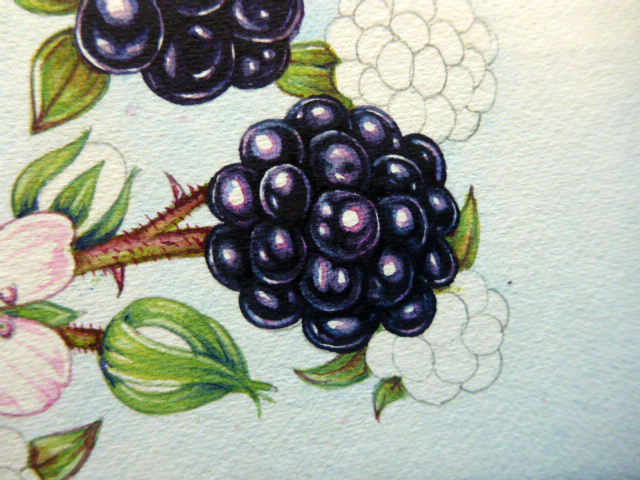
All the drupelets have had pink added copyright Jersey Post (www.jerseystamps.com) 2017
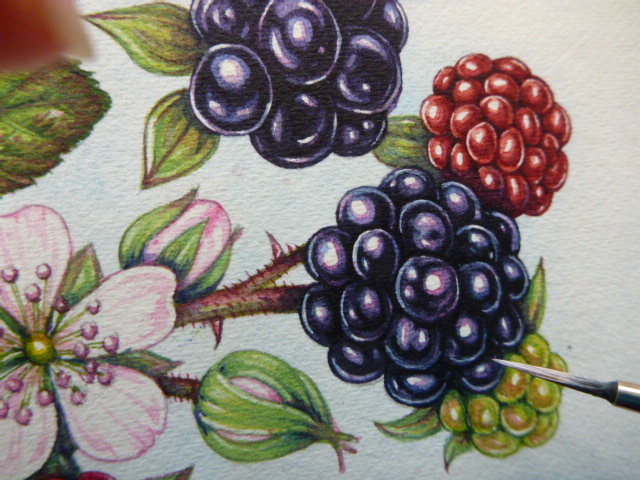
Before putting final tweaks to the berry, I want to paint in the red and green unripe blackberries which are also on the sprig.
Blackberry with red and green berries unpainted copyright Jersey Post (www.jerseystamps.com) 2017
Adding highlights
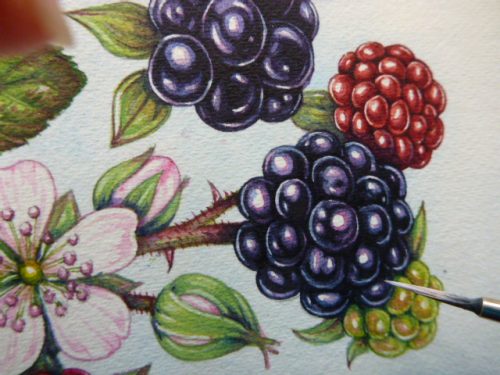
Using a thick-ish mix of Permanent white gouache (I like Winsor and Newton gouache), apply a hairline of this to the outside perimeter of each drupelet, pressing a little harder when passing next to the highlighted parts.
Adding white gouache highlights to a drupelet copyright Jersey Post (www.jerseystamps.com) 2017
Breathe a sigh of relief, you’ve painted a shiny blackberry. Now you can eat your reference!
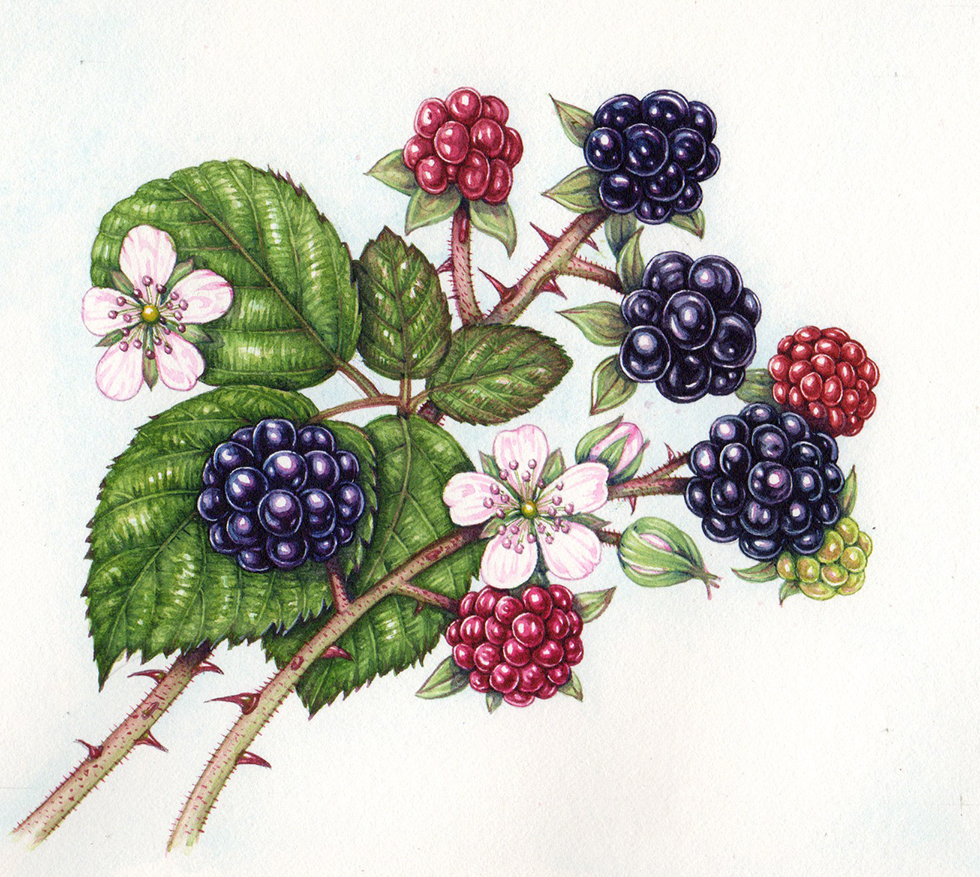
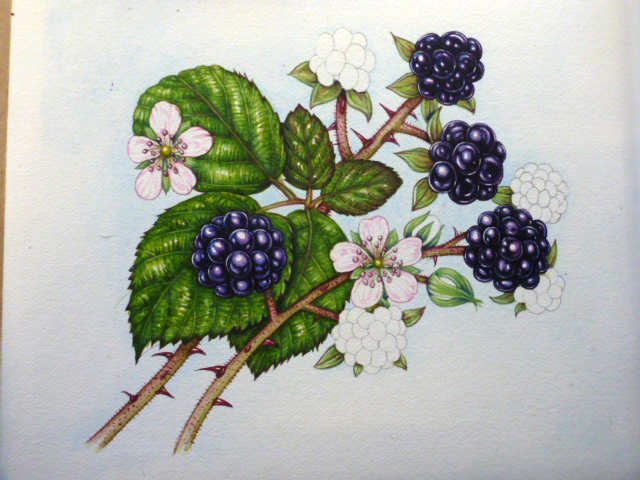
This is the final artwork of the Jersey bramble for the Jersey Post “Fruits and Berries” series of stamps; and one of my favourites in the set. copyright Jersey Post (www.jerseystamps.com) 2017
I hope this breakdown of the process involved in getting blackberries painted is helpful, they truly are a lovely botanical illustration subject to tackle.
For more on creating the “Fruits & Berries” issue for Jersey post, have a look at my blog.
Absolutely beautiful!
Thanks Hayley!
Your works are all’ausilio beautiful, and so is your generosity! Thank you for both!
Hi Rita
My absolute pleasure, and glad you enjoyed my work and blogs
X
Your works are all’ausilio beautiful
Thank you so much!