Step by step – Painting a Sweet Pea
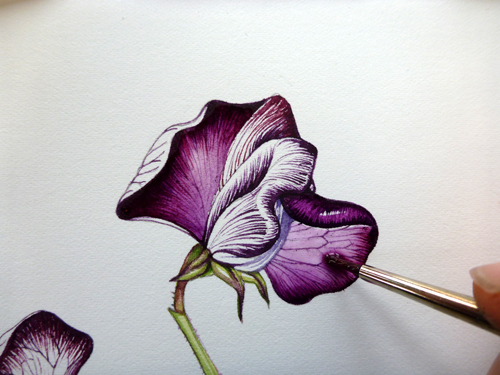
I’m currently working on a series of sketchbook style illustrations of common cultivated garden plants (like the sweet pea); there’s a possibility these will illustrate a book on foraging in the garden in the next year or so.
One of the plants needing illustrating was the sweet pea. While visiting a friend, I espied her sweet peas, and immediately begged some of the dark purple and bright red-pink ones from her. I ended up with an enormous bunch of flowers as well (thanks to Layla who runs The Majestic Bus, a wonderful converted bus where you can stay, in the gorgeous hills near us in Hay); but the sweet peas went straight into the fridge to stay fresh until I could draw them the next day.
Getting ready to paint the Sweet pea
If you put cut plants into a closed plastic bag in the fridge, with a paper towel wet with water, it really extends their lives and keeps them fresh for illustrating. Plants, paper and pencil ready, and most important of all, the cup of tea. Good to go.
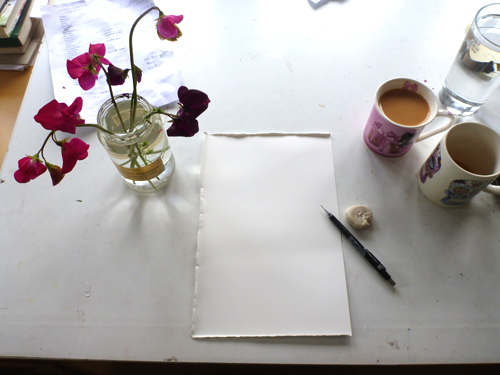
Drawing up the Sweet pea in pencil
The first step is to draw the plant in pencil (I use pentel P205 mechanical pencils). Keeping the line crisp and simple helps avoid mess when you work into the illustration with watercolour.
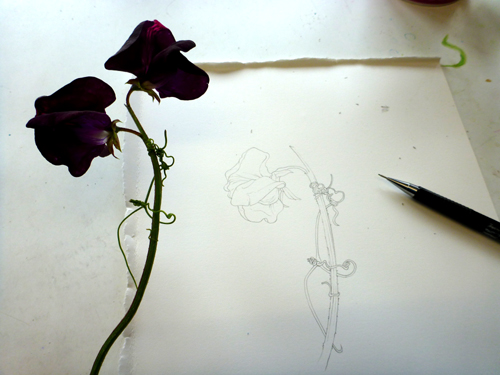
When you draw a plant, it’s vital to think about its position on the page and the composition, as well as copying the plant itself. I spend a while choosing what angle to draw the flower at; one that not only shows the aspects and form of the plant, but which is also aesthetically pleasing.
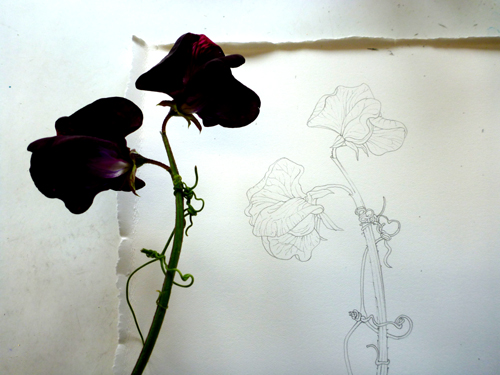
As you can tell, it’s the twirly tendrils on this sweet pea that I particularly loved drawing.
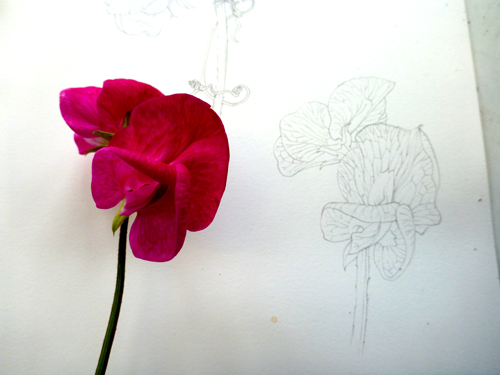
I also wanted to look at one of the pink sweetpeas, but decided this would be a study of the venation within the petals; a line drawing in watercolour, if you will. This helps if asked to draw a sweet pea again; once the purple ones are complete, some of the detail will be swallowed up in the dark colours.
Getting going on the colour: Painting the stem
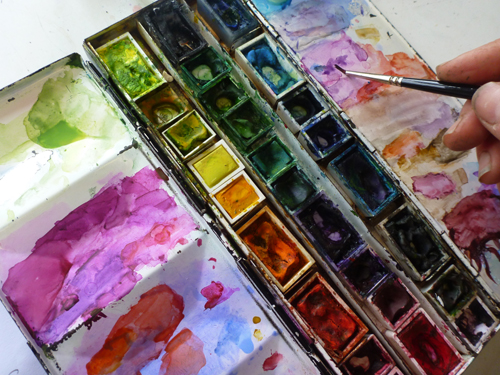
This is my trusty paintbox (what a mess) with me mixing up some purple to go into the green on the stem. I favour Winsor & Newton paints, and much prefer using Winsor & Newton series 7 brushes to any other sort.
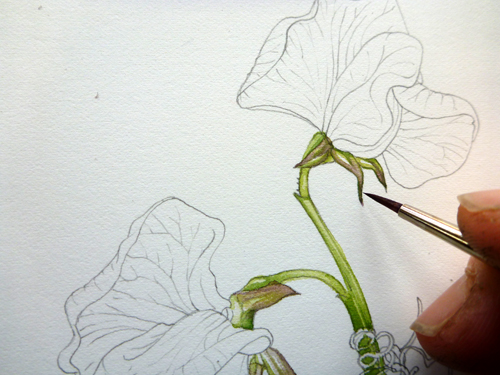
Having put down the initial green on the stem and calyx, I work into it, adding the flush of purple. I try to keep my colours fresh and light, and don’t erase the pencil in these sketchbook studies, which gives me a little more freedom with the paint as it doens’t have to delineate any edges.
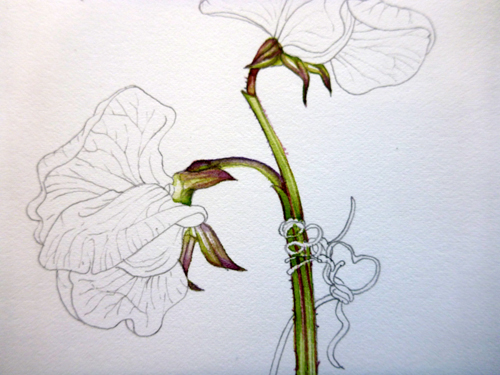
More detail on the stem and calyx, this is alizarin crimson and purple lake, with a touch of vandyke brown.
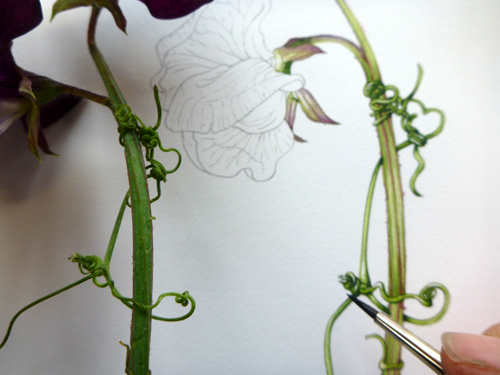
I simply loved painting these tendrils, the way they knot and twist is fascinating. A simple green line either side then a very pale top wash suffices. Here I’m adding some darker areas; the green mixed with prussian blue and purple.
Painting the Sweet pea petals
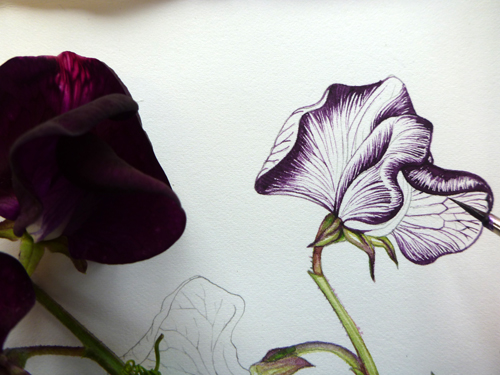
I start the flowers by plotting the veins, and working up a network of darker lines where the petals are deepest in colour. This purple is alizarin crimson, purple lake, a touch of vandyke brown, and some violet doctor martin inks which add real kick to the mix.
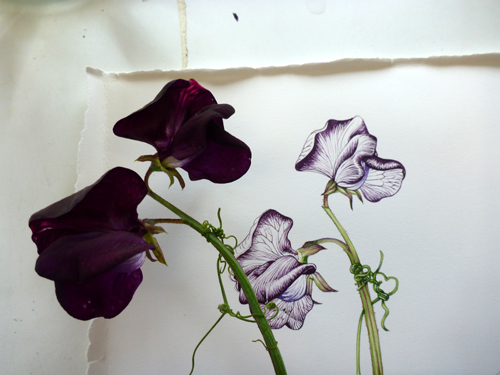
Both flowers have now been drawn in paint.
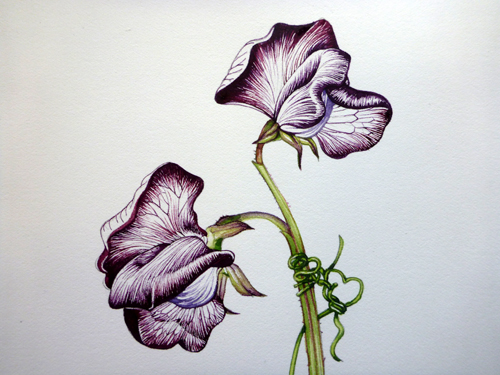
All I’ve done now is to add some more depth to the darkest darks by putting more little lines in thse area. These will help add depth when I put the watercolour wash over the top as this picks up pigment lying below it on the page.
Painting a top wash on the flowers
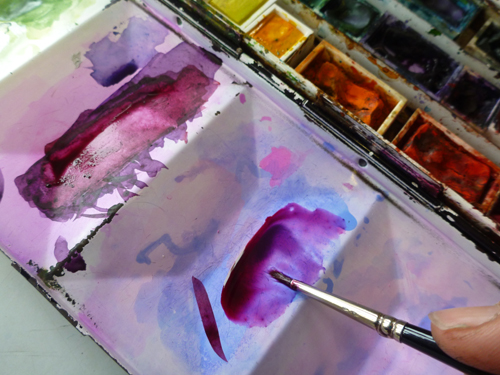
Mixing up the wash to go on the sweet pea. This is a similar mix to before, but with much more water and no brown.

I apply the wash very wet, it naturally carries pigment to the edges but is supplemented by the colour already on the page. Keep the pale areas pale, and be sure not to smudge the wash as it dries.
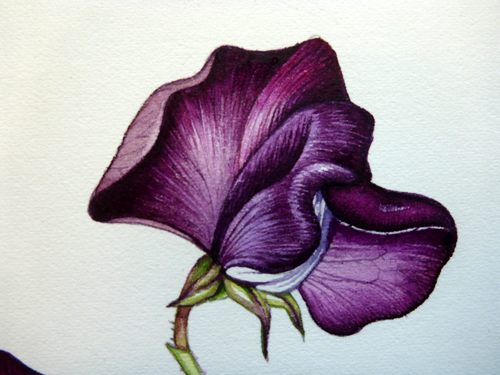
This is a detail of the flower once the wash has been applied.
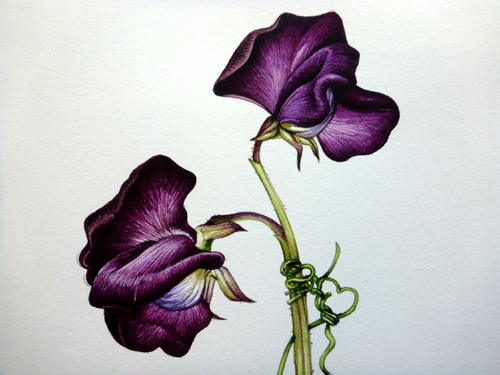
Here the illustration is pretty much finished. All that I altered is adding some darks. With the purples, these were quite an extreme mix of purple, brown, and prussian blue.
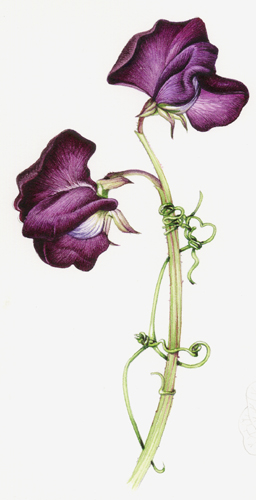
This is the completed sketch. This image is a scan rather than a photo; it’s interesting to note the difference in tone and colour due to the different ways of recording the illustration. Generally, scans are lighter and yellower. You can always adjust for discrepencies between colour of scans or photos and the true illustration’s colours in an image editing programme such as Adobe Photoshop.
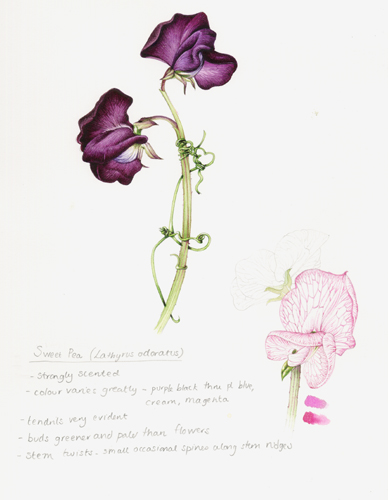
The final sketchbook sheet. The map of veins of the pink sweet pea is complete, along with notes to remind myself of specifics of the plant. I also test my colours on these sheets, and keep notes of them on the same page. It’s important to keep notes of size and scale too.
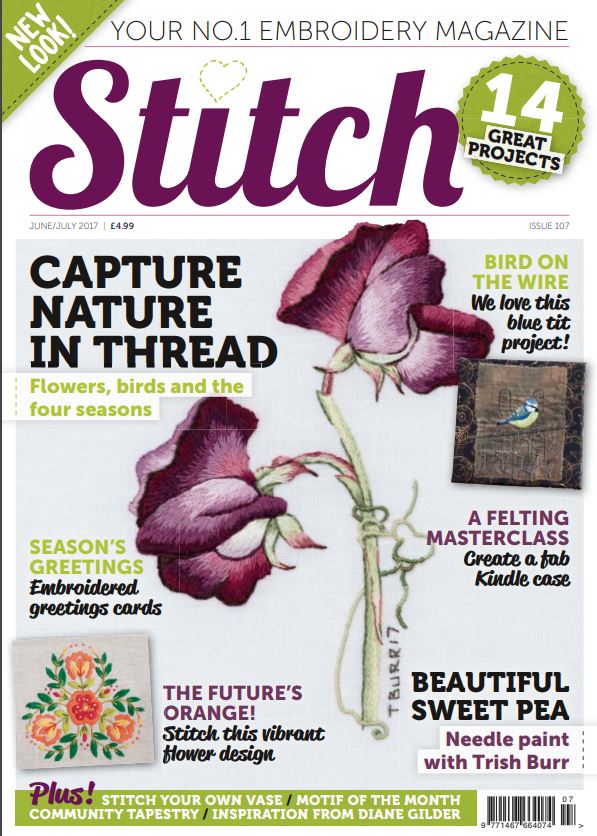
You might be interested to take a look at the embroidery version of this illustration completed by Trish Burr Embroidery; I think the silky threads are a wonderful way of glorifying the beautiful sweet pea flower. Here’s a link to Stitch magazine where her article based on (licensed) use of my illustration was published.


I want to know how to draw a sweet pea not how to paint it.
Hi Anya.
That’s the thing isnt it, all these blogs (and I include mine in this) blithely wittering on about painting, with the assumption that the drawing is already done, and posed no challenge! I totally get your comment.
I’ve not done a sxs on drawing a sweet pea, but I wonder if the techniques described in s couple of my other blogs might be of use?
https://lizzieharper.co.uk/2018/03/step-by-step-pencil-illustration-of-a-bean-leaf/
https://lizzieharper.co.uk/2013/09/natural-history-illustration-pencil/
https://lizzieharper.co.uk/2018/10/drawing-for-beginners-learning-plants/
In general, its about looking carefully then plotting basic shapes. After that you can add detail to the shapes before worrying about lights and darks. SOunds so simple, right?
I like your comment. Ill try to get my act together and do a good sxs on how to draw (not paint) a flower at some point. I might just wait til the sweet peas come out again….
Thanks for your comment.
Hi Anya, my method is to copy images (mostly line drawings) onto a word document. Then I also look for any compositions that I like. I trace the drawing onto paper, then tape it to the window to trace to my watercolor paper. With other flowers, as I’ve done this a few times I come toknow how to draw different flowers. Here is one link
https://www.google.com/search?q=simple%20sweet%20pea%20drawing&tbm=isch&hl=en&sa=X&ved=0CB8QtI8BKABqFwoTCJDszKHYm_YCFQAAAAAdAAAAABAH&biw=1263&bih=881#imgrc=vBF1mFXtk0wOKM
Laureen , thank you so much for providing your information. I have sweet peas in my garden but for some reason I have such difficulty drawing them . The site you suggested has very good drawings that I will start with . I agree once you start practicing it becomes easier . This caught me at a low point where I am not having luck with drawings and remembering all steps without some direction . I thankyou so much
Hey Valerie
I love it when people support each others’ journeys into drawing and painting, it feels lovely. Good luck with the sweet pea. x
This is how I want to paint its beautiful
Hi Kathy, that’s good to hear. And I tell you, with a good brush and a bit of time youll find its really quite easy to get a similar effect. Enjoy it!
Thank you for this – interesting technique of drawing with the paint so I will try – love sweet peas.
Hi Melanie, yes; it’s always interesting to try new ideas and techniques. I learn so much from other illustrators. Hope it’s an approach that works for you and that you enjoy.