

Step by step sketchbook study of a rose
I recently did a botanical illustration sketchbook study of a rose for a natural history illustration project I’m working on. This proved really tricky; partly because the flower and foliage were very dense and lush, but mostly because by the end the rose had shed all its petals!
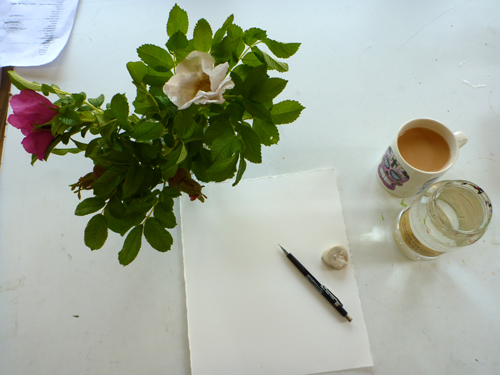
Step 1: Set up the Rose and your equipment
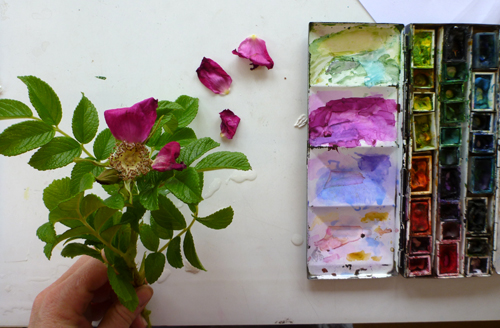
The first step is to make a mark on that threatening sheet of white paper, and to get all your kit ready (including a nice cup of tea).
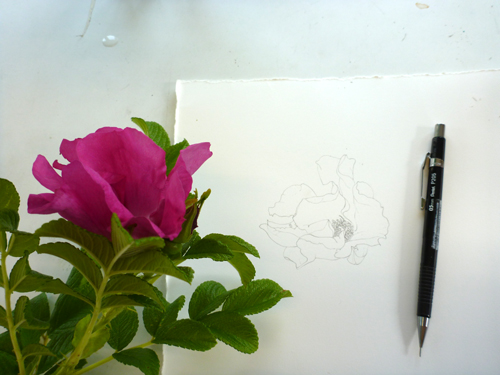
Step 2: Pencil rough
Then comes the part I love, the drawing. As always, I use a mechanical propelling pencil (I like pentel ones), a soft rubber, and Fabriano Artistico hot press watercolour paper. Because I won’t be using a lot of wet watercolour washes, I don’t find it neccessary to stretch the paper for sketchbook studies.
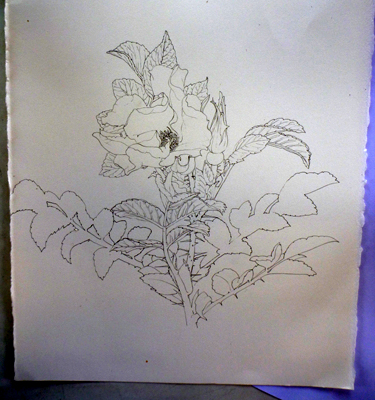
I start by deciding the scale of the illustration in my head, and positioning the drawing so the main focus (the flower head) will have plenty of room around it for the rest of the plant details.
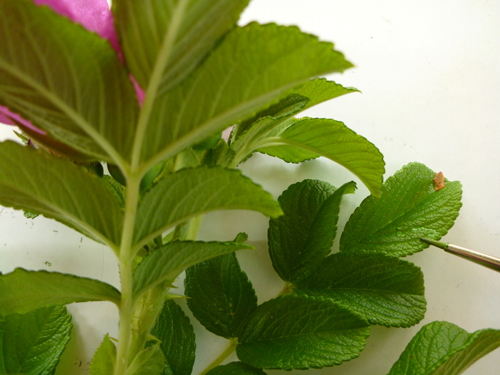
After the rose, I work on the foliage. I had trouble here as the angle I chose to draw the rose at wasn’t an easy one to hold the plant at, so I kept imperceptibly rotating it, and then positions of stems and leaves failed to line up. I always hold the plant I draw with my left hand (it leads to very stiff thumb!) and wrap a twist of saturated tissue paper around the stem base to prevent wilting.
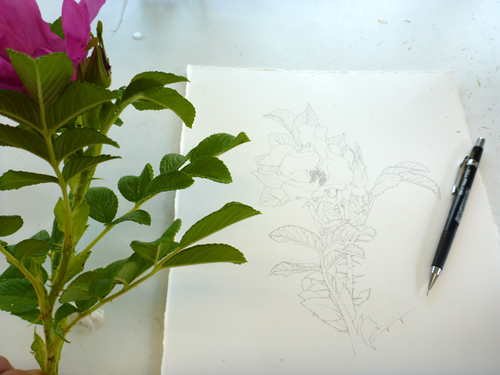
After details of the leaves, enough to show me what the structure is, I blocked in some further foliage simply by drawing the shapes of the spaces between the leaves adn stems, the negative space. Negative space is such a handy tool; if ever I simply can not draw a line right, if I try to draw the shape of the space around it instead of the object itself it always solves it for me. Drawings of negative space are very beautiful in their own right too, very free and bold. For more on this, please check out the negative space tutorial by Marian Boddy-Evans.
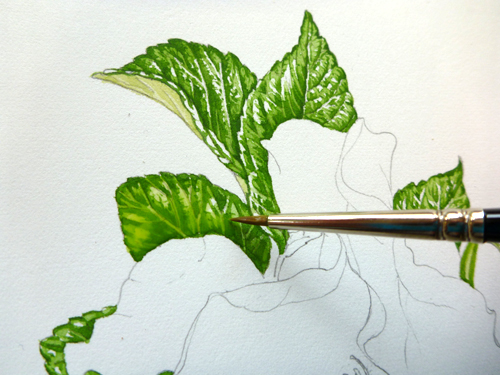
Step 3: Painting the leaves of the rose
Since I love working on the wild colours of the flowers most, I tend to work up the leaves first, saving the best til last. Mixing up correct greens is tricky; this green is sap green, cadmium yellow, yellow ochre, and a touch of turquoise. My paints tend to be Daler Rowney or Winsor and Newton; my brush is always the delicious Winsor and Newton series 7 (a number 1).
One way I check my greens is by literally painting a touch of the mix onto a leaf. Obviously, paints change colour once dry, but I find it’s a good trick to check you’re more or less on track with the colour matching.
As described before in some of my earlier blogs (Botanical illustration sketchbook study of broom, Botanical illustration of a Himalayan balsam flower, Japanese knotweed sketchbook study), the next step is to plot out the dark areas of the leaves.
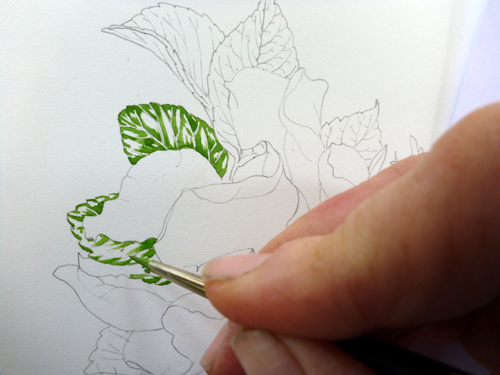
I tend to do many leaves at the same time, altering the mix slightly according to what each leaf offers. ALways keep your light source in mind and try not to work too dark.
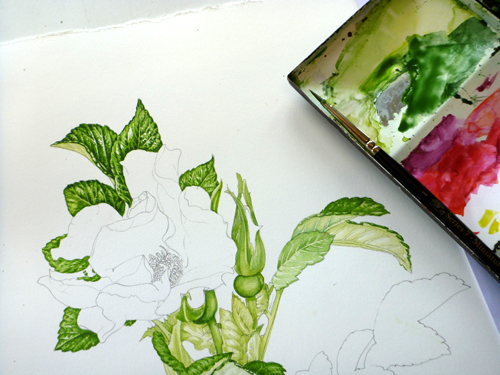
In this case, I still felt the drawing was too confusing, so in order to clarify all the foliage, I plotted in the bug, calyx, and stems. Some of these will be worked into later. It meant I felt I could see what I was doing a bit better.

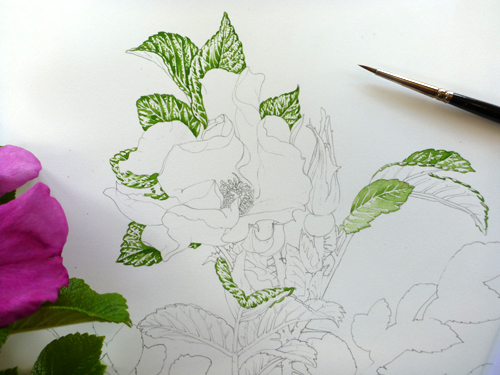
Step 4: Midtones of the leaves
Then, using a dilute version of the same colours used on the leaves, I pop in the mid tones. A very watery (and often slightly yellower mix) of the same colours provides the paler greens. The highlights are still left white, specially in this instance where the leaves are glassy with shine.
Here’s the sketch with the leaves near completion, and showing how trashed my watercolour box is.
Step 5: Painting the Rose
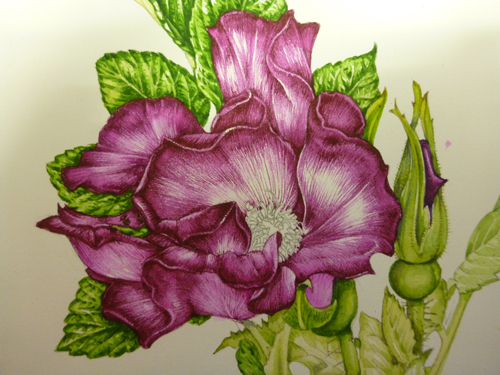
Then comes the fun part, the flower. I was already in some trouble by now as the flower was no longer prettily half-unfurled, but in full blousy bloom. Focusing on each petal and referecing other roses which hadn’t blown open so thoroughly, I started to build the pinks of the petals.
For this, I use a mixture of watercolour paints, and Doctor Martin watercolour inks. In this case a mix of DM cherry red and moss pink was combined with some crimson lake and violet watercolour pan-colours.
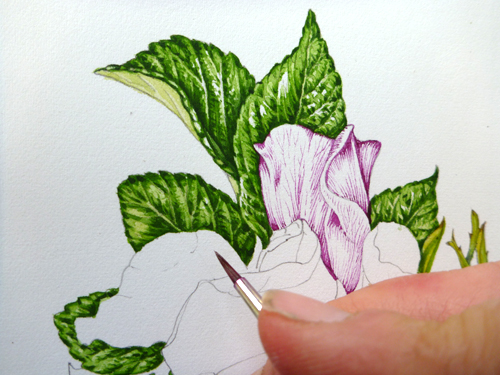
Using tiny brush strokes, I tried to build up the shade and shape of each petal, trying (always) to keep the lightest areas white for as long as possible.

The structure of the petals become clearer as you apply the colour.
Step 6: Midtones of the Rose
Next, I used water on the existing paint to “colour in” the rose; moving the water (which picked up the pigment from the lines below it) so the edge of any drying puddle would be on the edge of a petal, the darkest part of this flower.
At this point, once I’d put this first wash over the flower, I realized the petals weren’t looking right; there was too much confusion on the under side of them.
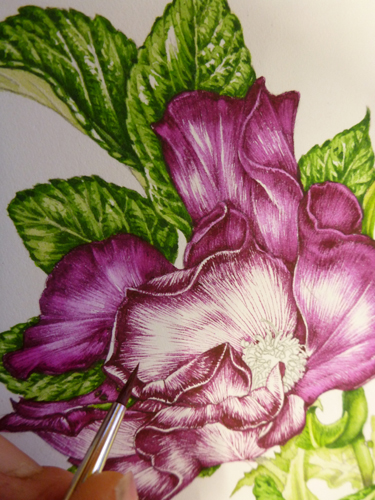
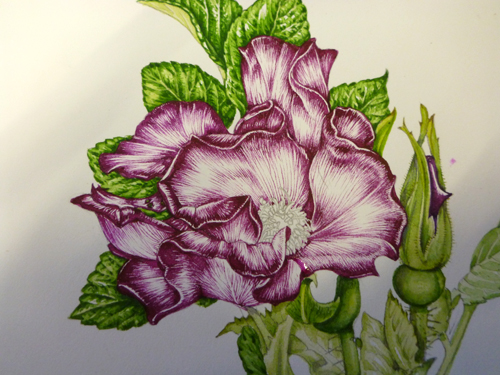
Step 7: Working into the darks
I decided to work further into the petals, first with a uniting very pale wash (doctor martin inks orange mixed with a tiny touch of crimson from my watercolour pan). After this I wanted more contrast so took the darks darker with shadows of ultramarine and purple.
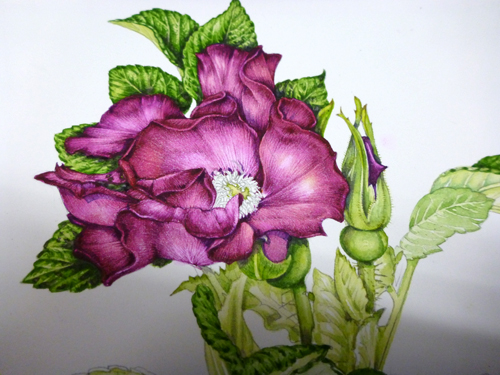
End of the day…and a dying flower!
Two things were against me now. First the light. It had got dark, so instead of daylight I was working under electric light. Yes, I have daylight bulbs in the studio, but there’s a decided difference which changes colours. The second problem was the rose; my specimen how had only two petals left! Honestly, these botanical subjects. You just can’t get them to behave!
I worked into the centre of the rose, truing to keep it light and bright and to show the detail on the anthers and stamens. In truth, I voerworked this region and had to return to it with white gouache which didn’t lighten it as I’d hoped, but slightly muddied the area. That’ll teach me for painting at 1am. But what’s a girl to do? The rose was wilting more with each passing hour, and assuredly wouldn’t last til morning…
The one part I did do the next day was the sturdy rose-hip. Isn’t it remarkable how very like an apple its colours are, before the hips ripen into the more oftenly noticed scarlet? You can tell they’re from the same botanical family (rosaceae).
I thought it might amuse those of you who have suffered similar brutal fates at the hand of specimen plants to see what the rose looked like as I finished the painting. As Adele Nozedar (author of the Hedgerow Handbook which I illustrated) said, “Never work with children, animals, or roses.”
Will look forward to following your beautiful work.
Thank you Renate! And feel free to suggest topics if anything comes up that you think might be worth blogging about. Thanks for the comment.
Looking forward to it as well!
I am discovering your work and I am really stunned! You do have amazing skills and great passion – very ispirational!
What a lovely comment. Thanks you ever so much! x
Me ha parecido un trabajo precioso
Tienes el boceto de la roda psra compartir? Mis dibujos no son muy buenod
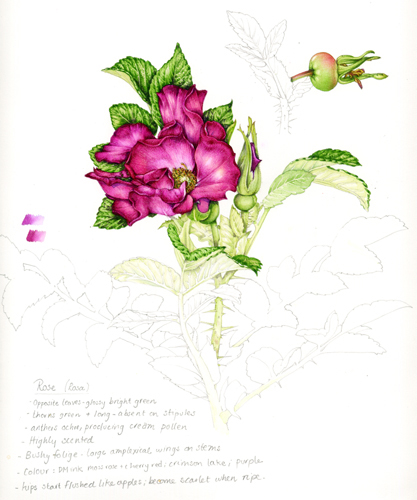
¡Muchas gracias! Aquí hay un enlace a la ilustración de la rosa terminada: https://lizzieharper.co.uk/image/rose-rosa-rugosa-with-rosehip-sketchbook-study/ Sigue practicando, esa es la mejor manera de mejorar. ¡Sigo aprendiendo después de 35 años!