

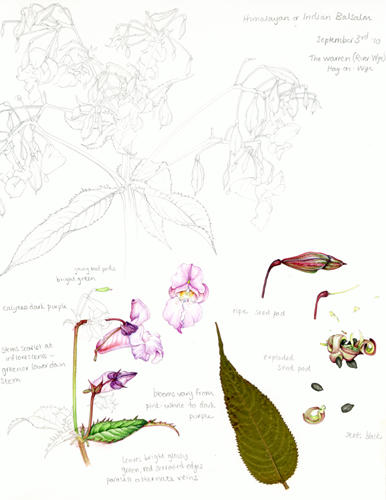
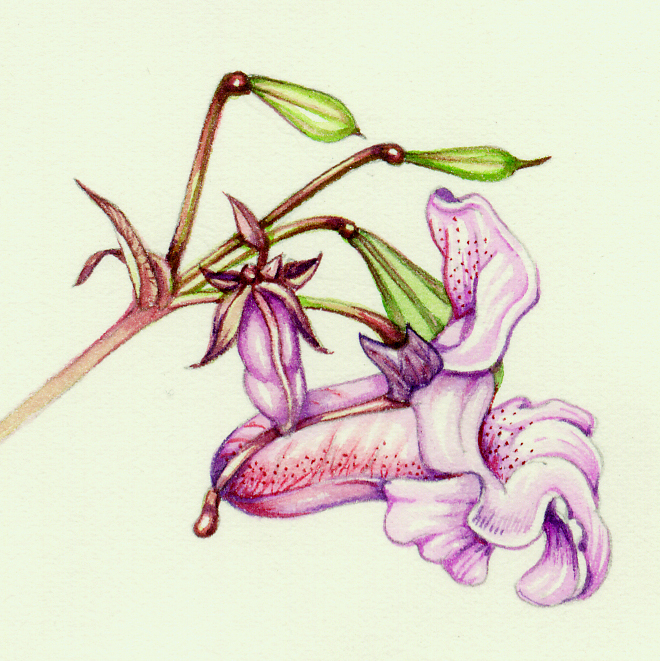
Botanical illustration of a Himalayan Balsam Flower
Overview of Himalayan balsam
One of the invasive plants I was asked to paint by Summersault Communications is the Himalayan balsam Impateins galndulifera, which is growing out of control along many of Britain’s water courses, out-competing native plants and clogging up drainage channels.
Although a truly problematic invasive species here in the UK, it is also very beautiful. Following on from last week’s step-by-step tips on painting a leaf of Japanese Knotweed; this week I’ll be explaining how I go about painting the flowers of this gorgeous plant.
Finding reference
As always, the first step is to get decent reference to work from. Although the Himalayan balsam isn’t currently in bloom, luckily I had lots of photo reference, and some detailed sketchbook studies to work from.
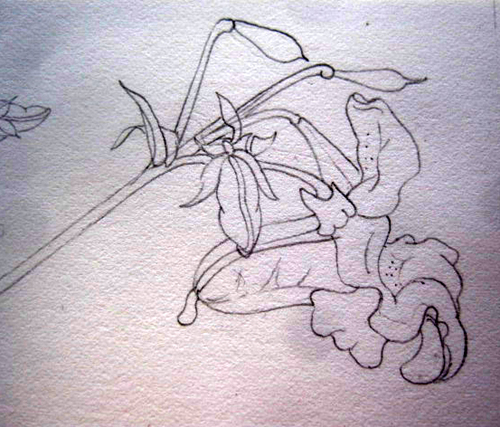
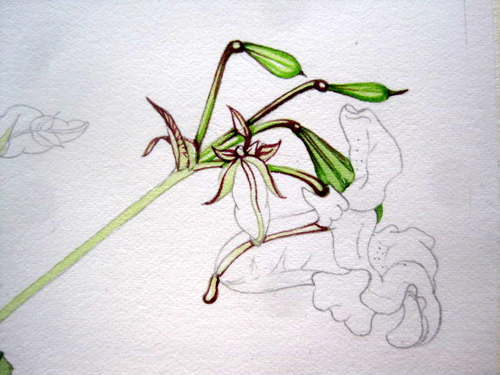
Pencil drawing of the plant
The first step is to draw up the plant, which I do in pencil. This is a detail showing one of the flowers. I’ve scanned it in so that you can see the dents where I drew it wrong and rubbed out then re-drew the line of the flower’s stem.
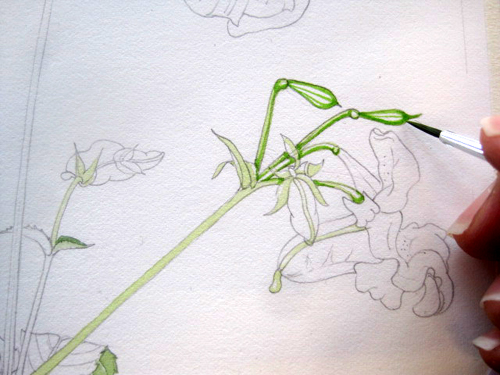
Painting the stem
The first step is to put a pale wash along the stem, then work into the details of the young seed pods; painting the darkest areas first. I use a series 7 brush (no.2). The pale green wash is sap green mixed with cadmium yellow and some yellow ochre (which I like as it makes greens less artificial). The details are being put in with a darker version of the same. In general, I tend to use Winsor and Newton or Daler Rowney watercolour paints from pan, or half pans. If I need to do a large area of one colour I’ll work from a tube, normally mixing the colour on a chipped saucer purloined from the kitchen.
Adding colour to the stem
There are parts of plants that I take a great deal of pleasure in painting, and the way crimson or red hues flush onto stems is a weakness. I’ve gone in with a mix of alizarin crimson, a purple, and a touch of van dyke brown. The colour is bold and dark, so I make sure I observe carefully to see where it’s strongest, and where if blends out to.
Using a weaker wash of the same colour on top of these dark red areas (remembering to leave the palest areas pale) makes it look less drastic
I’ve worked some more into the seedpods here, very lightly bringing the flush of red down from the stem, and using a weak green wash to build up the colour of the pods.
Mixing the pinks for the flower
I’ve also overlaid the pale green stem with a pale red wash (alizarin crimson) and have started to work on the flower. For a colour as blousy and pink as this one, I use a mix of watercolour paints and Doctor Martin’s inks which are incredibly intense in colour. They are also in no way light-fast; so be aware that if you work with them your colours will fade over time. This isn’t a problem for work created to be reproduced, but obviously is if a painting is intended for exhibiting and sale it needs to be borne in mind.
The colours used for this paint are doctor martin’s moss rose, a touch of watercolour purple, a touch of crimson lake and lots of water. A similar colour can be achieved by mixing white gouache in with the moss pink, but I find the resulting colour heavy and chalky, even in a dilute wash.
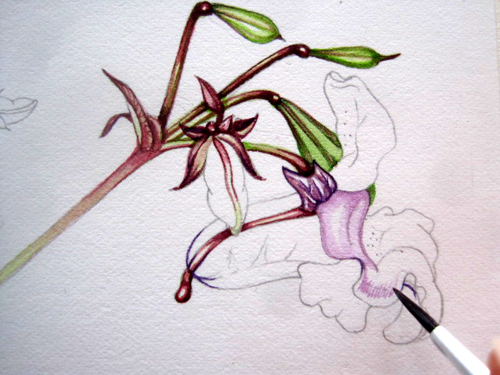
Plotting the darker areas
Next I draw the edges and areas of dark with the brush, and then work into them with a watery wash of the same colour, to try and make the areas of transition between light and dark less abrupt. (As an aside, you can see some masking tape on the edge of the paper. I stretch my paintings with gummed tape as a rule, which stops the paper from buckling when wet washes are applied. However, if there’s time pressure and I know there’s not going to be large areas of wash, I take the short cut of “stretching” the page with masking tape instead. If you do the same, be terribly careful when removing the masking tape at the end!)
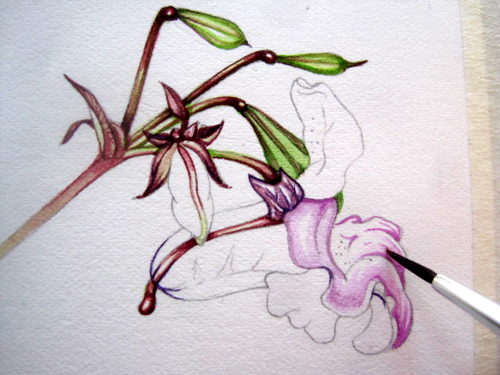
More pink washes
Here you can see I’ve worked more into the remaining areas of the flower, with increasingly pale and watery washes. It takes very little colour to make an area clearly not white, so washes can be very dilute indeed and still effective.
Working into the flower with darker colours
Once the main body of the flower is plotted in, I work into the areas of colour in more detail. Here I’m applying a purple (straight from the pan) to show areas of shadow. Working into the painting with a darker colour can also be used to ease transition from very pale to very dark areas.
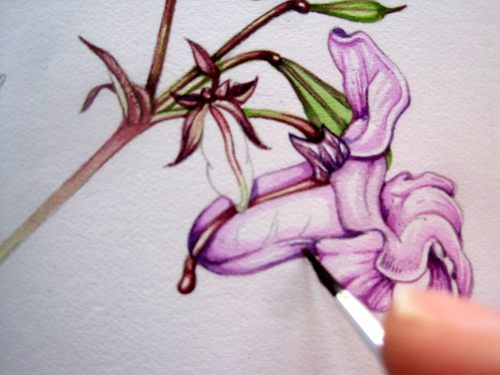
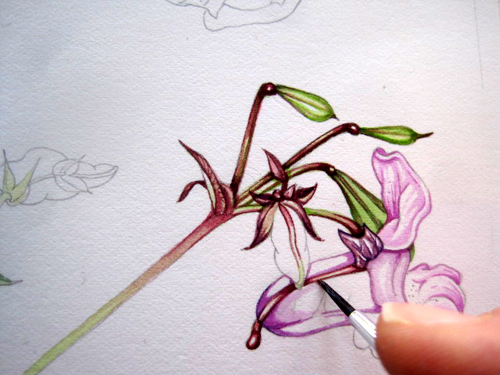
Darker hues for the details
Once I’m happy with the tone of the flower, I have the excitement and joy of working into the details. The Himalayan balsam blooms are extraordinary; speckled with crimson spots and veins. For these I’ve used a concentrated mix of alizarin crimson with a tiny touch of cadmium orange. I also use an extremely dilute wash of the same colours in tiny areas around the detail, this helps to ground the spots and veins and make them blend in with the flower.
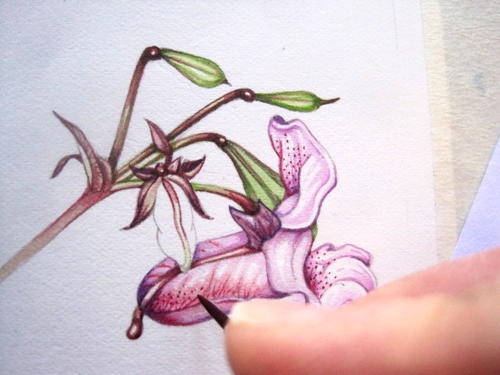
Here’s the final of the flower, with the bud plotted in as well.
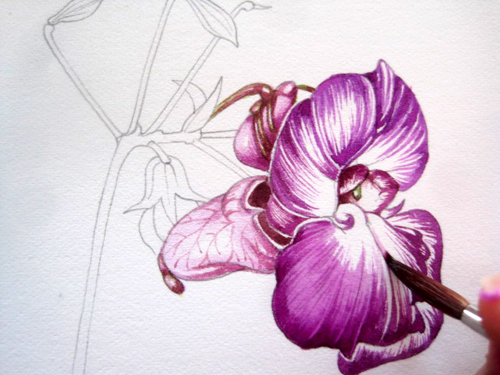
The second flower: Plotting in the darks
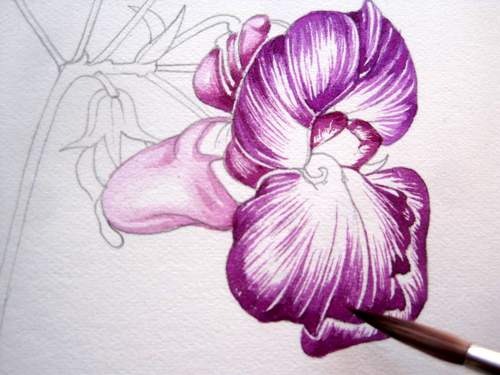
Once one flower is completed it’s time to move onto the next; a really lovely prospect as it’s at a perfect angle to draw and is one of my favourite colours. The Himalayan balsam flowers vary in colour from almost white to a deep purple (although tend to be all the same colour on individual plants), so this sketchbook approach allows me to paint two blooms at differnt ends of the spectrum on the same page. This purple is a mixture of purple and doctor martin moss pink. Again, in the first instance I’ve just built up the flower with lots of thin painted lines, being sure to leave plenty of white paper.
Knocking back the darkest areas with a diluted wash
As before, a dilute wash of the same colours is applied. The paint itself also bleeds very slightly into the watery wash, which helps the blending. I’ve also worked into the detail of the stem attachment and popped in the veins on the rear area of the flower.
Extra depth comes from extra layers of pale wash, and detail in the darkest areas
Here I’ve finished working over my initial painted lines with wash, and have worked a little more into the areas of darkest darks. It’s getting close to finished, which is always a really good moment.

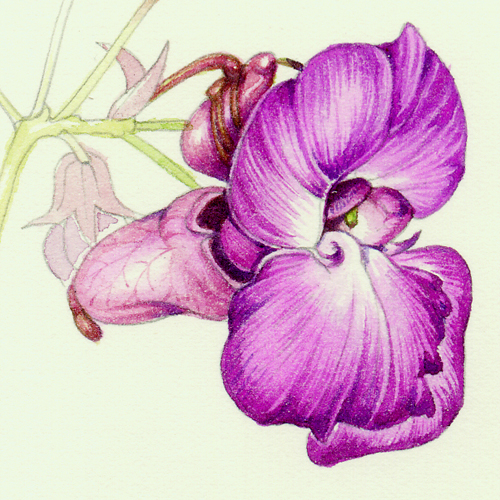
Completed illustration
This is the final. It looks different as it’s a scan rather than a photo (and is less dark, and also shows up tiny white spots where the wash hasn’t soaked into the page) but you can see that I’ve plotted in the stem and surrounding area of the plant with very pale washes. I’ve also used purple mixed with french ultramarine to work into the darkest shadows.
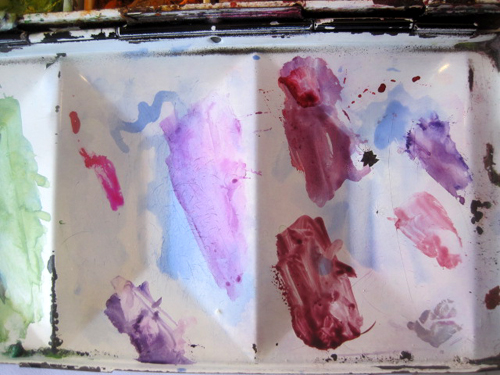
And here is the area of my paintbox I was mixing pinks in at the end of the Himalyan balsam painting. In terms of time, it took 2 hours to draw the plant in pencil and a day to do the painting (and a lifetime of painting 9-5 every day to feel confident enough to accept that I’m more or less pleased with the end result!)
Again, my thanks are due to The Botanical Art Group for Beginners whose suggestions and support for my blog are invaluable. Thankyou!