Step by Step pencil illustration of a bean leaf
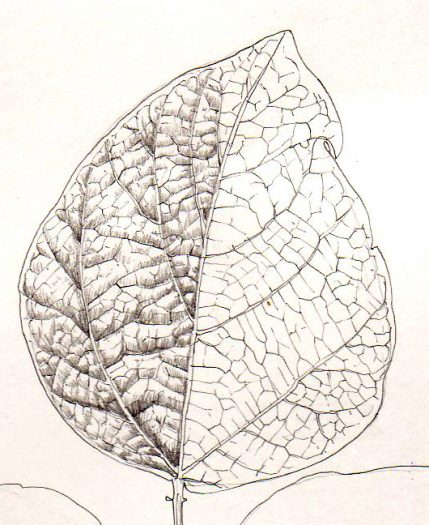
Using Pencil to understand tonality
In order to complete a decent botanical illustration, you need to understand about lights and darks. You must be able to see where your shadows fall. One of the excersizes I recently got my flower painting workshop to try was to complete a detailed pencil study of a relatively simple leaf, in this case the leaf of a runner bean.
Step 1: Draw up the basic shape of the leaf
Working on cartridge paper, with a soft eraser and a sharp pencil (I love mechanical pencils like the Pentel P205, and use HB and H leads), I started out by plotting the outline of the leaf shape onto the page.
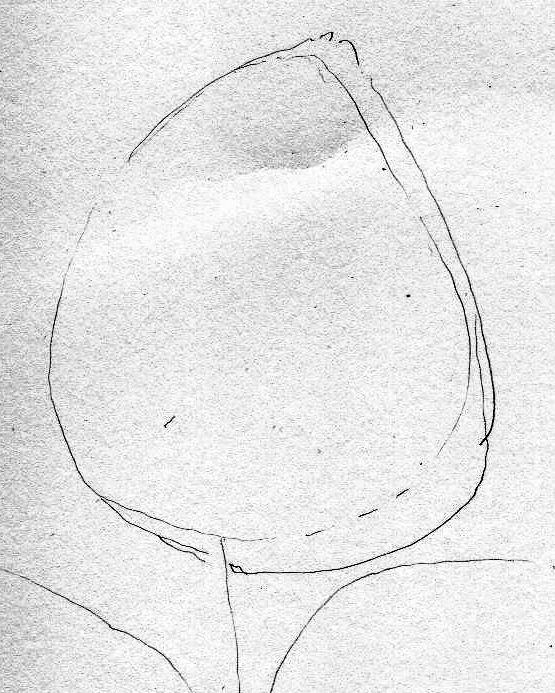
Step 1: Basic rough outline
Step 2: Add the main structures and veins
The second step is to start building into the structure of the leaf, by giving each leaf its mid-rib. With these steps, it’s vital to avoid putting a line just anywhere. Closely examine the leaf in front of you and draw exactly what you see. Avoid drawing what you think might be there. Do this by observing the leaf closely.
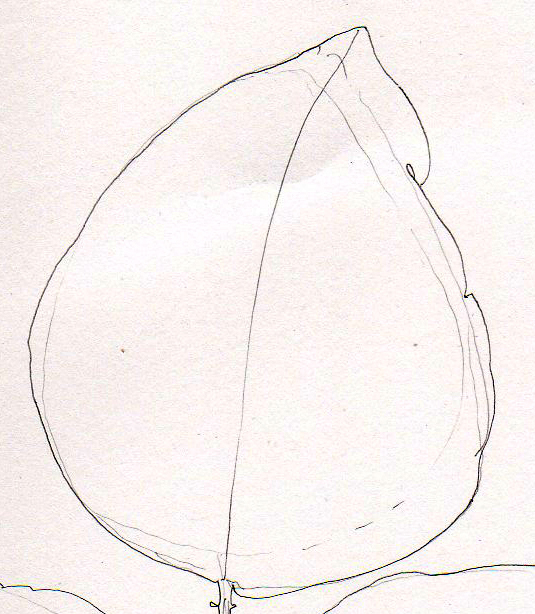
Step 2: Positioning the central vein
Step 3: Draw in the veins
The next step is to build into the structure by plotting in the intricate network of leaf veins. In this picture you can see how this is done. Start with the largest lateral veins (on the left hand side) then work into the veins and capillaries which branch off these. If you think about it, the leaf needs to have every cell of itself serviced by a network of veins delivering water and nutrients, so it’s no surprise the network is complicated! A magnifying glass can be useful, and the key is to not lose your place as you plot the veins in.
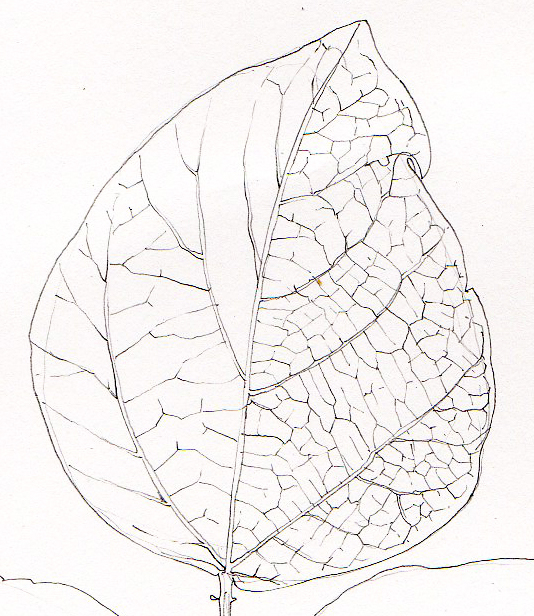
Step 3: Drawing in the network of veins, built around the main side veins
Step 4: Plot in your shadows
Now you need to start looking at the lights and darks. Although this sounds straight forward, it can be really tricky to see until you get your eye in. Put your leaf somewhere that’s lit by a directional light. (Traditionally in botanical illustration, your light source comes from the top left corner – don’t ask me why). Remember that there will be consistency here. If the shadows tend to fall below the side veins, then they’ll do this throughout the leaf. Every shadow or area of dark has a cause. A shadow is caused by something above it being hit by light.
Different areas of the leaf have different intensity of shadow. This depends on how prominent the vein is, how creased that area of leaf is. It’s all down to variations based on the structure of the leaf. Try to think about these as you draw, it helps to assign logic to an illustration.
Step 5: Complete the shadows on one side of the leaf
I tend to work on one side of the leaf and then the opposite side. Because I’m right handed, I’ll draw up the left hand side first. This means I don’t lean on and smear the completed work when I move onto the other half of the leaf blade. Work with your drawing hand leaning on a sheet of clean paper. It won’t interfere with your drawing, but helps protect the initial pencil lines lying under your hand.
To get dark tones, push harder with your pencil. Try a softer pencil lead. Perhaps try an HB or a B instead of the usual drawing point of an H or 2H.
Practice on scrap paper first if you feel anxious. Try making gentle gradations of tone between white and very dark. Getting this gradual darkening of tone can be tough. However, it’s neccessary as it makes a pencil drawing look natural.
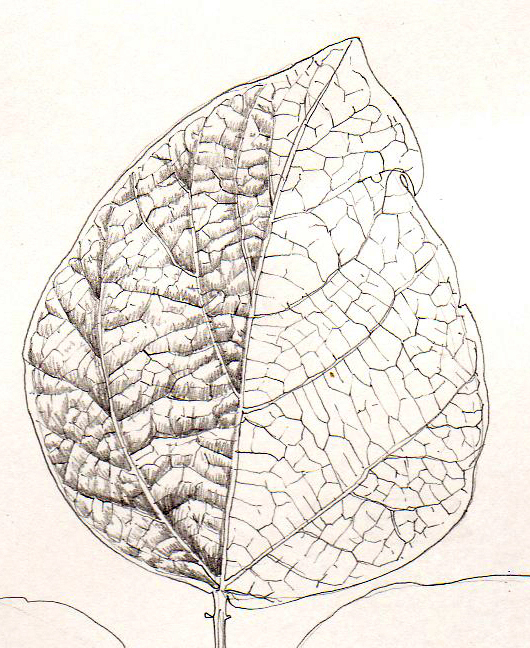
Step 4 and 5: Working into the lights and darks on the left hand side of the leaf
Step 6: Plot in the shadows on the 2nd side of the leaf
Moving on to the other side of the leaf, look afresh at the lights and darks. This side may be hit differently by the light. This will result in a different pattern of shadow.
Remember that shadows often have distinct shapes. Don’t be tempted to smudge your work with a finger. Your observations of shadow shape inform the drawing and shouldn’t be muddied.
Finally, once you’ve faithfully recorded your shadows and tonalities, go over the illustration a final time and pick out your darkest darks. Use a sharp pencil and a heavier touch. This often helps bring the whole picture together.
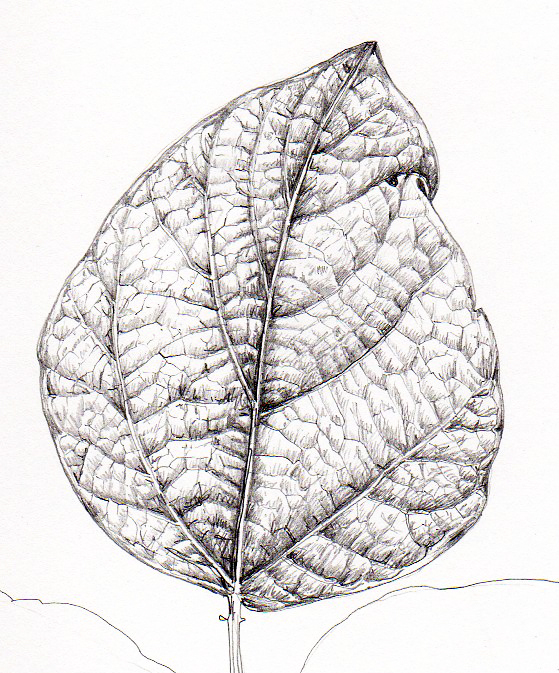
Step 5: Finishing up the tonality on the other side of the leaf and plotting in the darkest darks
So why work in pencil?
I realise that doing detailed pencil studies may not feel very glamorous, or produce paintings you may want to frame, but it is an essential building block for anyone who wants to draw…anything! The same tricks relating to seeing and recording lights and darks are directly transferable to your watercolour work, and the knwoledge you get from working into a detailed tonal study stands you in good stead for understanding leaf anatomy better (which means your pitcures will be better too).
Here are a couple of finished pencil tonal studies to show that pencil work can be a medium in which to produce finished art work, as well as a way to learn about tone. The cucumbers appeared in Rodale’s Vegetable Garden Proble Solver by Fern Bradley, while the Reed mace and White waterlily were completed for the Wildfowl & Wetlands Trust.
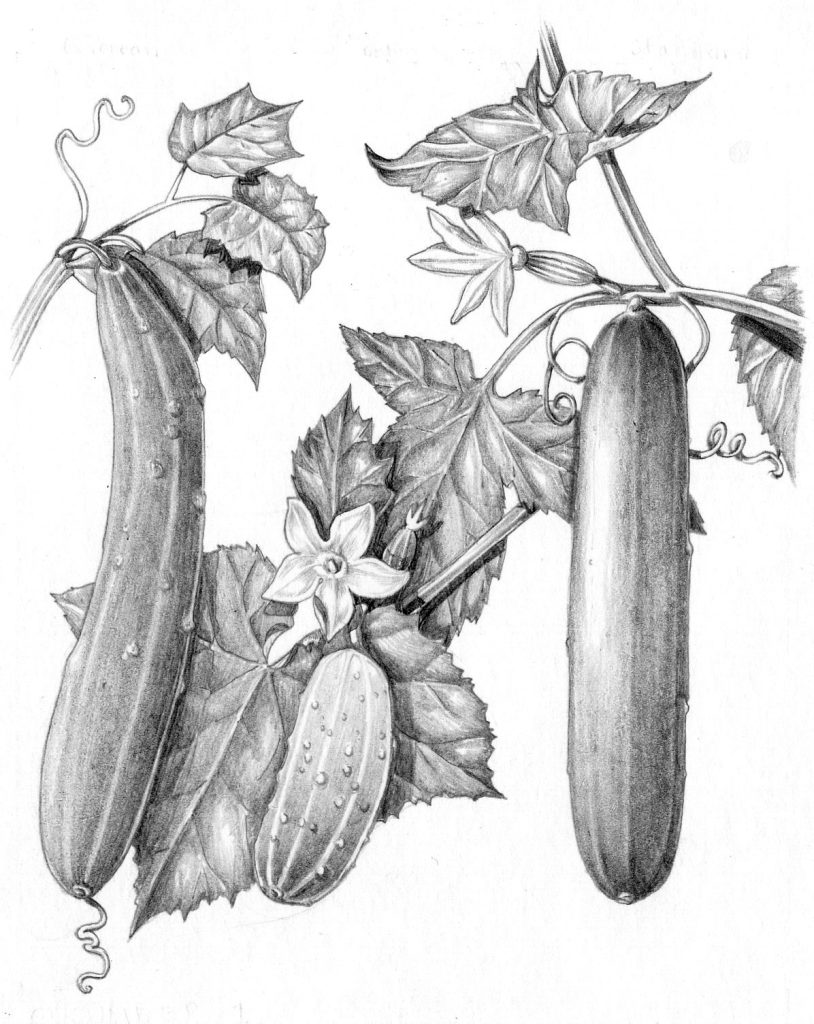
Cucumbers
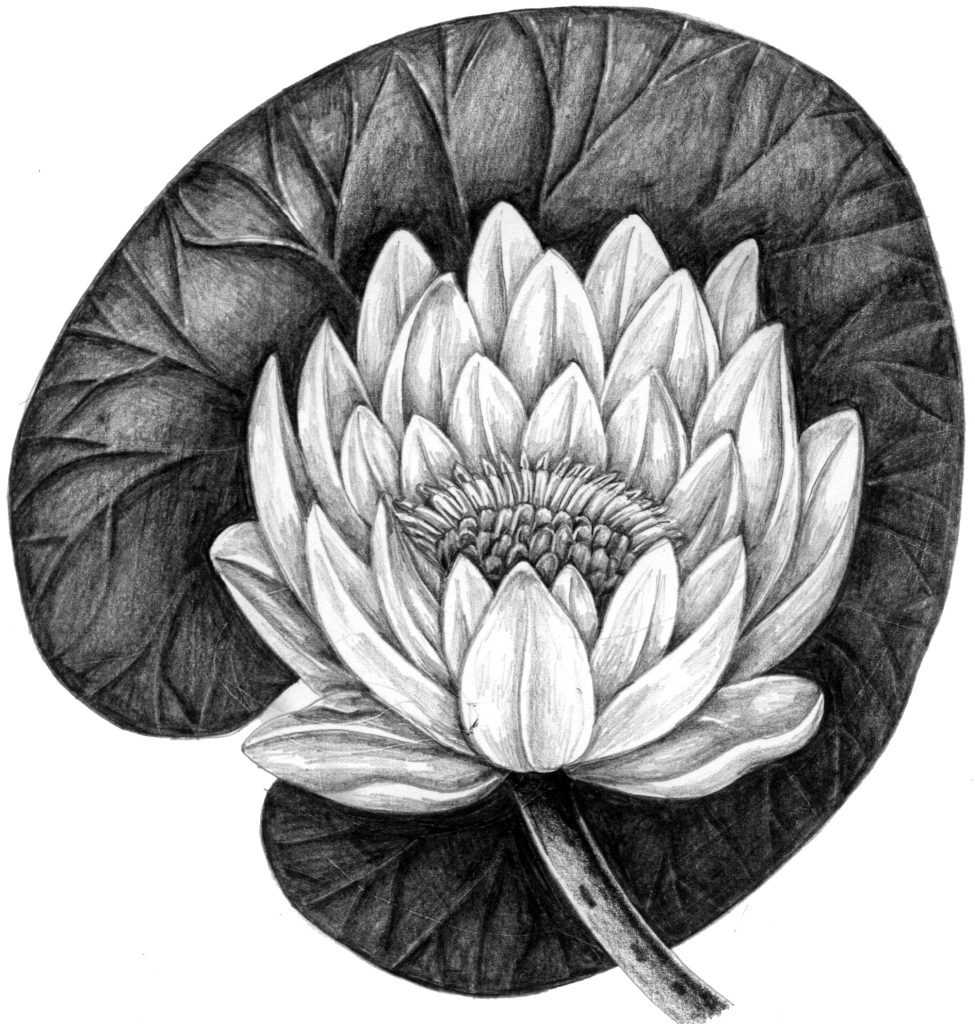
White water-lily
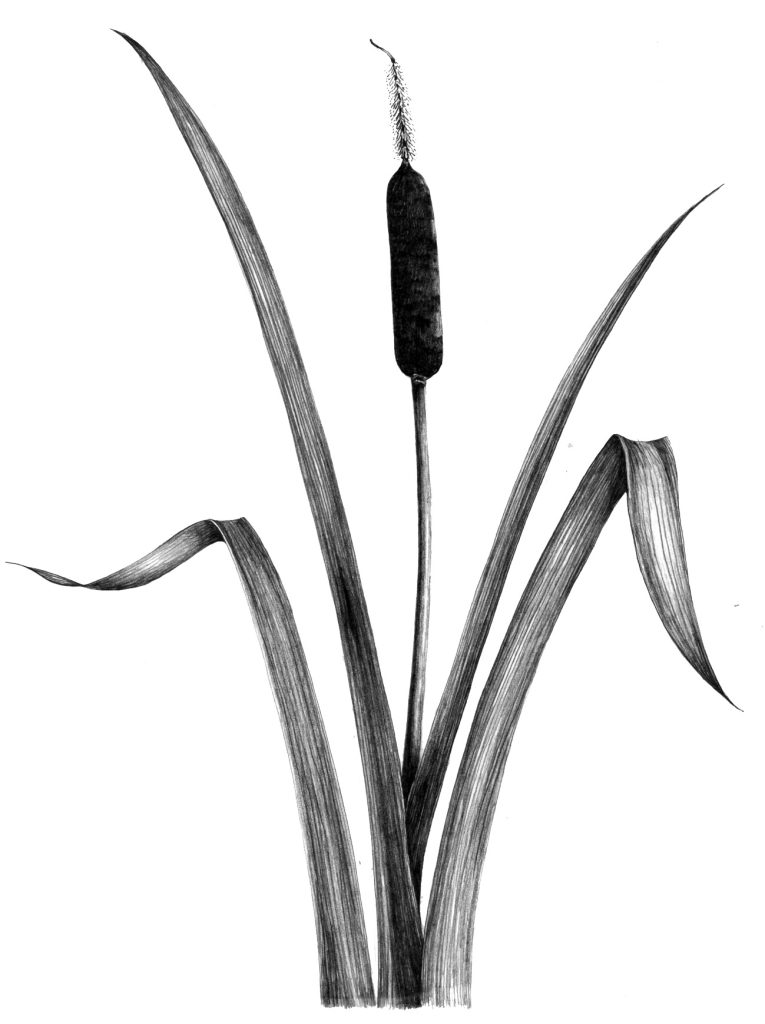
Greater Reed mace
For more of my pecnil illustrations, have a look at my blog.


This is really lovely and helpful. I came to this page via the painting of your sweetpea. Thank you for showing how to.
Hi Ros, I’m so glad! I also love that you’ve been paddling about in my blogs, that’s a wonderful thing to hear. I often use pencil as I way to untangle lights from darks, to simplify a subject before you get onto the complexities of colour. In fact, another good excersize is to do a watercolour, but in only one colour. I like sepia-brown or a sort of dark blue-grey for these studies. Again, it’s just a helpful way of figuring out the tonality pf a subject. Thanks for your comment, and for the the positive feedback!
Hi Lizzie,
I am brand new to drawing/watercolor at age 65 living in Ohio, USA. The last time that I painted was a paint-by-number hunting dog scene in the 1970s. Thank you for providing so much free instruction and encouragement in creating beautiful illustrations from your relaxing, birdsong-inclusive studio.
Question about drawing:
Do you typically draw your entire illustration directly on the paper that you will be painting? I see where some artists draw on one paper and then transfer that image face down to the clean paper by tracing. That seems so redundant, put it probably depends on how much erasing you do on the original?
Hi Karen
I’m sure your painting by numbers dog scene was lovely! Glad you’ve decided to come back to it, and have found the time to do so, not an easy ask.
Yes, I do draw direct onto the watercolour paper, but I know a lot of professional botanical illustrators balk at the idea. They tend to create tracings until the drawing is perfect, then push the illustration through. This means they don’t spend time rubbing out graphite on water colour paper which can change the sizing (the sealant). Saying that, it’s not something I’ve ever had a problem with, but if you’re creating expensive art to sell I can see that it could be important to keep everything close to perfect.
Playing around with different elements (say a plant then a separate leaf, or another sprig) can be easier if you have the bits on tracing paper as you can move them ’til the composition is good. Again, I don’t do this, but I know many illustrators who do. It’s a personal thing, and I think using the tracing is a way of getting close to perfection before getting marks onto your watercolour paper. I’m afraid I’m a little more slap-dash! both appraoches are fine, i think it’s very much a matter of what you feel more comfortable with.
Hope that helps, and good luck with your art!
X