

Pansy step by step sketchbook study

Pansies and violas are one of the loveliest garden plants to study through botanical illustration; they’re also common, affordable, and quite easy to paint. This blog will talk you through the basic steps in completing a sketchbook study of a viola or pansy.
For lots more of my botanical illustration step by steps, click here. For more of my sketchbook illustrations, follow the link.
Choose your plant and draw up the flower
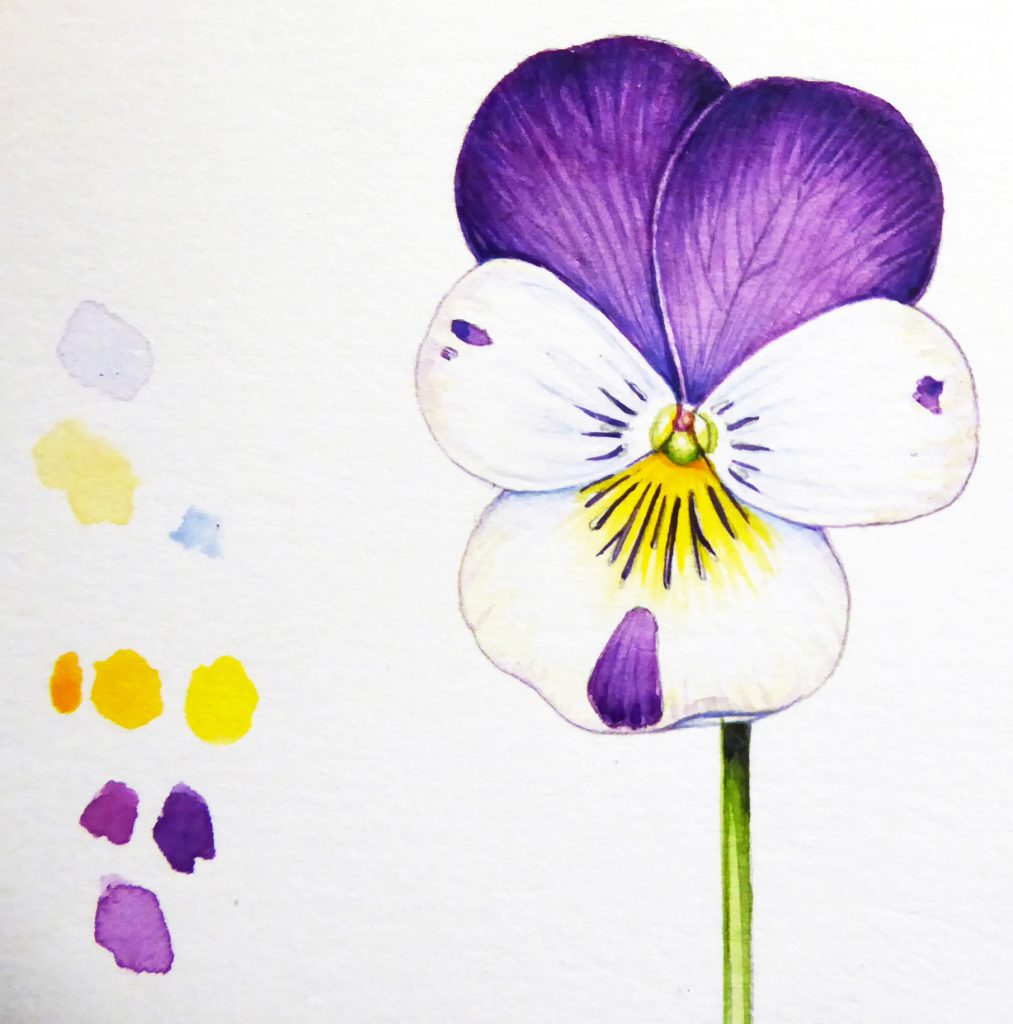
First, choose a plant whose petals have colours that you think you’ll enjoy working with. Purples, whites, yellows and warm pinks predominate. I was taken with this pretty plant, and it also allowed me to play about with both pale and dark petals.
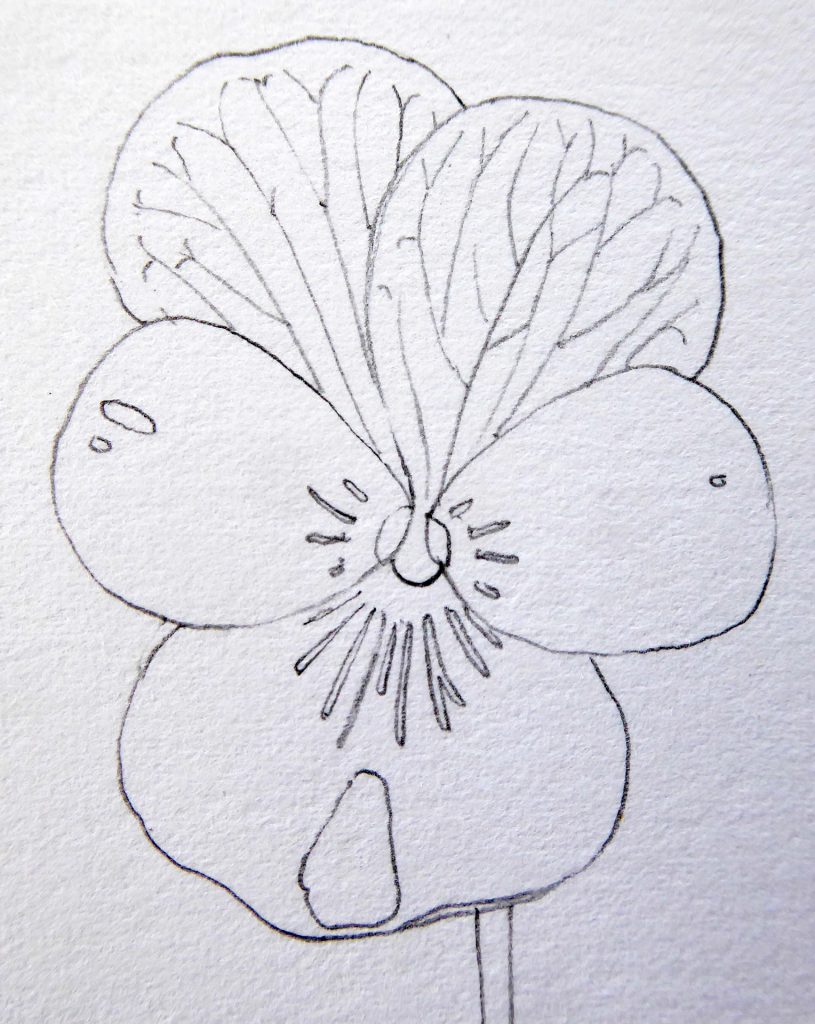
Draw up the flower in pencil, as always I use a mechanical pencil (Pentel P205) LINK, an H or an HB lead. Be sure to include plenty of information on the veins within the petals as well as the shape of each petal.
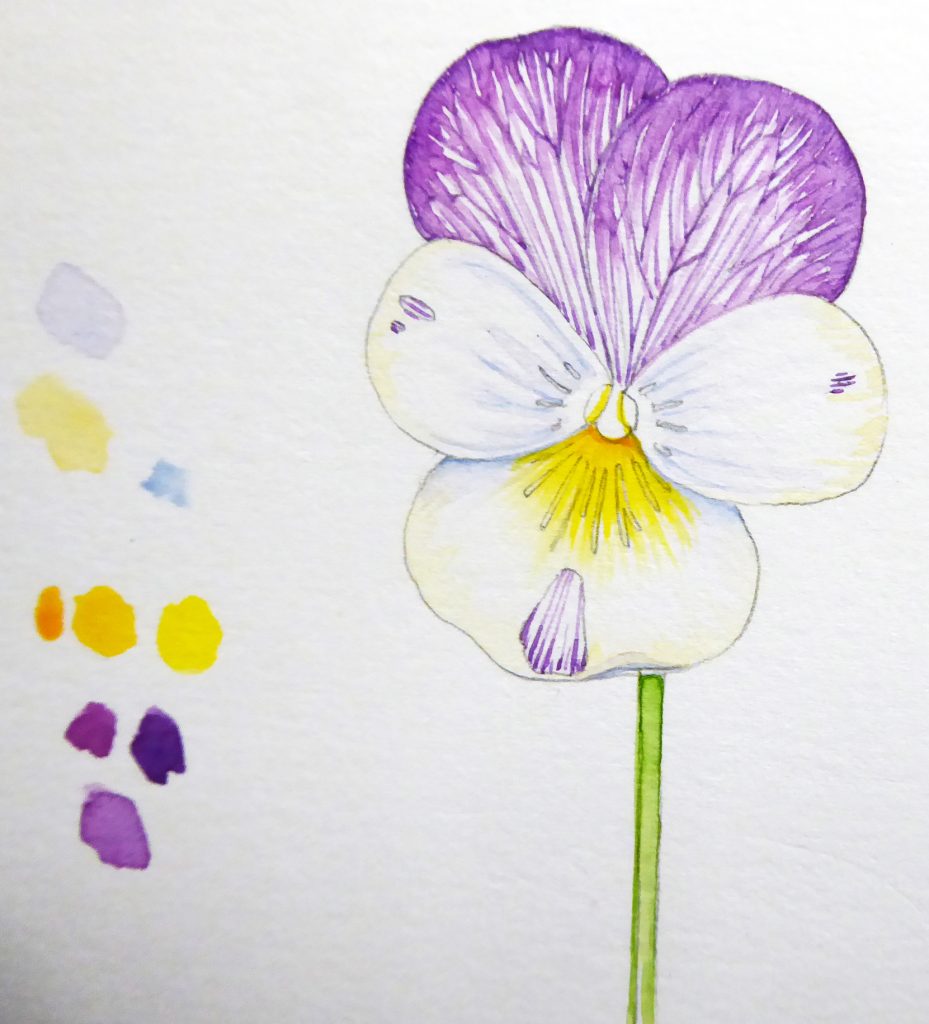
Painting the pale petals
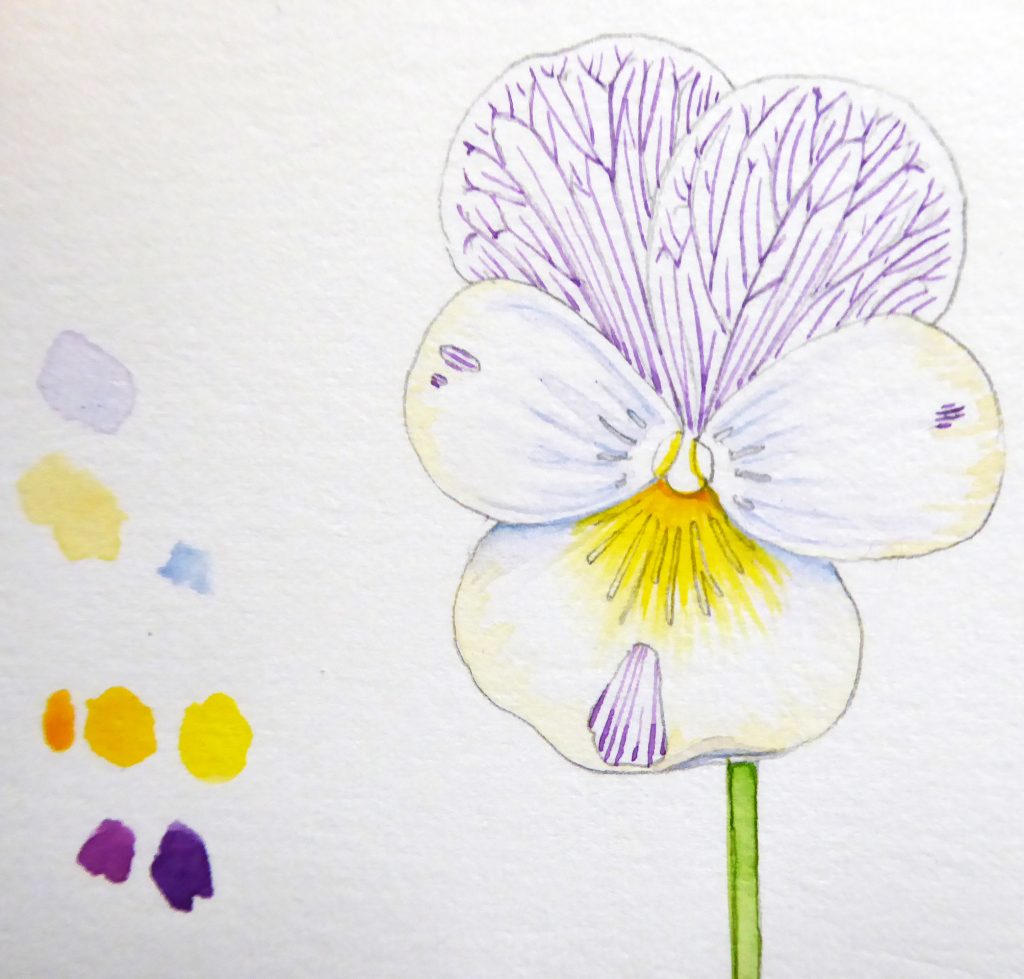
Start with the white petals, and remember, with all pale subjects, less is more. You can always make a colour darker but you can’t lighten an area of paint once it’s been applied. (For more on painting white petals and flowers, look at my blog.)
I mixed up a pale mauve and a yellow from my watercolour box. I could tell you the names of the paints, but sometimes I think a little experimentation is simpler, not least because everyone’s paints and selection of colours is slightly different. My paints tend to be Winsor & Newton pans.
I mixed a tint, a watery paler version, of each colour. Make a visual note of the colour you’ve used by dabbing a little of it on the paper you’re using.
I just used a little of these at the edges of the petals, then allowed it to dry.

I worked into the pale petals first. I made sure to note the areas of shadow where shadows overlapped. Picking these out with a mix of ultramarine and purple works well (any blue-purple will work) . I also got the bright yellows at the throat of the flower plotted in. It’s a good idea to get the lighter, brighter colours sorted out first. I think it’s more a matter of keeping things clean and good housekeeping than anything else. Painting with darker colours muddies the water, the palette, and the brush.
A darker yellow line at the centre of the flower helps give the flower structure.
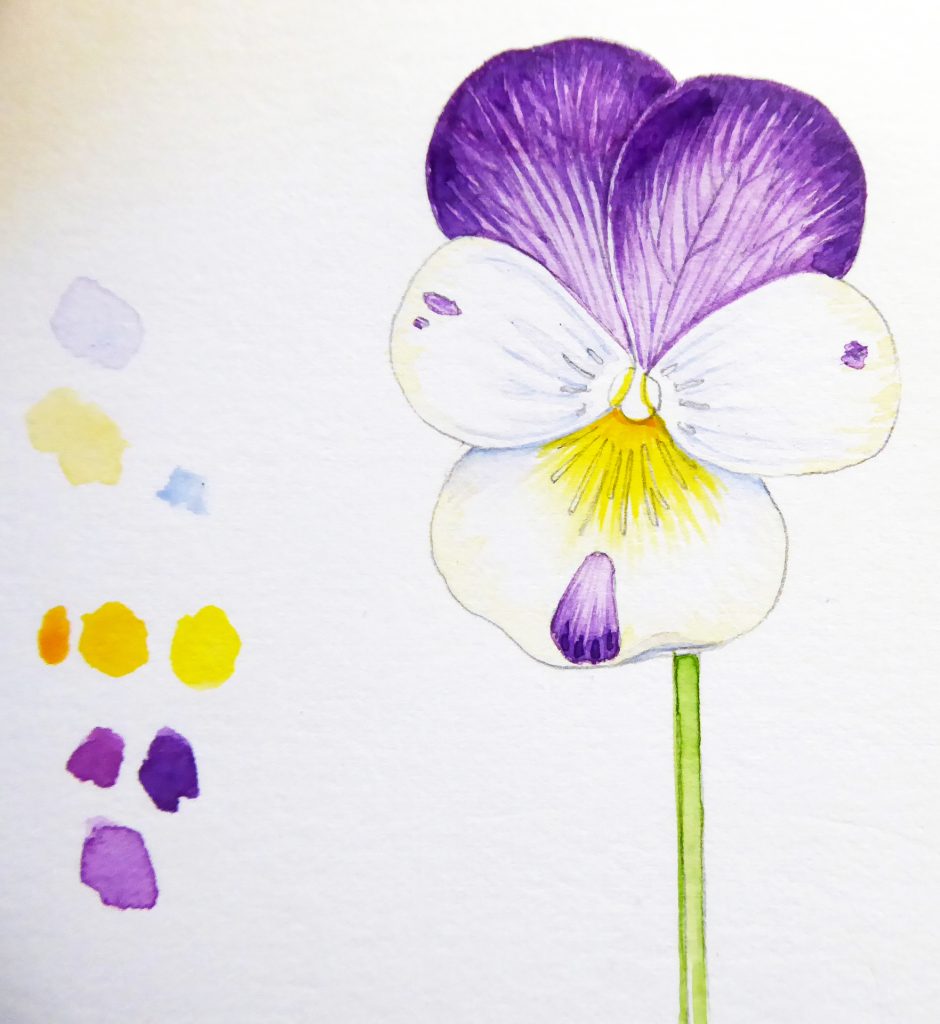
Plot in the stem and petal veins
Plot in the stem. I tend to mix a green then draw two parallel lines. The one on the right hand side is slightly thicker and darker than the other. Once dry, put a watery wash of the same green over these lines. This gives you your stem, with tonal information included.
With a steady hand, and referring at all times to your specimen, paint in the veins that network their way across the petals. You need a sharp tipped brush for this, despite its cost the only brand I can rely on for this sort of fine work is Winsor & Newton Series 7 sables brushes (a number 1 or 00).
Show the petal edges
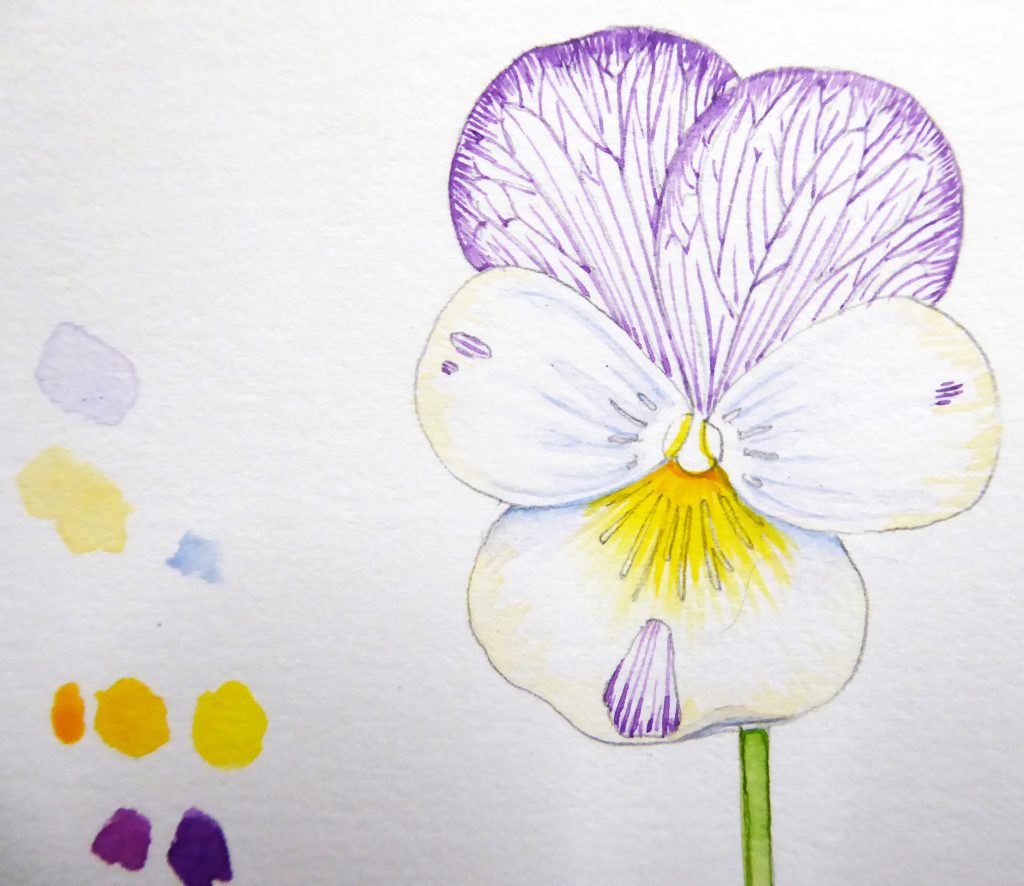
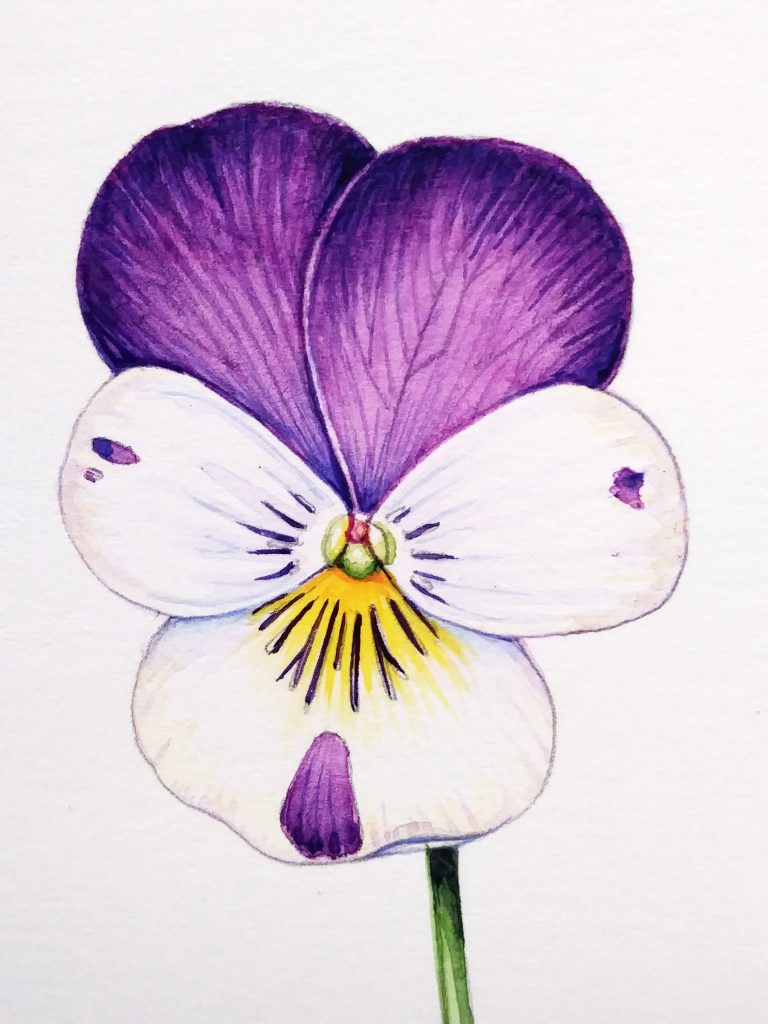
I build up the perimeter of the petals with a series of tiny brush marks. These blend in with the veins, and also show the edge of the petals which tend to be darker than the body of the petals.
Laying colour over the veins
Next, I mix up a watery paler version of the purple (a tint). Again, experiment with your own paints to find a good colour match, I think this one was purple lake with a little ultramarine and a touch of permanent magenta. Since I made a colour note on my page, it’s easy enough to mix it up again when I need it.
Working from the veins outward to the petal edges, I lay this carefully onto of the veins and purple edges. I keep it wet, and allow it to dry without messing around too much, this lets the paint give crisp slightly darker edges which I like. This also softens the stark contrast between white page and purple veins, and will provide a structural framework for the top layers of darker purple to sit on.
Repeat the process for the spots on the petals.
Adding some darks and shadows
Work into the purples with a darker hue, using a less watery colour and adding some blue to the mix. Again, apply the paint with care, following the line of growth and building up a textured area of colour, darkest at the petal edges. Allow all of these stages to dry between layers of paint.
Using the same purple, plot in the shadow that falls on the stem.
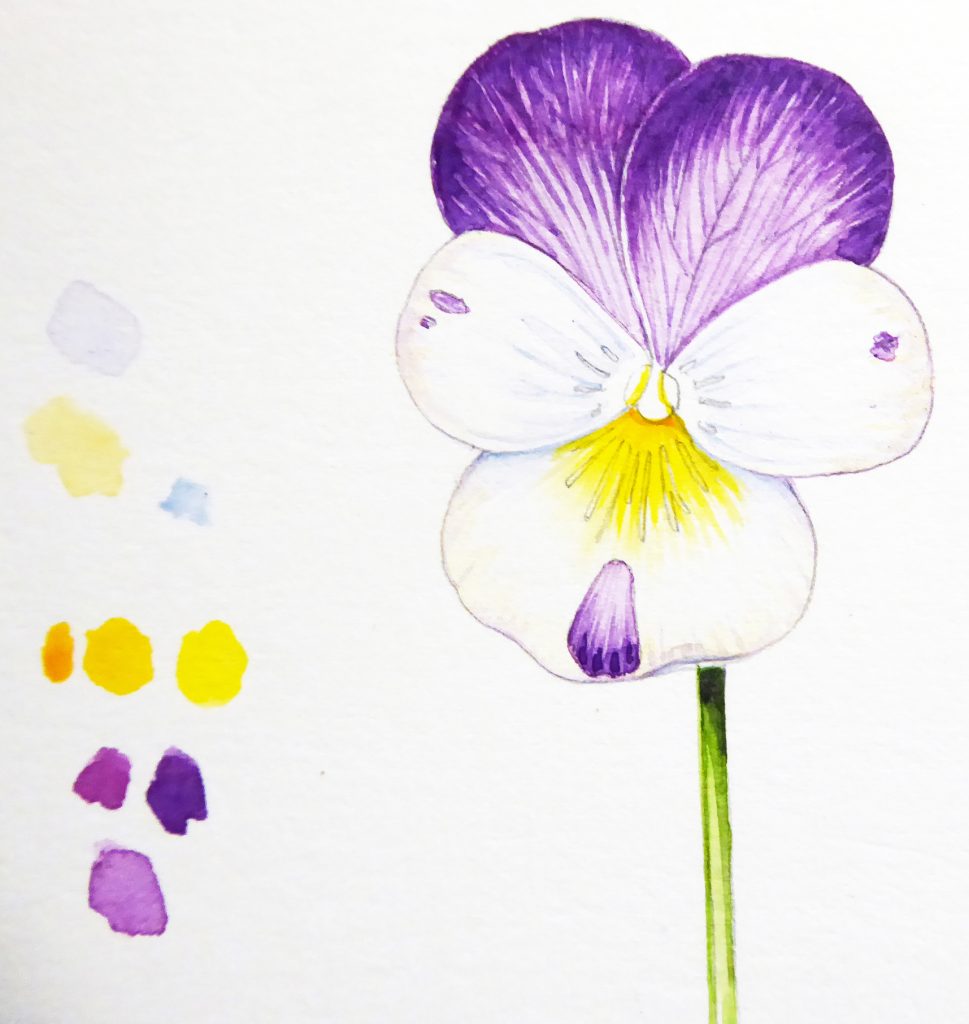
Working into the purples
Make a watery wash of your dark purple and apply it to all the areas of purple. Don’t overwork it, and allow it to dry fully. It’s a good idea to leave a tiny sliver of white page where the petals meet; you can knock this back later but it helps provide structure.
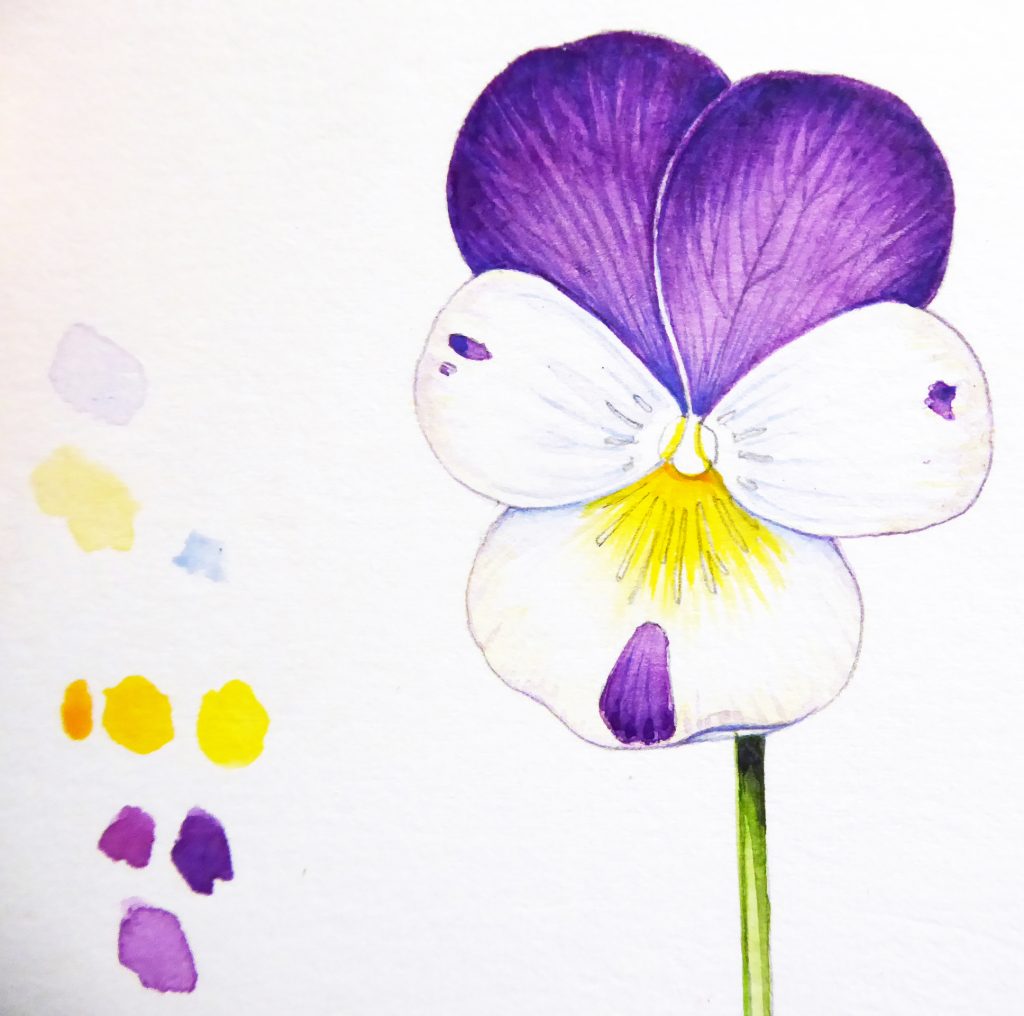
Side petal detail
Using the same dark purple, pop in the veins on the side petals. Keep your hand steady! Work into the centre of the flower looking carefully at the structures there with a hand lens and providing a couple of quite dark areas as this helps attract the eye.
Finished! You can tweak the painting if you wish, but most of the hard work is now done.
The Structure of the pansy
At this point it’s well worth taking out a scalpel and looking further at the structure of these fascinating plants. Make notes of their appearance in cross section, in side view, internally. The more you find out about your flower subject, the better informed you’re drawing will be.
Here’s an excellent cross section of a pansy done by Ann Bebbington, which appears in her fabulous and incredibly useful book, “Understanding the Flowering Plants” which is a guide and something of a bible for all artists and illustrators involved in depicting botanical subjects.
![]()
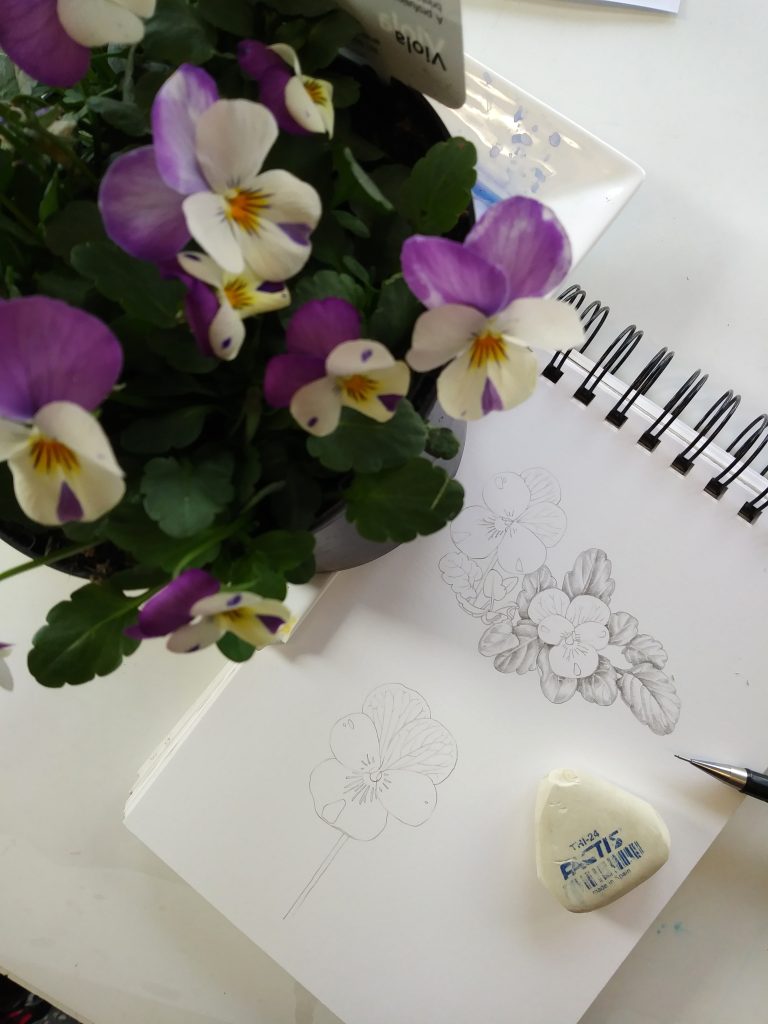
Here’s my finished page of studies, along with my trusty tools of the trade. It has to be said, an afternoon spent painting and examining one of these flowers is a perfectly wonderful way to pass the time. It’s also a great way to get some useful reference gathering done!
