

Botanical Illustration step by step: Bell Heather
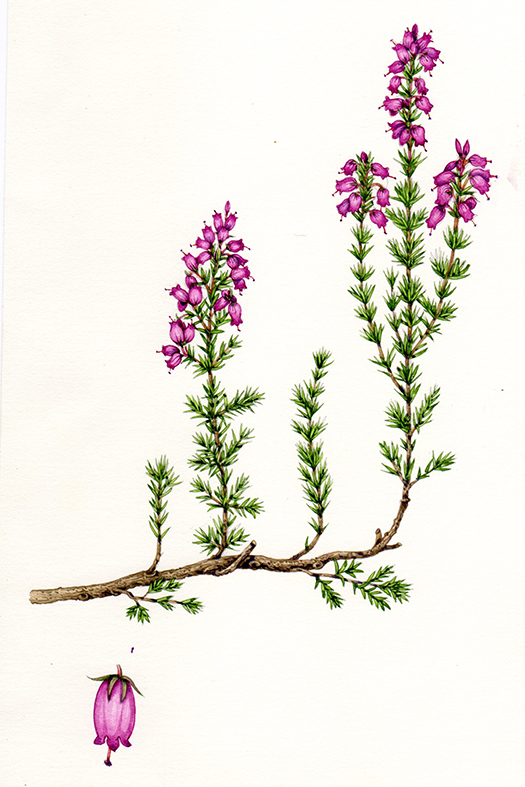
One of the plants I completed a botanical illustration of recently is the Bell heather, Erica cinerea. It’ll be used on a leaflet on Heathland plants produced by the Field Studies Council. Bell heather is one of several British heather species (see my blog for more) that appear on the chart. Although both leaves and flowers are small I thought it might be interesting to break it down into a step by step process.
Drawing up the plant
First, I drew up the pencil rough onto Fabriano Artistico Hot press paper. I use a mechanical pencil (I like the Pentel P205). For reference I used the plant itself, still growing in vegetative form on the hillsides near Hay on Wye. Reference also included Stella Ross Craig’s illustrations, and David Streeter’s Collins Flower Guide, along with photos I’ve taken of the plant in the past.
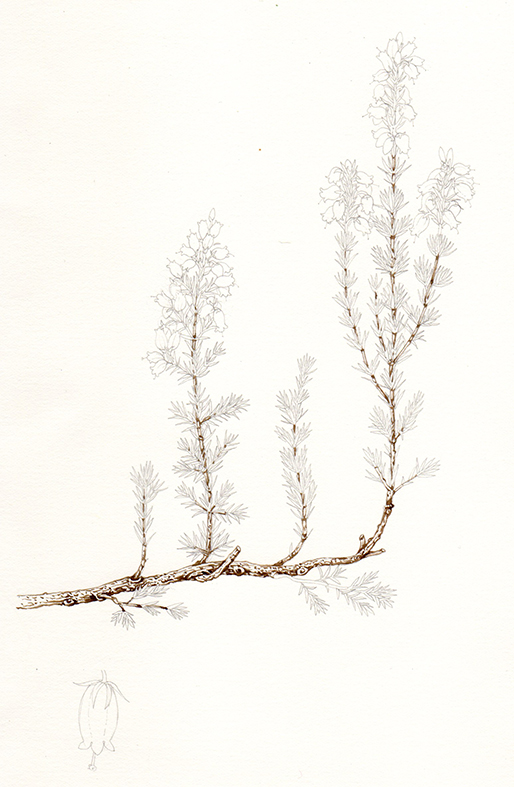
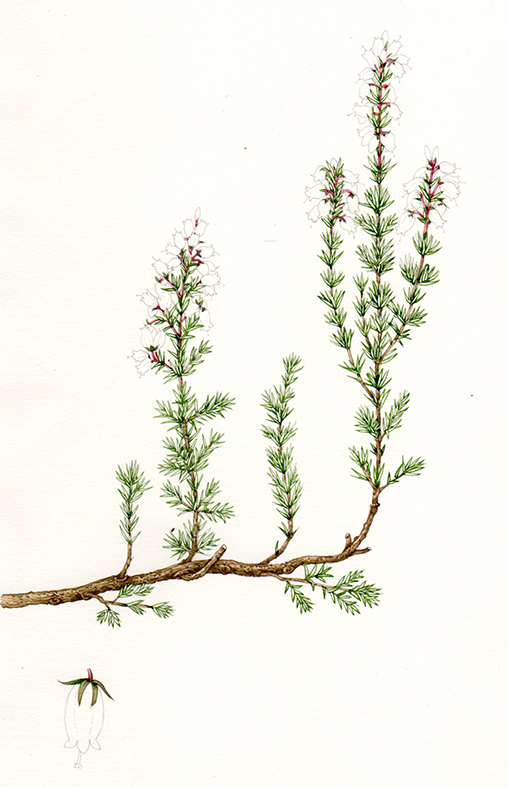
Step 1: The stem
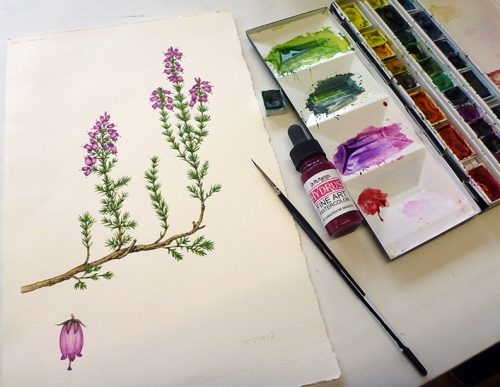
First, I started working on the woody stem. Initially, I plot in the darkest areas of the textured wood with my trusty Winsor and Newton series 7 paintbrush. The paint mix includes vandyke brown, yellow ochre, and a little Cadmium orange. The paint is used quite dry.
Next, I put on a top wash on the stems and woody parts of the plant. The first was the same mix as before, but with some green added. I picked out the stems and the woodier parts of the plant with this mix.
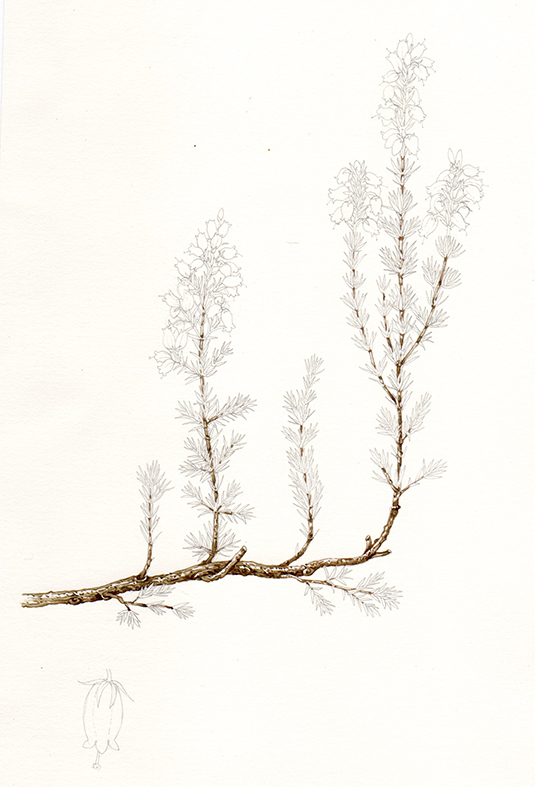
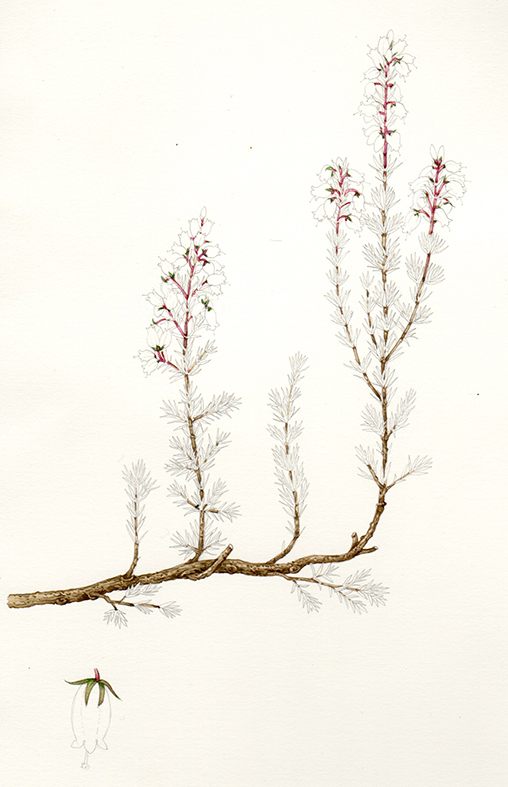
The next wash was a much wetter mix of yellow ochre . I covered the entire stem area with this, and let it dry. Then I picked out the flush of crimson which reaches from the flowers down the stem. This was Crimson lake with a bit of Vandyke brown. On top of these areas a put a wet wash of magenta, this is Doctor Martin’s Hydrous inks in Quinacridone magenta with some normal Cobalt violet (Winsor and Newton). I love these Doctor Martin inks, they are incredibly vibrant and help enormously when it comes to getting petals and stems to glow as they do in nature.
Then I mixed up an earthy green and started to pop in the stems and green areas at the base of each flower. It’s important to remember to work on the detail of one flower as you go along, it saves mixing up all the colours again later on.
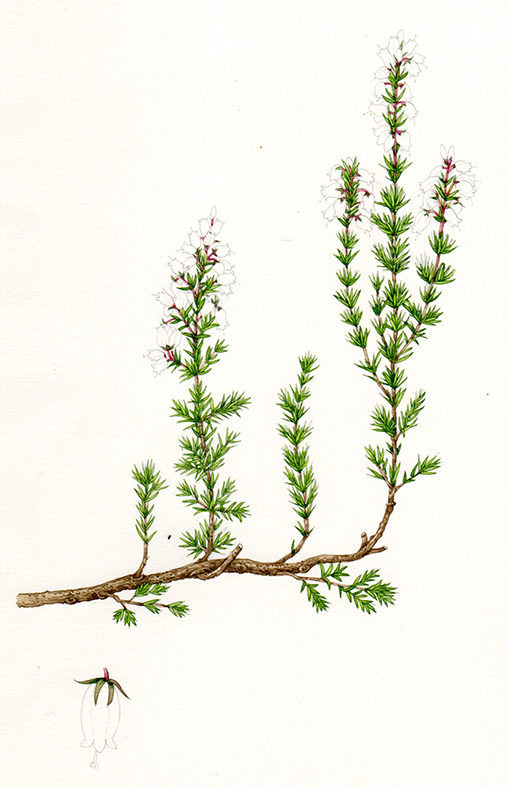
Step 2: The leaves
Next step is to tackle the leaves, which are a rich bright green. I start by outlining each leaf with a mix. This consists of Hooker green light, Vandyke brown, Cadmium yellow pale, and Winsor blue. I apply this in a thin line quite darkly. It’s vital to do each leaf individually or you lose the crisp detail required for a botanically accurate illustration.
I mixed up a series of three yellow greens for the infill of each leaf perimeter and applied these according to whether the leaf was in the light or shade, lower or higher up the plant (the leaves are a little brighter towards the flowering spikes). A watery top wash of cadmium yellow pale and Hooker green light covered all the leaves.
I also plotted in some leaf shadows with an almost black green (Hookers green dark with purple and Winsor blue), and shadows on the stem were Winsor blue mixed with Cobalt violet.
Step 3: The flowers
Next I got to move onto the flowers. Using a similar technique, I outlined each flower in a dark magenta. I used Doctor Martin inks mixed with water again, but this time I used the magenta and a touch of Doctor Martin Cobalt violet ink, and lifted the mix with a speck of Doctor Martin titatium white. This tends not to make the colours dull or chalky, so is wonderful. I also plotted in the stamens and a slightly purpler colour for the anthers.
Next came the top wash for the flowers, vital not to swallow up the detail by drowining out the white of the paper below.
This shows how wet the wash I used was as I put it onot the heather flowers, its always important to let wet washes dry before trying to get tiny crisp details down on the same area.
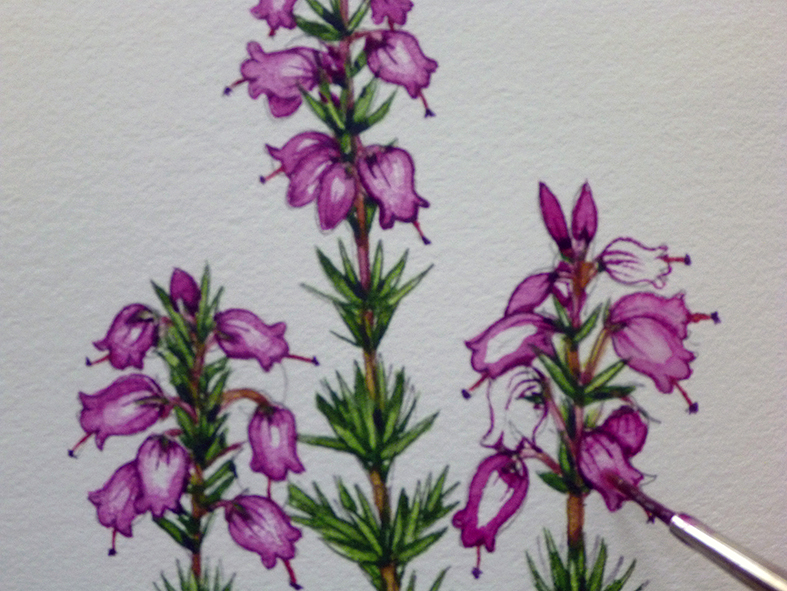
It’s a slow and steady build up of layers of magenta mixed with watercolour purple and alizarin crimson. The colour beecomes paler towards the centre of each flower; at all times allowing the gleam of the white paper to show.
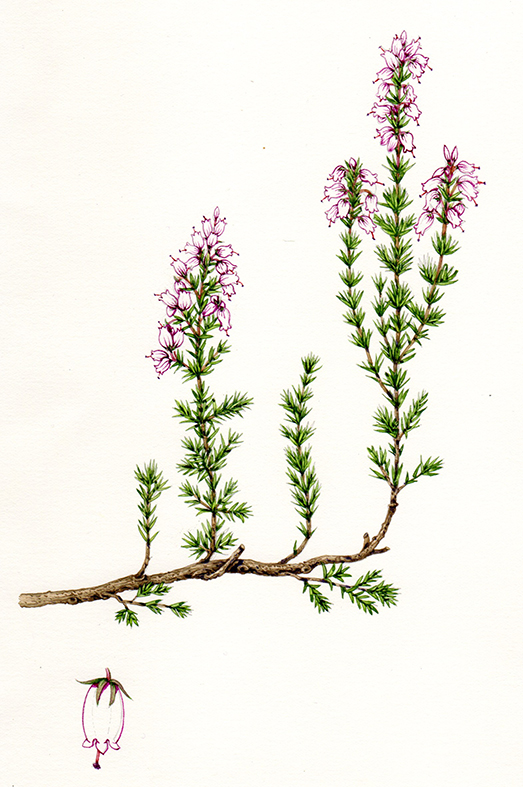
Final touches
Then I darkened the tips of the petals with a little more magenta and gave a pale crimson top wash to uinite the flowers; the dark edges help give a bit of structure to the flowers rather than having them resemble a froth of pink. I also reddened up the stamens a little and popped some deeper shadows amongst the foliage. And there it is, finished!
Below is a sheet of the colours I used, along with ntoes of what I mixed to get that hue. I don’t normally do this, but thought it might prove interesting for this blog.
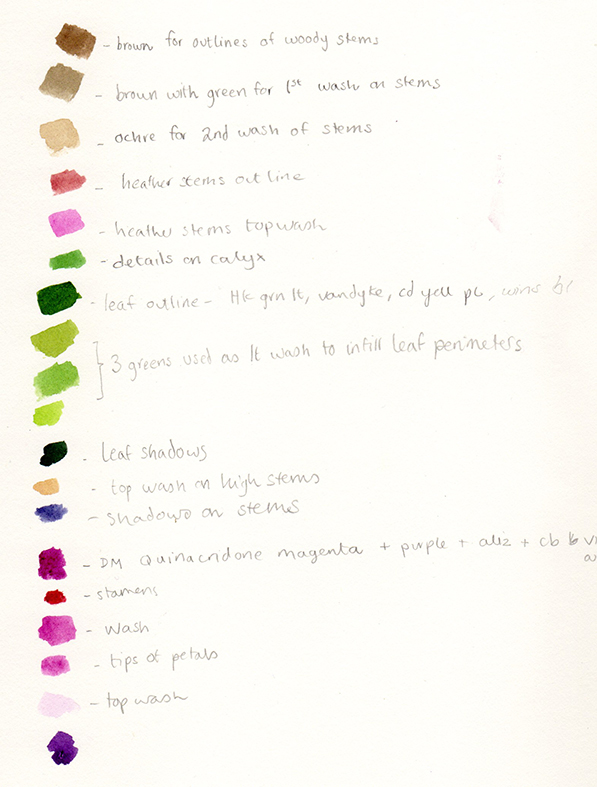
So there it is, a breakdown of the steps involved in painting something full of tiny flowers and tiny leaves. Lots of little steps, but worth it and entirely enjoyable too.
