

Botanical Illustration: Step by step Sphagnum moss
I’ve been working on botanical illustrations recently for the Field Studies Council; specifically on a big batch of Heathland plants. Amongst these are several Sphagnum moss species. (See my blog on moss illustrations for more.)
The first step is to get your hands on the moss itself; drawing mosses is so unusual and new for me that unless I have a reliably identified specimen to work from, there’s no way I can even begin an illustration of the species. I’ve been incredibly lucky in having the support of Ray Woods (Radnorshire Wildlife Trust botany and mycology expert) and Jonathan Sleath (British Bryological Society), both of whom collected and delivered samples for me.
Drawing a moss
Drawing up the pencil roughs of the mosses required a different approach from my normal atonal line drawings, this is because the moss makes very little visual sense without shadows, so each pencil rough is almost a finished tonal study.
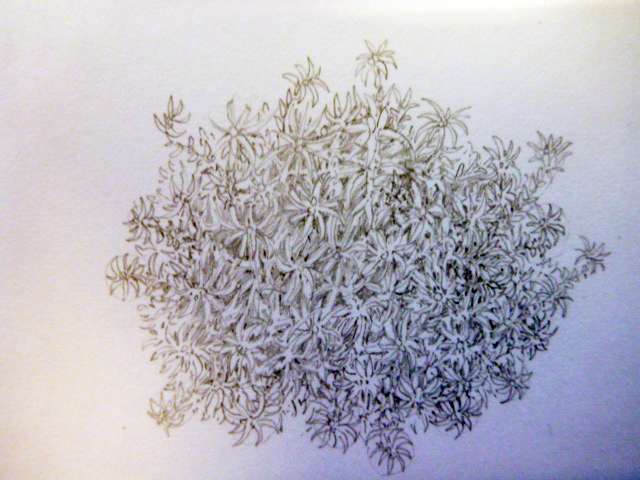
Pencil rough of Sphagnum tenellum
Getting into the detail of the bryophyte was a challenge, until I took my contact lenses out (I’m very short sighted). Suddenly, by peering closely and getting right down to the moss, I could see every tiny detail of the plant, and just drew what I saw.
I also made sure I was “seeing” the plant correctly by checking for distinctive and species-specific traits with a couple of brilliant reference books; Mosses and Liverworts of Britain and Ireland: A Field Guide by Ian Atherton, Sam Bosanquet and Mark Lawley, The Moss Flora of Britain and Ireland by Smith, and British Mosses and Liverworts by E.V. Watson.
Adding colour to the Sphagnum
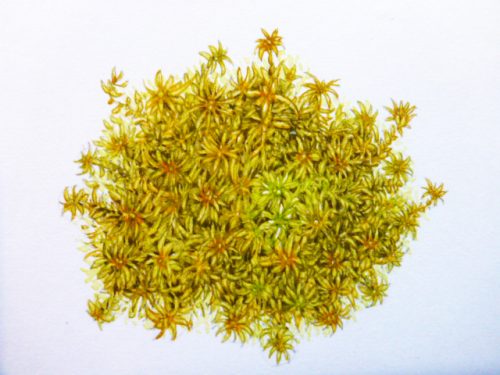
Once I got the go-ahead on the roughs, I started by delineating the edge of each leaf of the moss in various shades of green. S. tenellum is a very yellow species, tinged with orange (but also green at times), so I used a variety of hues. Without my trusty Winsor & Newton series 7 sable paintbrush (sizes 1 and 000) this would have been impossible. The brush holds its point, and enough paint, like no other paintbrush I’ve ever used.
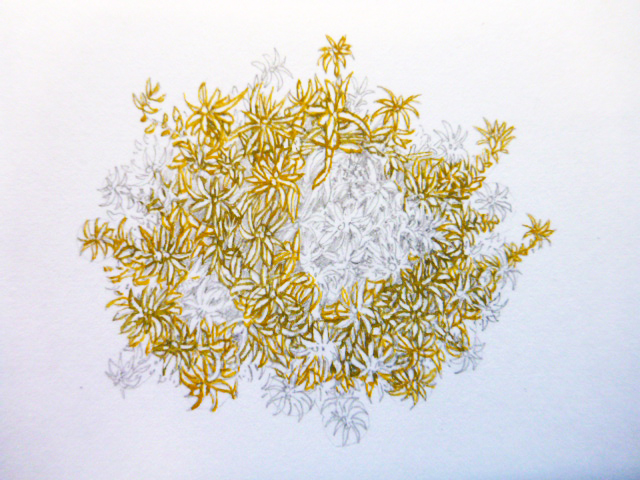
Delineating the leaves of S. tenellum
Because I was mixing colours in the paint-box and looking closely at the moss specimen (and my drawing), I put one contact lens in (so I could see what colours I was mixing) and left the other out (so I could focus on the minutae of the plant.) An odd approach, but it was really effective!
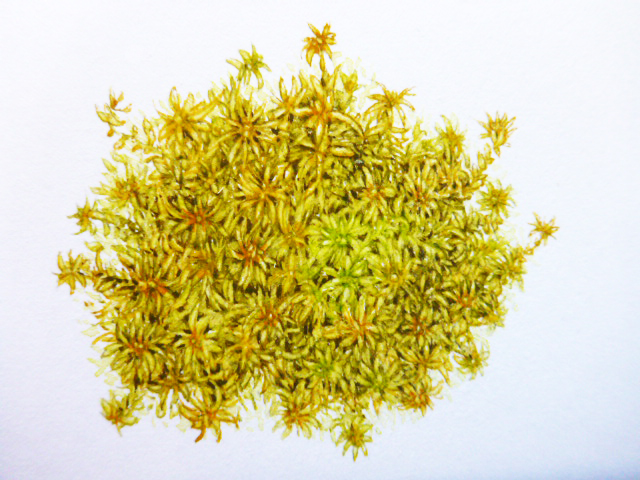
I made sure one area of the moss was significantly brighter and lighter than the rest of the clump. I hoped this would help give it depth, and convey the cushion-like habit of the Sphagnum.
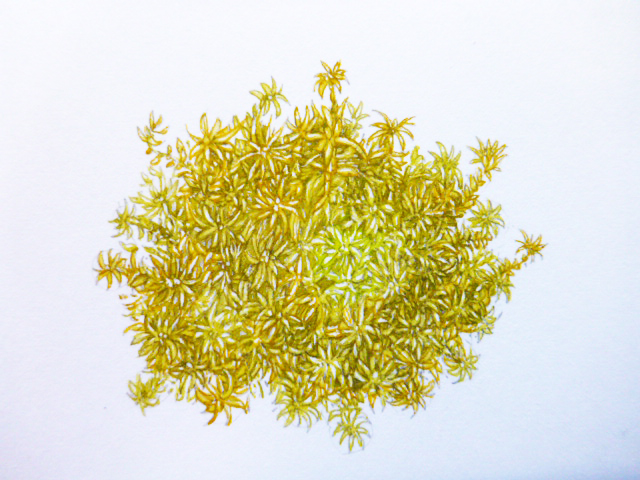
S. tenellum with all the details outlined
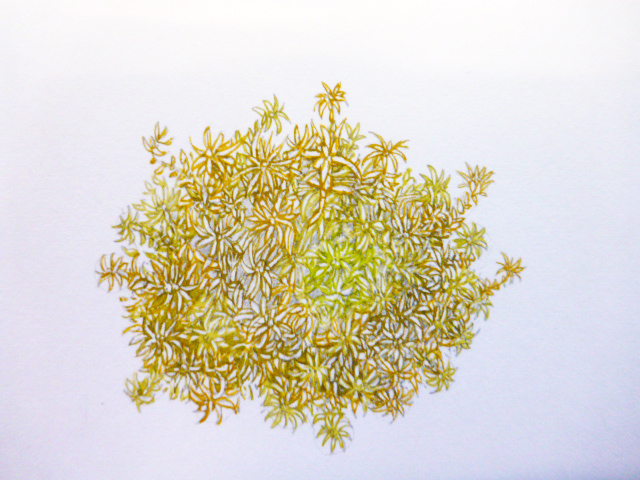
Next I added colour to the background; again, this was a mix of greens, yellows and ochres.
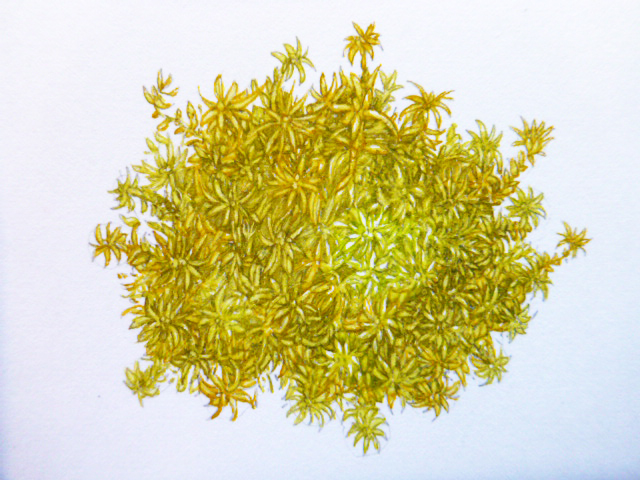
S. tenellum with spaces between the moss stems blocked in
Adding depth to the Sphagnum clump
I applied a very pale yellowish wash to the whole clump to try and unify it, but left the top of the clump on the right hand side white – this is the area that needs to look raised; by putting a wash there I’d have flattened it.
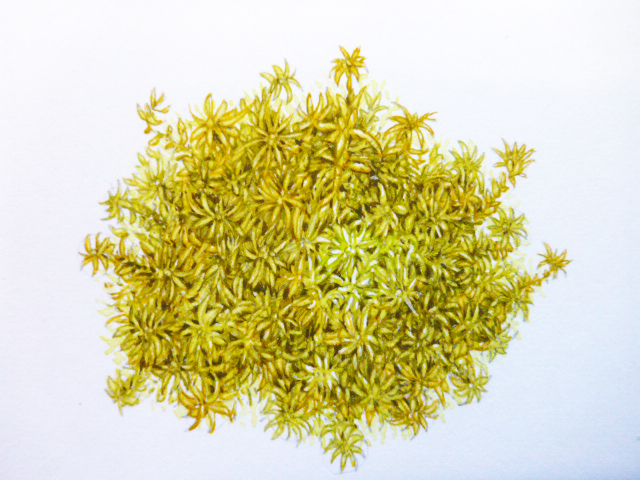
S. tenellum with wash applied
Back to the background of the clump, and I picked out the darkest areas of shadow with a mix of browns and blues. Although this gives the moss clump substance, it also knocks back the more subtle detailing done with lighter colours.
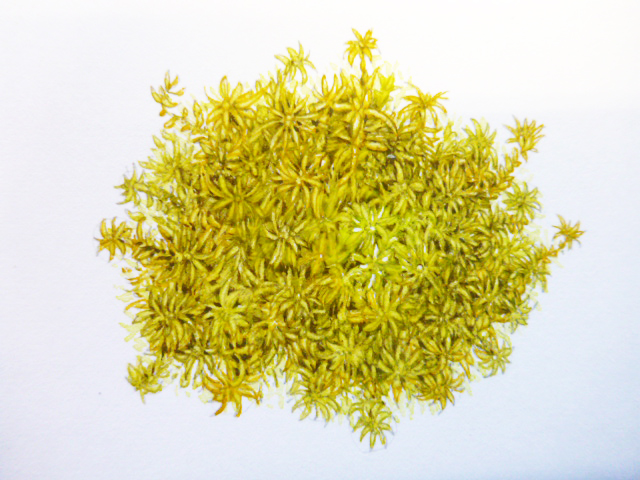
S. tenellum with dark areas of shadow picked out
Another layer of wash is applied to the picture, this time making the different colours of the areas of the moss more distinct (and still leaving the raised area white).
S. tenellum with a second layer of wash applied
At this point I was beginning to wonder if the moss would ever look right, so I had a cup of tea and a 5 minute break. When I came back, I noticed the flush of red around the tips of the shoots, so added a suggestion of this to the painting. Instantly the illustration was improved.
S. tenellum with red added to the shoot tips
I was feeling a little more cheerful by now, so happily worked further into the darks with greens, browns, blues and reds.

More tonality and detail is added
I considered leaving the pale areas on the right of the moss white (they looked good on the paper), but when I scanned the illustration they stood out and looked forced and clunky. I added a very pale top wash of yellow ochre which knocked them back without swallowing them up.
Adding botanical details and final touches
The last step was to illustrate the associated diagnostic structures, and a side view. Compared to the main clump this was straightforward (although I was still working very small).
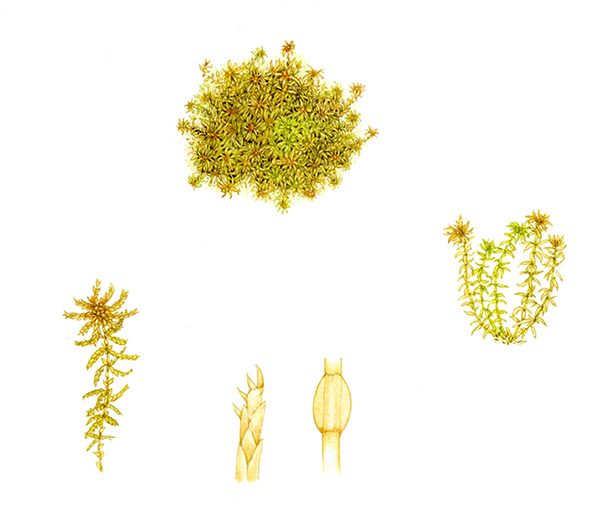
Final Sphagnum tenellum
I won’t pretend that working on these moss botanical illustrations is easy, but it is incredibly rewarding, and I am becoming quite passionate about the glorious variety and intricate details of these stunning lower plants.
Hi Lizzy,Love your drawings of sphagnum mosses. AS a drawer and painter of same I Realise how tricky they are.
Do you ever use a magnifying tools…if so can you recommend one PLEASE! Thanks Monica
Hi Monica
Thanks for the comment. Now, the thing with magnifiers is that I’ve never worked with them. Ive been told Optivisor 6 is a good one by students I’ve taught in the past? I think they’re a great idea, but I’ve not used them. I have recently been told to start using reading glasses, so I find that these (a + 1.5 works fine) plus a good and bright daylight light is fabulous. I’ve recently purchased one and it’s made a big difference. However, with mosses I use a different technique, especially because they are so very tiny. I am dreadfully short sighted, so when I paint moss I take the contact lens out from my stronger eye. Cant see anything much at a distance, but moss, and the sheet of paper I’m painting on? Massively clear. The other eye I leave with a lens in. This means I can go on mixing colours etc rather than stumbling about like some lost nocturnal beast. Sadly, if your eyesight is in any way decent this unusual solution may not work. Saying that, I am surprised at just how many botanical illustrators out there are alarmingly short sighted, so maybe you’ll be in luck? Thanks for the comment, and sorry not to be of more use! Lovely to find someone else into painting mosses, it’s something of a niche endeavour…