

Illustrating a Heath Fritillary Butterfly
Illustrating a butterfly out of season: Challenges and solutions
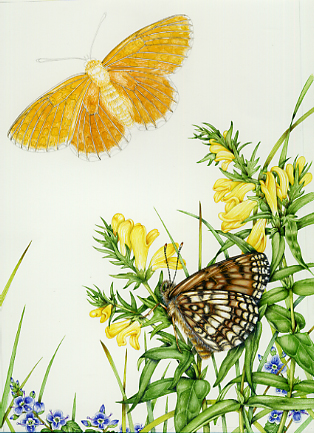
Illustrating a butterfly out of season is always a challenge as it’s hard to get good reference. This is true for the butterfly and the plants to be included in the image. However, I thoroughly enjoyed this private commission to illustrate two Heath fritillary butterflies and the food plants their caterpillars feed on.
Heath fritillary facts
The Heath fritillary is very rare in the UK. It only occurs at a couple of sites where volunteers work tirelessly to create the environment these insects favour. This painting was done for one of these volunteers. For more on this butterfly, please click on the link to Butterfly Conservation’s website.
Getting reference together
First step is to collate your reference. This came from flower and insect guides. I used Collins Flower Guide by Streeter and butterfly identification charts by the FSC. I also used copyright approved online sources, my own sketchbooks, and written notes. In an ideal world I’d have had the time to access museum collections. I love illustrating from real specimens, but in this case it was not to be.
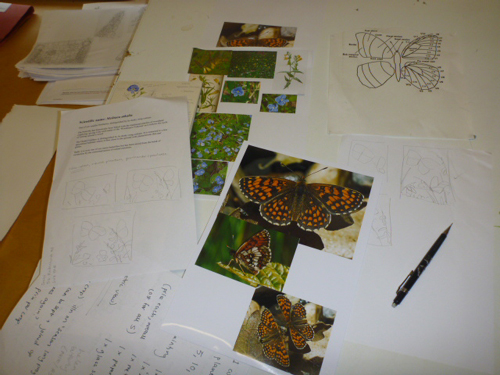
Composition and roughs
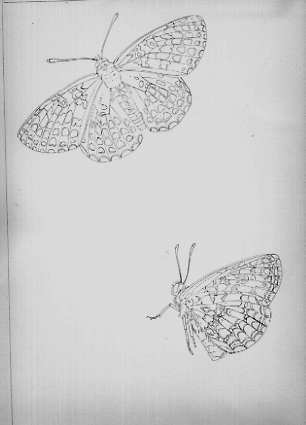
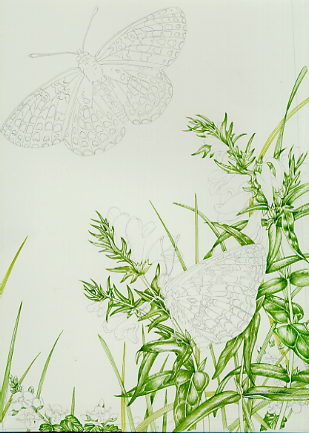
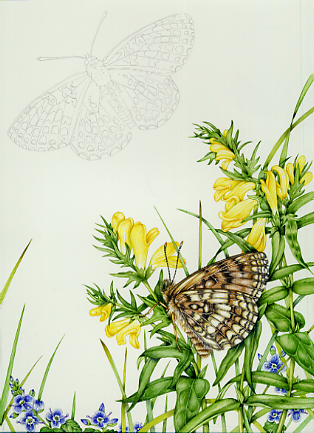
Next step is to come up with a composition that will show all the information about the butterfly, incorporate the food plants, and look pretty. I do this by working up a series of very rough thumbnail sketches (which you can just see above the pencil in the photo above). Once that’s done, I draw up the butterflies. You can save time by tracing and flipping butterfly wings since they’re symetrical. With fritillaries, although I always start drawing them atonally, inevitably once I get to putting colour on I find I need to shade in the darker regions with pencil. I should do it to start with and save some time!
I favour mechanical pencils such as the Pentel p205, and work on hot press Artistico Fabriano watercolour paper.
Next step is to include the plants, and make the composition flow properly. The lower butterfly needs to look natural, perched in the vegetation.
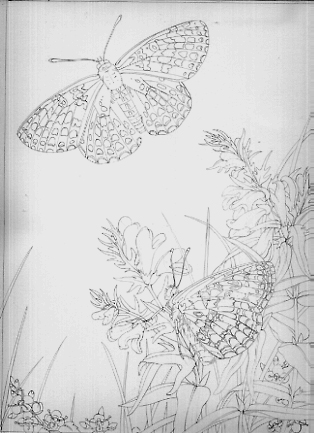
Illustrating the Cow wheat and speedwell leaves
Once the common cow wheat, grasses, and speedwell are drawn up, it’s time to get out the watercolours. I use Winsor and Newton paints, and series 7 brushes(numbers 1 and 000), also by Winsor and Newton. Normally, I stretch my paper, but I taped it down with masking tape this time as I wanted to get started right away.
I always do the background first, building a jigsaw into which the animals can fit. Because I love painting the colourful flowers most, I tend to save them til last, and begin by working into the areas of foliage; trying to ensure there’s a variety of greens. As always, I start by plotting in the darkest areas, then build up from these with a series of green washes. Key colours in these mixes are sap green, yellow ochre, cobalt blue, windsor blue. ceruleon, vandyke brown, violet lake, and cadmium yellow light.
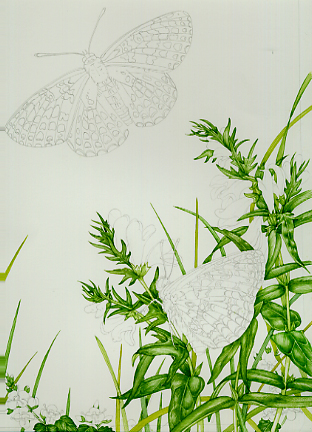
Putting the washes on top of the darker areas provides another opportunity to try and keep the greens different from each other; I knew there’d be oranges and yellows within the butterfly wings, so decided to try to echo that in the grasses’ colour. Already you can see some blades are far yellower than the other foliage.
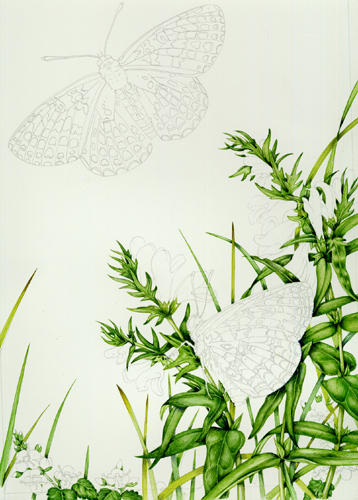
I work into the darks to try and give a little more depth to the leaves; a shadow using vandyke brown and purple is good, and cobalt blue works well too.
Illustrating the flowers
Once I’m happy with the greens, I can start working into the flowers. Again, the approach is similar, plot in the darkest areas to begin with. Doing the plants, I am aware that I’ll be returning to them again and again as the painting progresses. To keep a background unifed with the subject of the foreground requires not only a decent composition which satisfies the eye, but also an echoing of the palette. Here’s hoping these greens can take a certain amount of browns and oranges as I know those to be the predominant colours of the fritillaries.
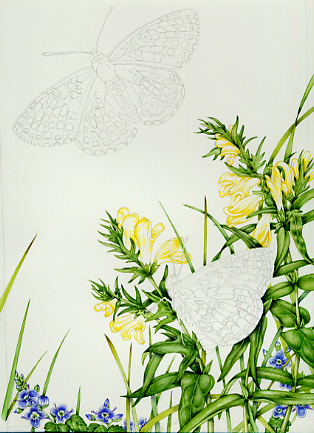
Next, work up the flowers by using watery washes. The speedwell was a mix of windsor blue and purple; the cow wheat is cadmium yellow light mixed with a touch of cadmium orange. Sadly, I slightly overworked the speedwell and with a colour wash they lost some of their intensity. So it goes.
Illustrating the butterflies
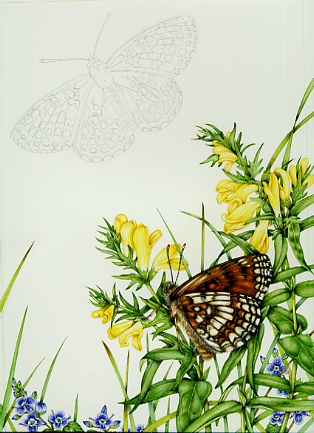
The lower butterfly comes next; and I start by delineating his veins. I find the veins of the wings of butterflies completely and fundamentally vital to my illustrations; they are the skeleton on which I build up the layers of colour and pattern.
Using tiny brush-strokes, I’ve simply plotted in the different areas of colour on the underwing, tending to keep it darker towards the veins and a little paler in the centre of each wing cell.
There’s always the problem of trying to keep the whole creature progressing at the same time, so I include the body. In the past, I’ve left the body til last, and of course by the time you come to paint it, none of the original colours remain in your paintbox.
I’ve worked thoroughly into the lower butterfly, and have put unifying washes of orange and brown on the appropriate wing cells.
It was at this point, having stopped for a cup of tea, that on returning to the picture I thought it’d be worth double-checking my reference, and looking at some supplementary images. Lo and behold, I instantly understood that the colours were far too dark; my reference had misled me.
Working with a lot of white gouache tinted with cadmium orange, I layered up tiny brush strokes on top of the butterfly until it looked a little more “normal” and a lot paler. Like I say, you can only ever be as good as your reference, so make sure your reference material is good.
Illustrating the top butterfly
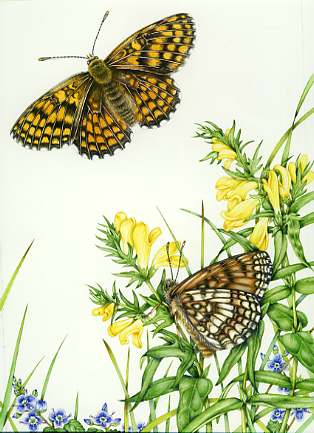
For the top butterfly, I took a tip I’d seen online somewhere’ A botanical illustrator paints an entire leaf bright yellow before working on the greens. this means the colours work together, and gives her a ground to work into. I thought perhaps a similar approach would lend an orange tinge to the darker areas of the butterfly wings.
As before, I started by plotting in the wing veins, then blocked in the undercoat of cadmium orange. By the next picture, I’d had to use pencil to sort out the areas of dark… Again, I’m working into the body at the same time as the wings.
I’ve now plotted in the dark areas on the fritillary wings. I love the antennae, stripy with orange tips. Very gaudy. The veins remain white until I cover the whole wing spread with a watery orange wash, for this painting I used Doctor Martin’s inks, the orange shade.
Adding depth to the colour
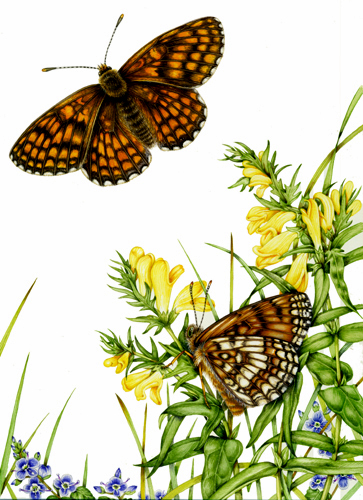
The over-wash of orange really adds depth to the butterfly. I worked further into the colour, trying to make the white checkered wing margins stand out a bit more. I worked on the gradation between areas of dark and orange. Vandyke brown is great for this. Shadows cast by the body, and dark areas within the abdomen are worked up with vandyle brown, purple, and blue. Again, tiny brush strokes are used.
A final touch is to add some detailing with white gouache. This highlights the tips of the hairs on the thorax, and puts in the tiny fringe of white scales between the upper and lower wing.
If you look carefully, you can see that a fair amount of extra work has been done on the foliage, especially in the darker areas of the cow wheat flowers (prefect for echoing oranges) and the brown tips of the blades of grass.
Finally, I rub out any pencil marks left showing (for example around the edge of the wings and the antennae) and that’s it, I’m done.
For more on the evolution of this painting, please check out my youtube video:
For more on the evolution of this painting, please check out my youtube video: