




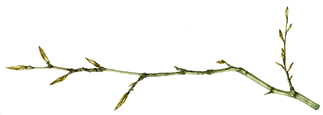
Illustrating apple blossom
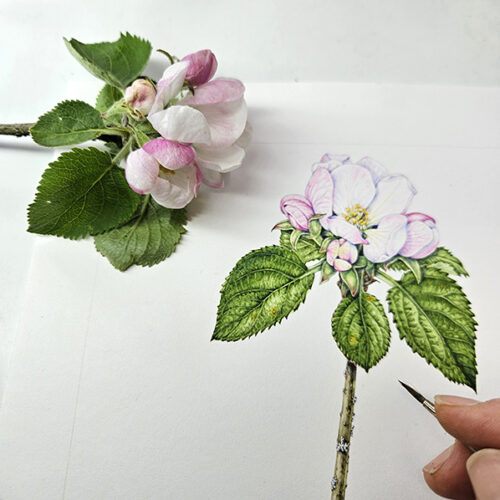
I’ve been doing quite a few botanical illustrations of apple blossom over the last few years, so thought I’d discuss some of the challenges and joys of working with such beautiful flowers.
Composition
If possible, start by finding out what variety of fruit tree you’re looking at. There are lots of experts out there, and some apple-specific websites such as Fruit i.d. and the national fruit collection. There are subtle differences in colour, growth patterns, and size and shape of petals; as well as bigger variation between the apples each variety produces.
Blossom is often clustered at the tip of a branch, may grow off sideways from a stem, or is produced on lateral spurs. This needs to be reflected in the drawing. If there’s lots of variation, I’ll include two bunches of blossom.
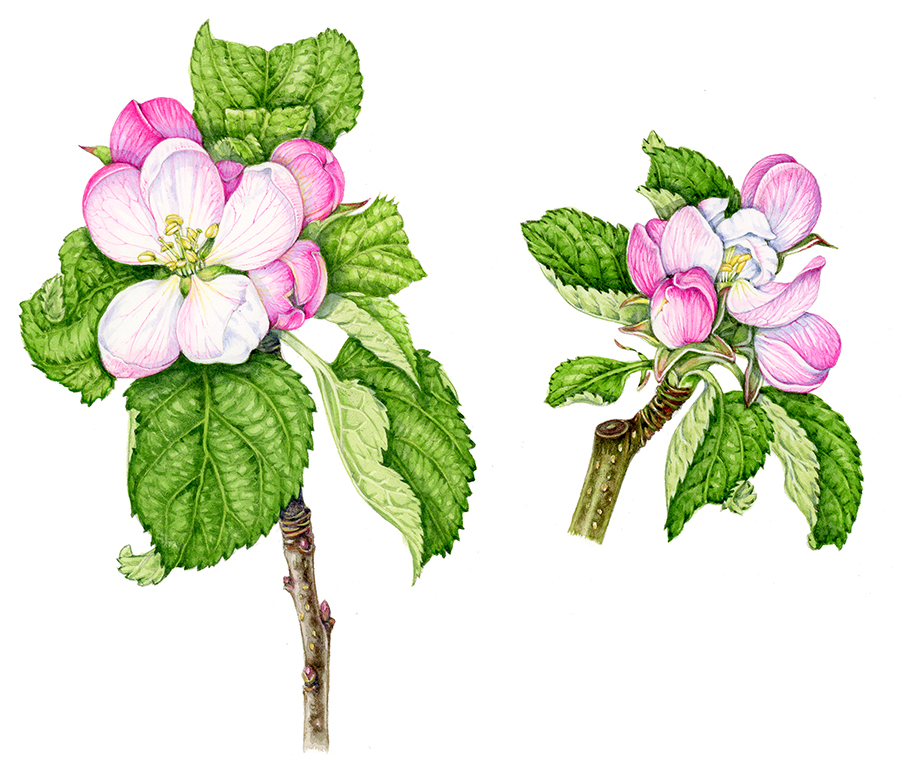
Two views of blossom from the same tree
As always, slightly curve straight lines of twigs, and leave plenty of white space around your subject.
Specimens and blossom care
A major challenge of painting blossom is that the flowers are so ephemeral. Buds unfurl, stamens expand, petals stretch outward and fall. You can cosset your blossom to try and make it last longer.
If it’s a small sprig, you can put it with a little moist tissue in a sealed plastic bag in the fridge.
Keeping blossom in the dark somewhere cool, like a cellar or garden shed, also helps to delay the blossom burst.
On the other hand, you may have buds you want to come into flower. Encourage them by putting them somewhere warm, in direct sun. Placing your specimen under a bell jar or in a greenhouse will also speed things along.
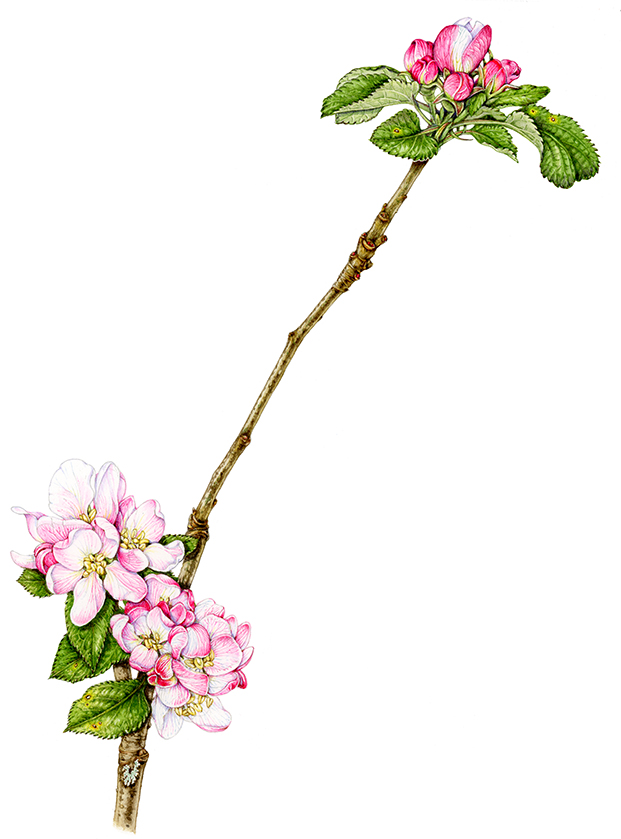
Apple blossom growing from the tip of a branch and from a spur twig
Caring for blossom as you paint
Once you’re at your desk, drawing, it’s something of a race against time. You can keep the room you’re working in really cold. This makes the flowers unfurl slower, and buys you a couple more hours. It’s not pleasant, though.
Draw fast. I get the basic measurements done right away, using callipers or a ruler. I always take lots of photos before lifting a pencil.
Make sure the cut end of the twig is wet. I use plastic test tubes held in a desk clamp. The specimen stays in water but isn’t resting on the side of a jam jar. It is is held still, in the position I chose to draw it in, and I can move the angle of the plant without touching the blossom.
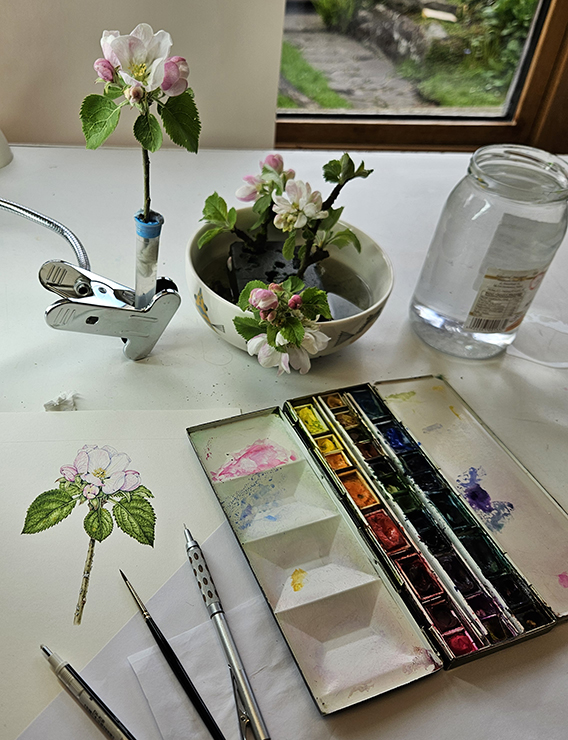
Apple blossom specimen held in test tube with a desk clamp
It’s also vital to have more than one specimen. This means if something happens to the flower I’m working with, I can refer to another one for the missing information.
If my illustration takes more than a day, I store my specimens somewhere cool and dark overnight instead of leaving them out on the desk.
Colours
Apple blossom tends to be white, flushed with pink. Within this, there are a multitude of nuances. Some flowers have a general pale flush, others only show the pink on veins on the petals. Most have far pinker buds than opened blossoms.
The buds are amazing. In many cases, as they unfurl, you can see a sharp delineation between white and deep pink. The pink is where the bud was exposed to sunlight, the white is the petal that was hidden.
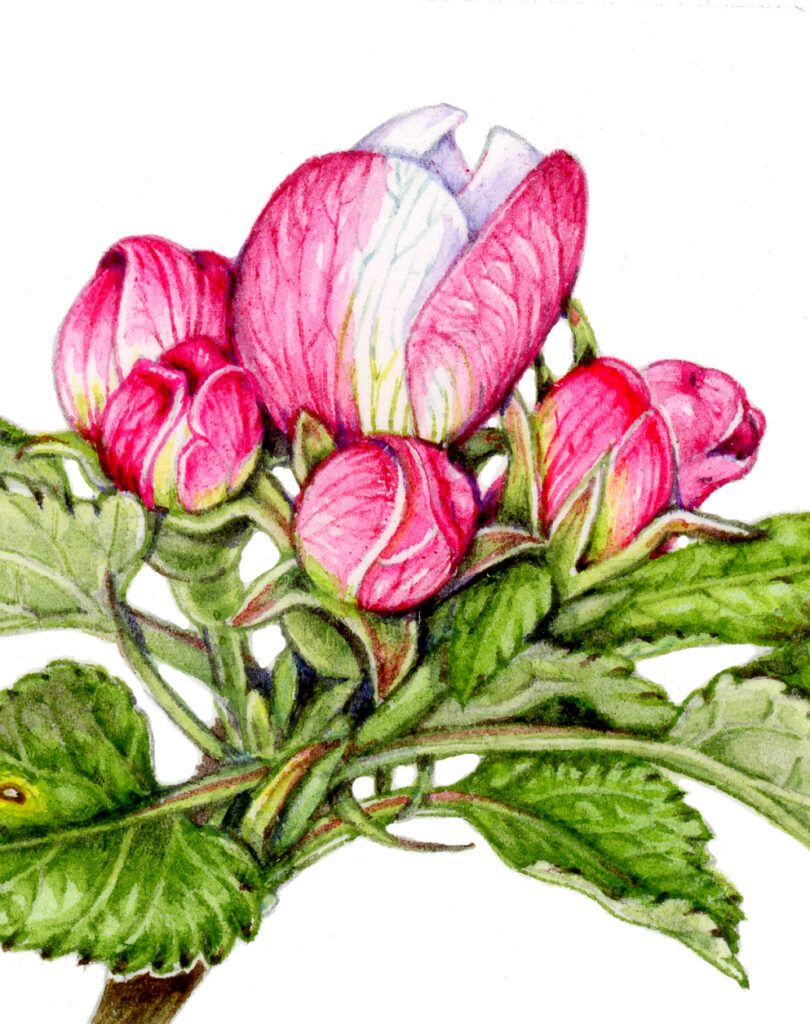
Apple blossom buds unfurling, showing the stark difference between pink and white.
I tend to use various ratios of Opera Rose, Cobalt Blue, Permanent Magenta, Alizarin Crimson, Cadmium Red, and Winsor Violet to try and capture the pinks.
Some blossoms have intensely coloured buds, almost purple.
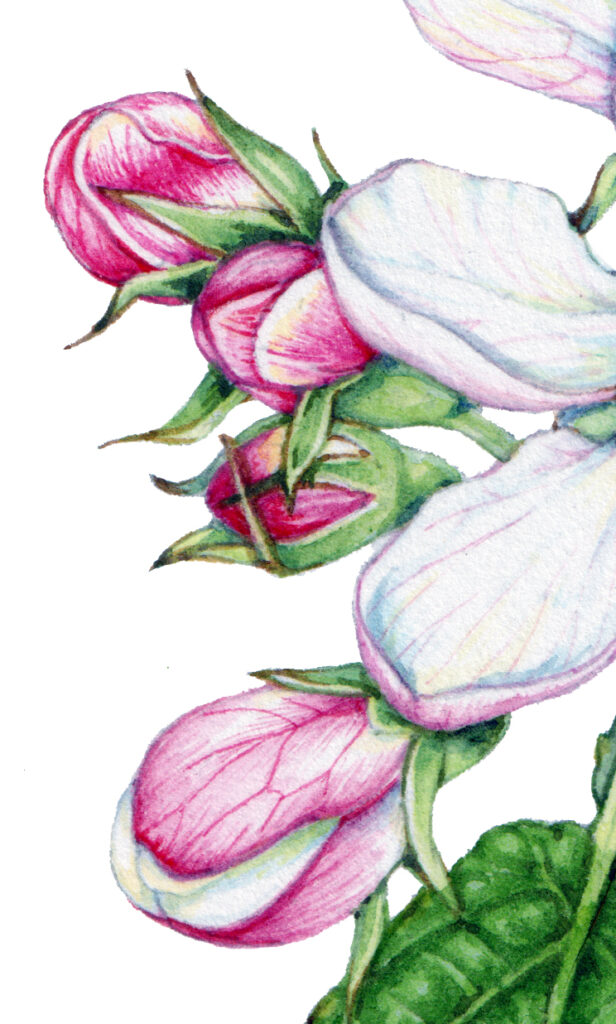
Purplish buds
Another challenge is that the hue of pink seems to alter massively depending on whether I look at in in daylight, artificial light, or direct sun. Pinks also become more purple as the day progresses.
White petals can be outlined in pencil, or with a neutral grey. I like a neutral mix of Alizarin Crimson mixed with Winsor Green (Yellow hue). The veins, if not pink, tend to be a yellowish green, and are often indistinct.
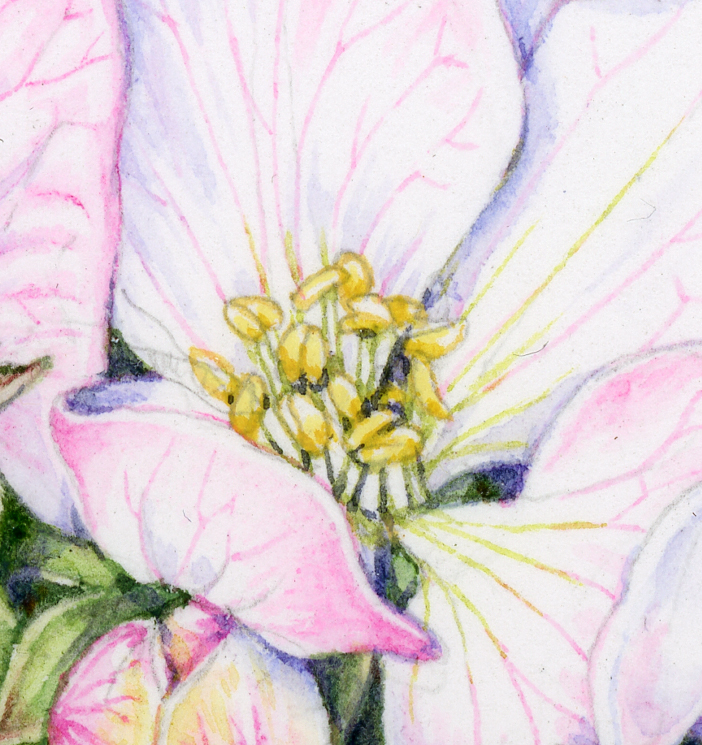
Flower veins, changing from yellow-green near the centre, to pink
Shadows
Representing petal edges, and shadows on pale flowers is always tricky. You need to show them, but it’s important to keep the flower white. For more on this see my blog on painting white flowers. Placing a darker leaf behind a blossom is one solution.
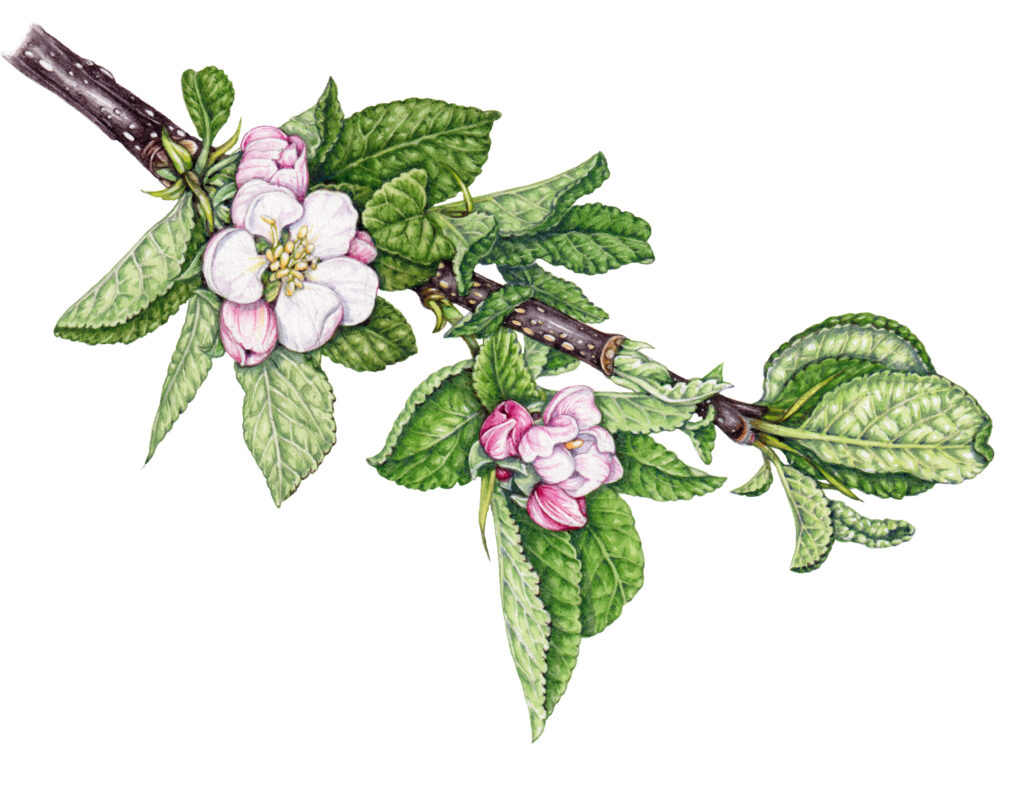
Blossom with leaves behind it. No need to outline the petal edges.
Adding drop shadows, where a petal casts its’ shadow on the one below it, can look really effective. Again, don’t overdo it. A dilute Cobalt Blue mixed with Winsor Violet, or Cerulean Blue are all worth trying.
Detail showing blue shadows on a bud
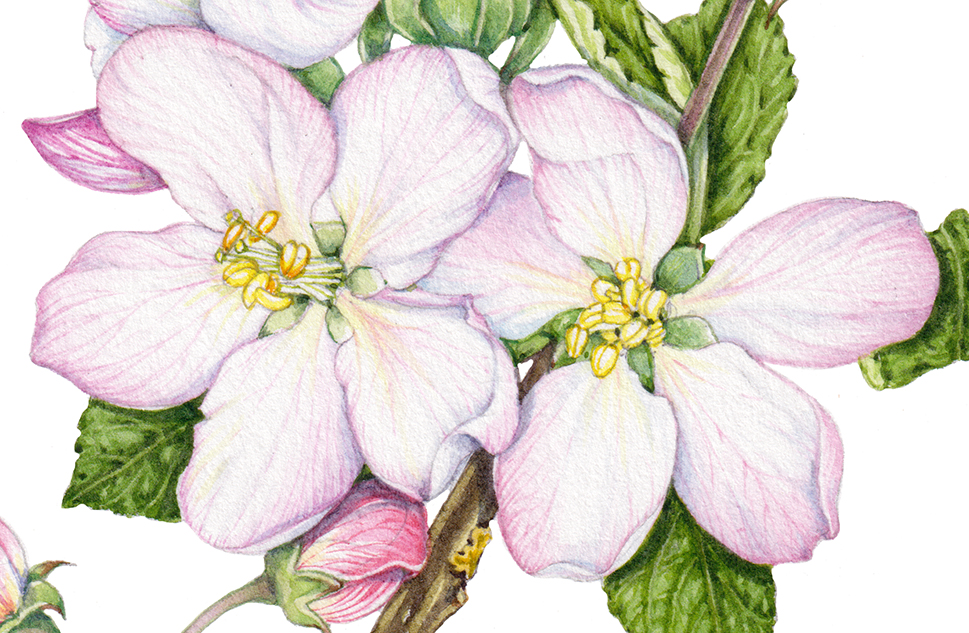
Drop shadows help separate the two flowers and their petals
Anthers and stamens
Surprisingly, the pollen-producing stamens of the apple seem to change colour. When newly opened, the anthers are a pale creamy yellow. (For more on the parts of a flower, check out my blog). Once mature, they turn a rich red, or even dark brown. They can often be a wide variety of colours in one flower. The filaments vary too, from a fresh yellow-green to a colour closer to Yellow Ochre.
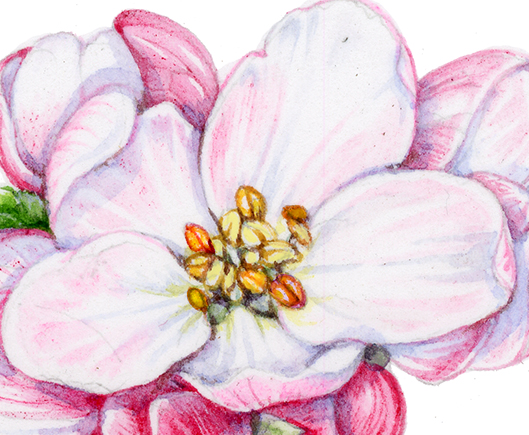
Different coloured anthers in one flower.
Petal drop
Petals dropping is the toughest challenge of all. You’ll be in the middle of illustrating the venation where a petal curls over itself and…poof! The petal is gone. I try to work with the fallen petal, but this is where the reference photos I took earlier come into their own.
None of my photos show this stressful moment, or even the desk at the end of a day where every single blossom has fallen to pieces. I think I’m too busy panicking to get the camera out! The pear below shows me working from two specimens. Neither is the flower I initially drew. It shed its’ petals a few hours earlier. I had to make do with under-studies. It’s a familiar story.
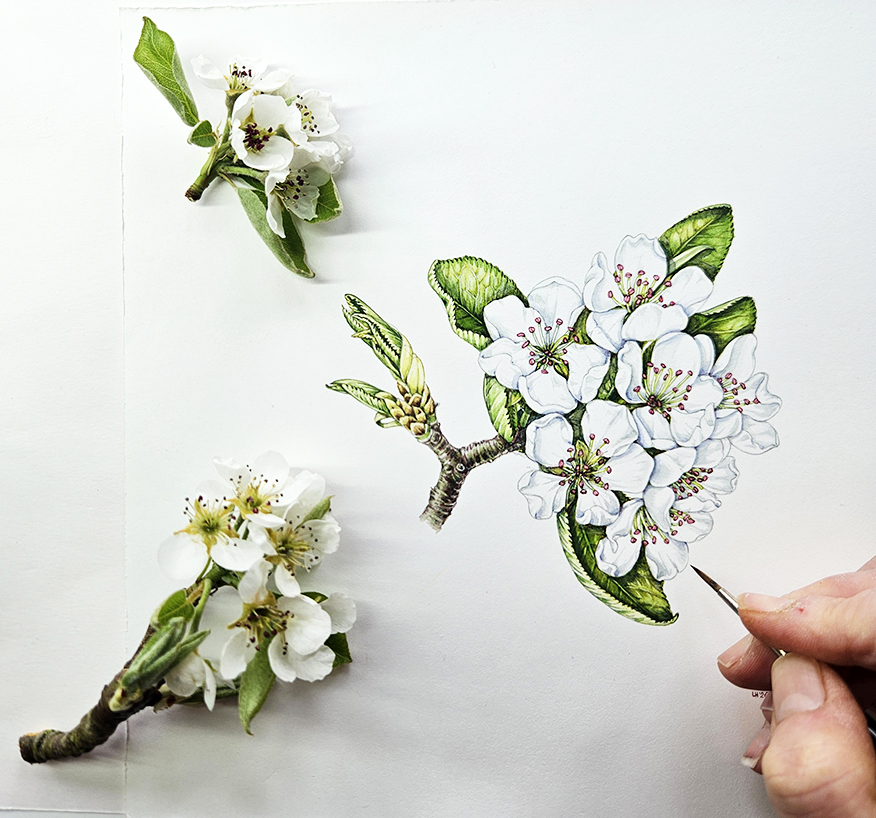
The main thing is to stay calm. And trust that the initial drawing shows the petal shape correctly.
Beautiful blossom
So yes, there are challenges. But the spring-time beauty of apple blossom more than counter-balances this.
Capturing the fresh green of an uncurling leaf, the magenta flush of a bud, the nuances of a pale pink vein on a petal. All of these are joyful.
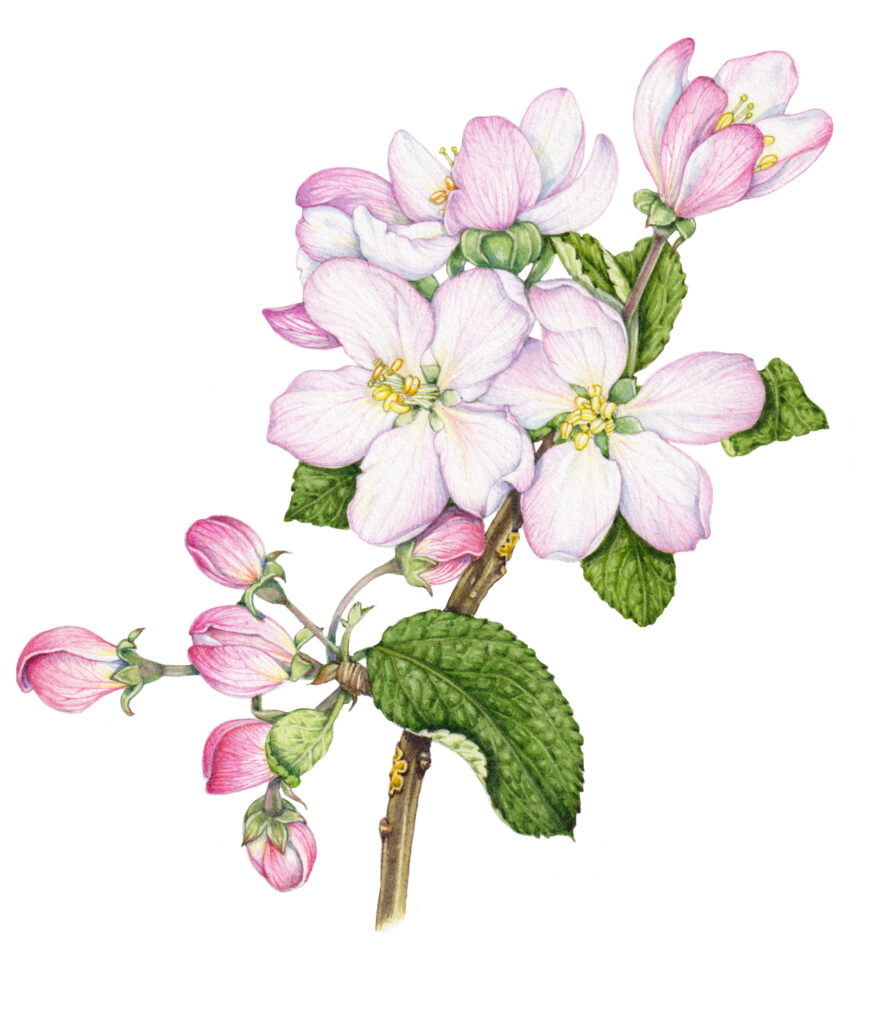
There’s also the pleasure of trying to depict the twigs as accuratley as possible. Are they grey or brown, or green? Is lichen present? Are there leaf scars? Lenticels? Is there a colour switch between the main twig and lateral branches?
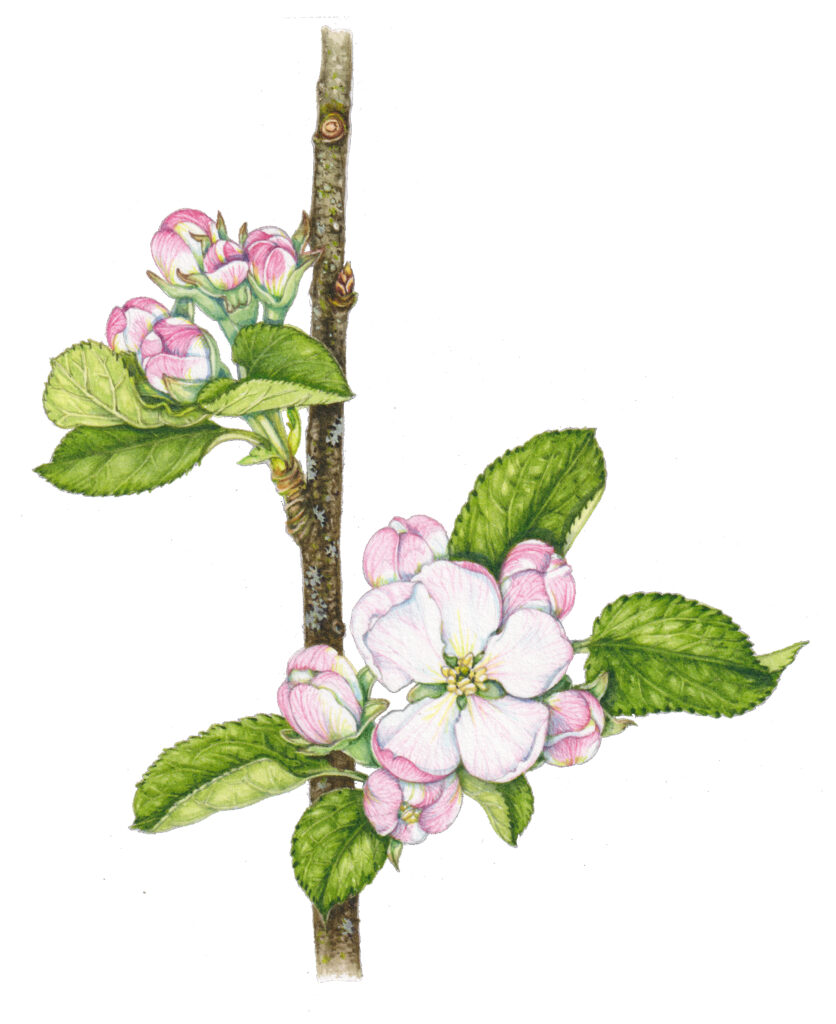
Twig with leaf scars, buds, lenticels and lichen
The leaves are young, so the greens are fresh. Illustrating tiny holes and leaf damage is a lot of fun too, as well as being true to life.
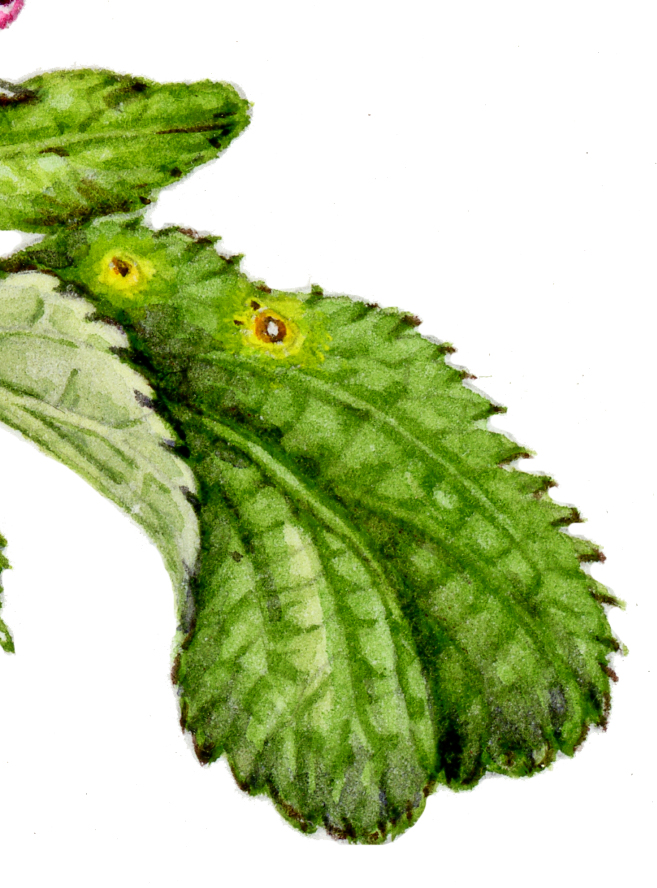
Leaf with damage
Conclusion
Whenever I illustrate from life, there are challenges. These are often the same across the board. Keeping flowers fresh is difficult whether you’re painting apple blossom or a sweet pea. Colours change because of time of day, or because a plant has been picked.
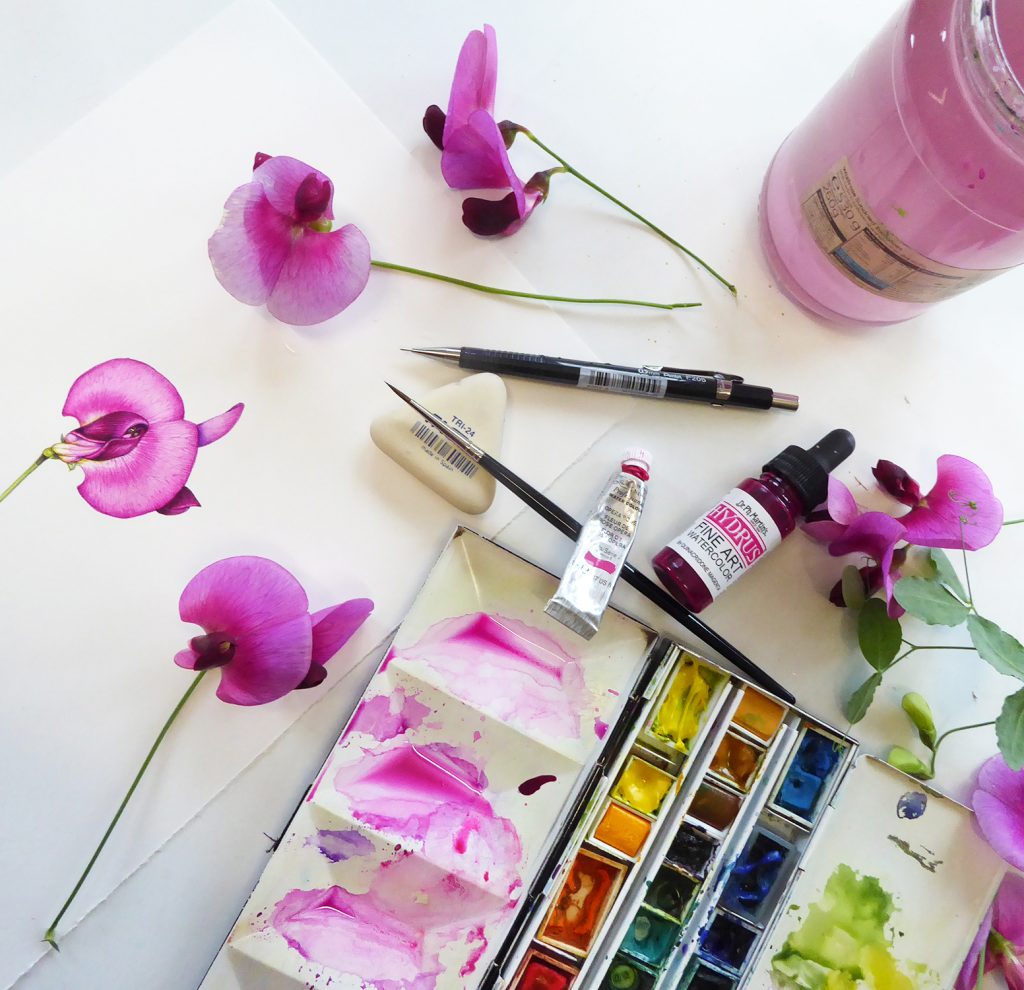
Sweet peas also change colour once picked
Leaves and petals move, buds unfurl. Specimens are alive, so they change. Some are more resilient than others, and over time you learn which ones are ok with being picked and which are not. A periwinkle might last several days in a jar of water. A hellebore or magnolia is hard-pressed to manage more than an hour or so. I take photos. I have lots of specimens to work with. I’ve got better at drawing fast, before the plant wilts. All of this helps.
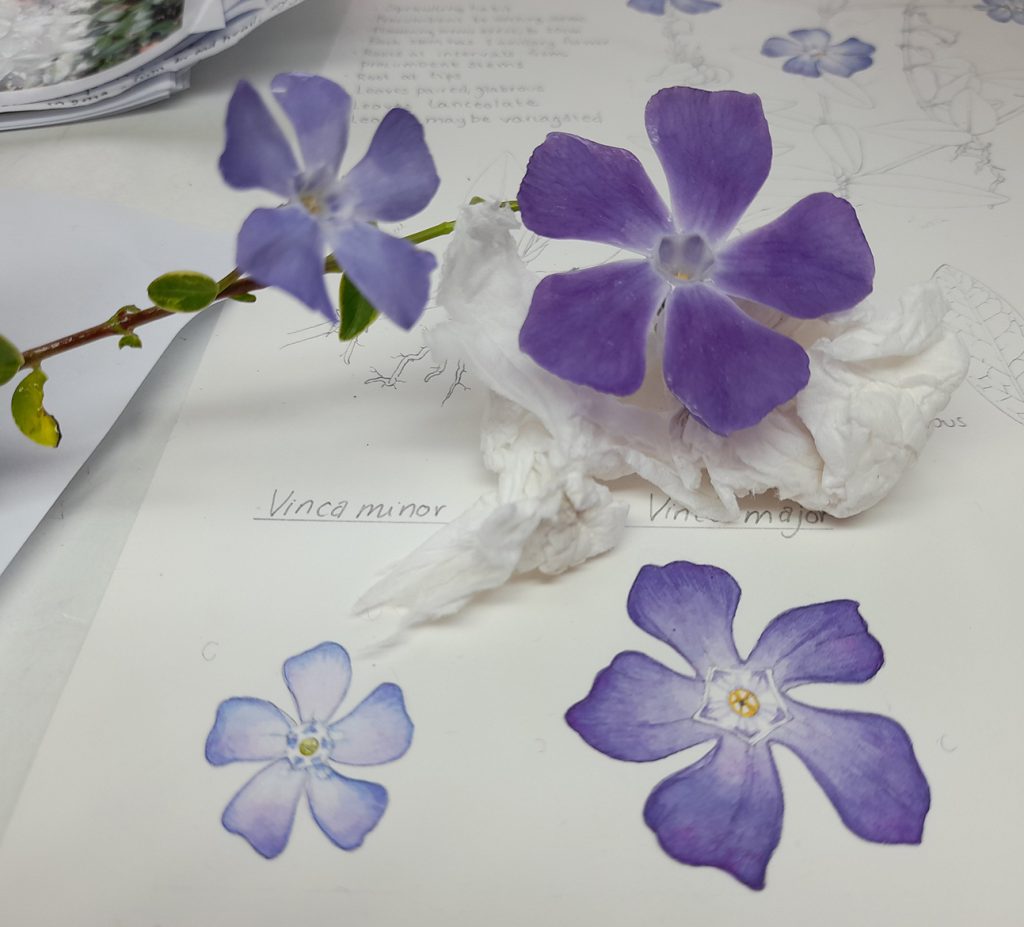
Periwinkle are pretty robust once picked
But ultimately I like the fact that the plants I illustrate can be so challenging. It’s a reminder to respect them as living, changing organisms. And to relish their beauty, fleeting as it may be.
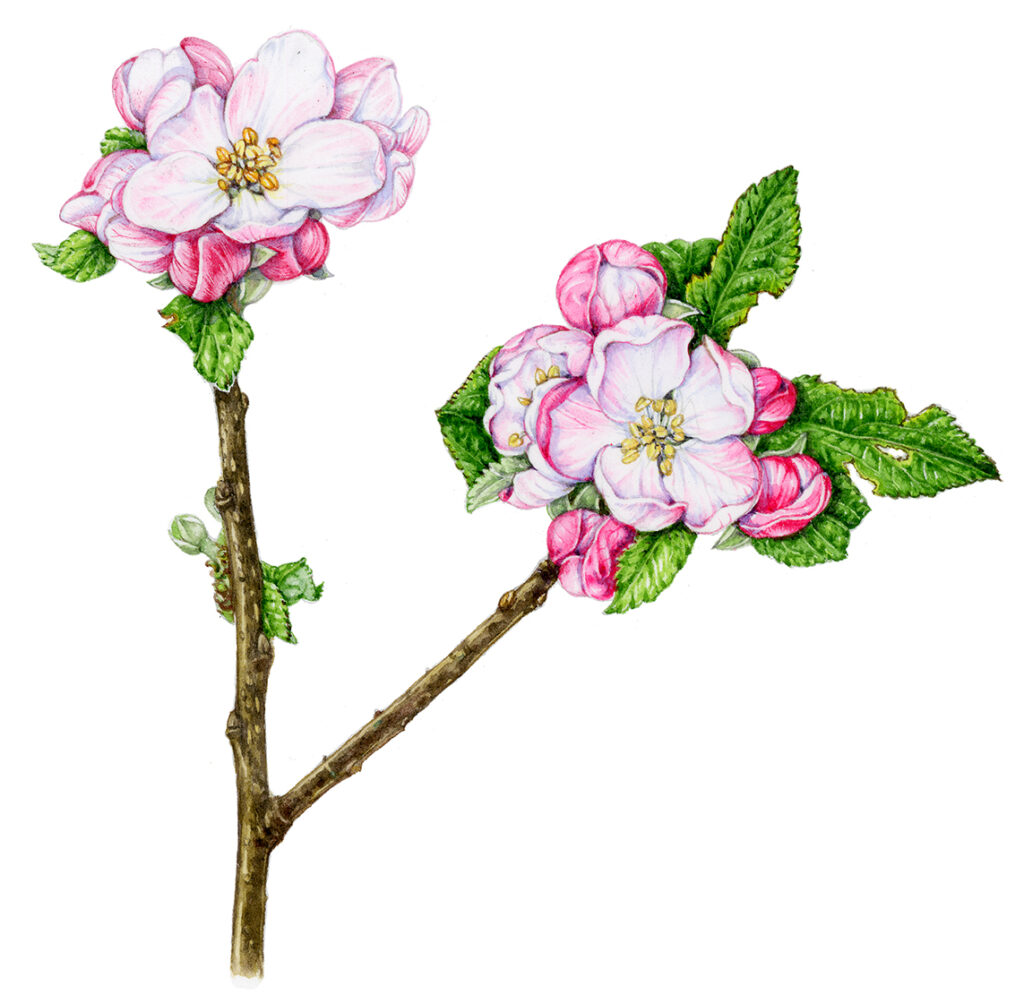
Another apple blossom variety

First of all, thank you to Priest Alaska for bringing my partner back in just one week after I contacted him. I have no words to express my gratitude and how happy I am. My partner treats me better and now spends most of their time with me, telling me how much they love me, more than ever. If you have any problems with your partner, contact Priest Alaska for help.
Spiritual Services:
Reconciliation with ex-wife
Love and reunion
Marriage
Protection
Spiritual purification
Healing
Lucky lottery number
Email: alaskaspellcaster44@gmail.com or WhatsApp: +233 59 274 5728, because he is the solution to all relationship problems.