

Botanical Illustration of a Sycamore Leaf
This blog follows on from my earlier step by step post on drawing a Sycamore leaf, which also has an accompanying youtube film.
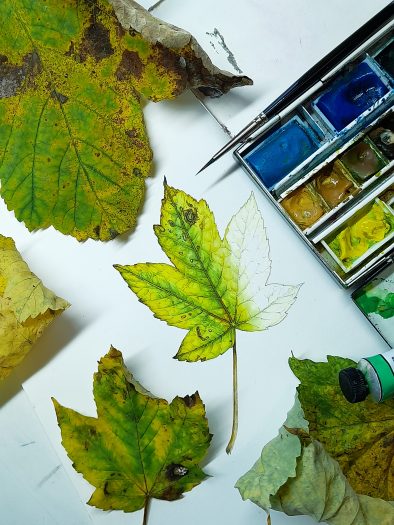
Apologies for the grey background on some of the photos. The final piece (at the end of a blog) shows a truer version of the colours.
Setting up
When you’re about to illustrate a subject that may take a while, like this Sycamore leaf (Acer pseudoplatanus), it’s important to make sure you have everything you need readily available.
Clear a (clean) space for yourself, if you’ve not got a dedicated table or studio. Get a jar of fresh water. Give your paint-box a cursory clean. Have several specimens of the species you’re illustrating available. Make sure all your equipment is right there; you don’t want to be having to go and find a tube of paint or a pencil in the middle of working, it could break your concentration. Make a nice cup of tea. Now you’re ready.
Equipment
I’m currently using Fluid 100 hotpress watercolour paper. I draw with a mechanical pencil, a Pentel P205 0.5mm, direct onto the watercolour paper. I like Winsor and Newton watercolours and use pans which I top up with paint from tubes. My trusty brush is always a Winsor and Newton series 7, number 1 size.
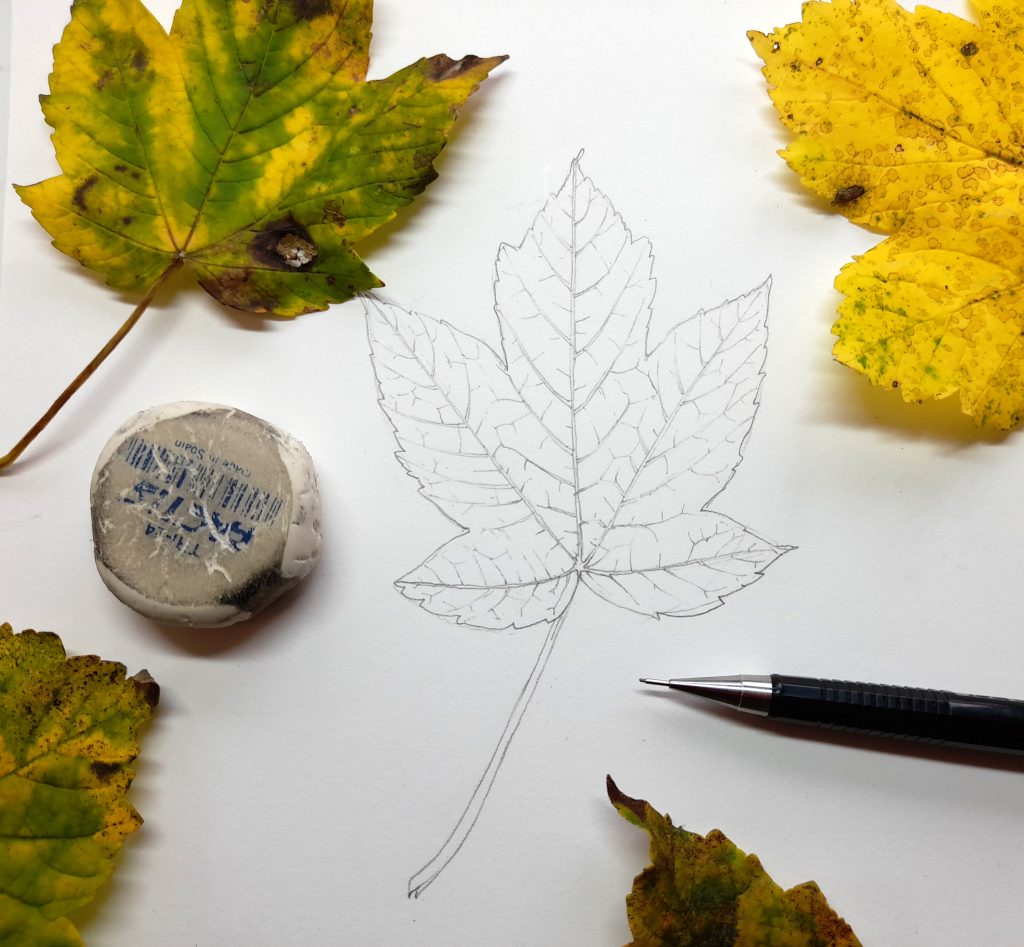
Leaf ready for paint
Decisions, decisions
Next, decide how you’ll tackle the subject. This leaf is yellow with green and brown markings. Should I paint each area of colour separately, or layer colours on top of one another? Decide where your light source is (conventionally from the top left) and be sure you stick to this. This is easy enough if you have a light and are painting from life! Think about what colours you’ll be using to mix up the greens, yellows, and browns. For this sketchbook study, I also need to decide how much of the leaf I’m planning on colouring.
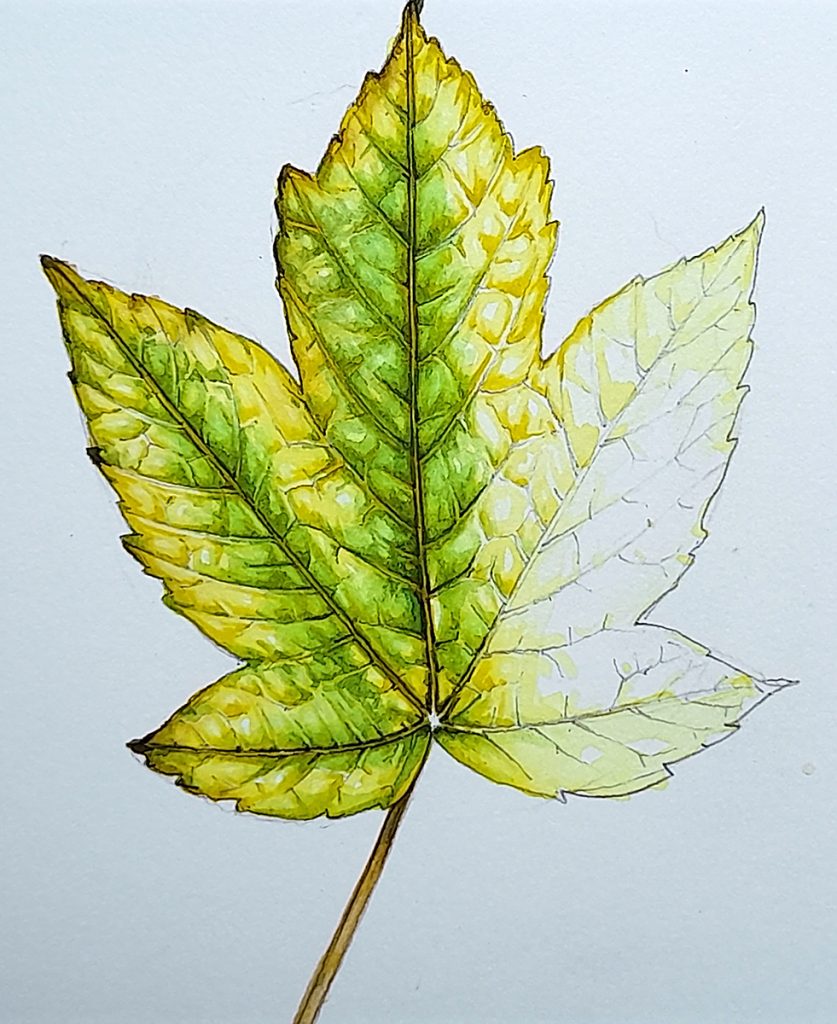
I decide to lay down yellow first, then add top washes of greens and browns. I’ll aim to colour approximately half of the leaf.
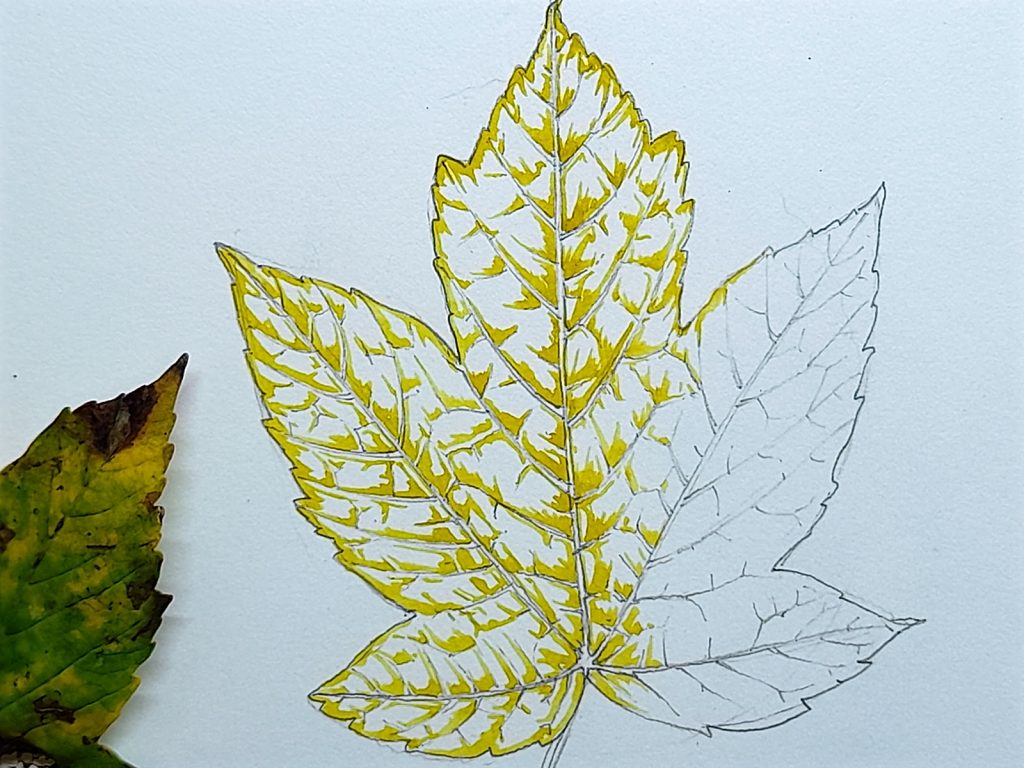
Base layer of Yellow
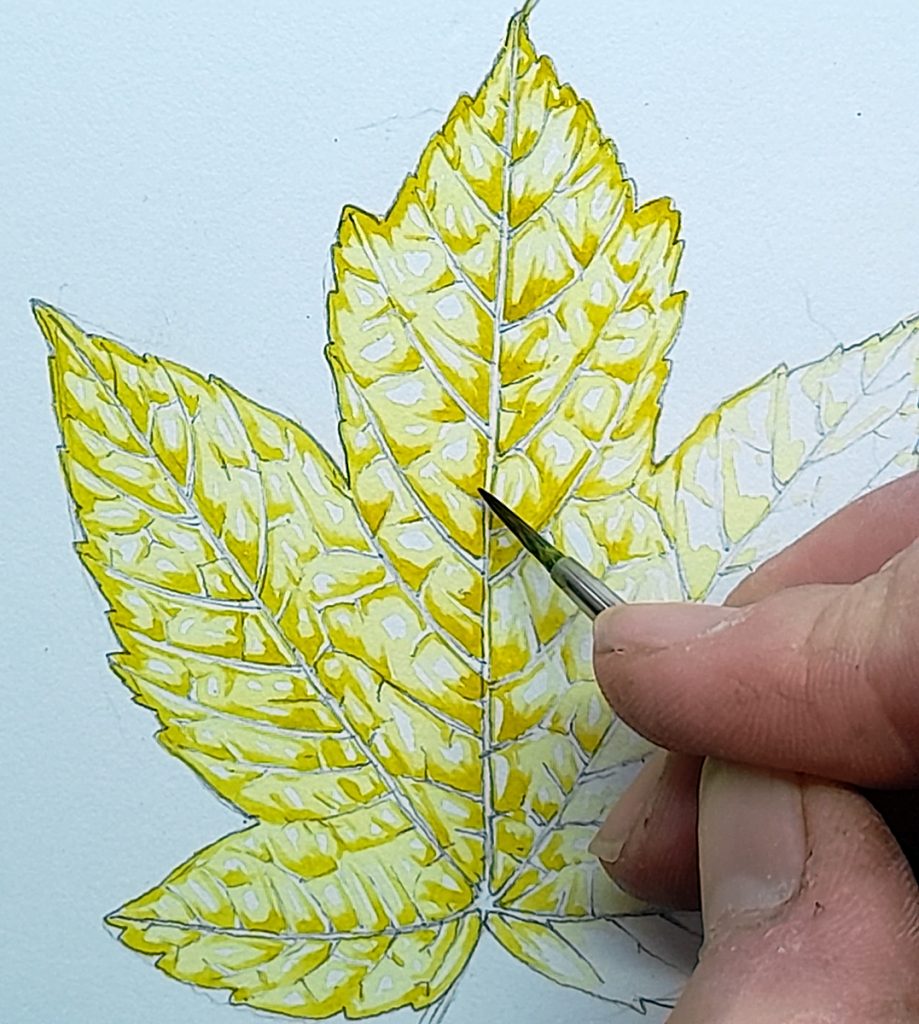
I mix a yellow that matches the yellows on the leaf. This is Cadmium yellow light, plus a tiny bit of Yellow ochre, and a dab of Cadmium yellow dark. I’m not brilliant and keeping track of which colour in my paint-box has which name, so apologies if this leads to confusion.
The consistency of the paint matters. Too wet and there’s not enough colour, too dry and the paint doesn’t move right on the page. Rather unpleasantly, I like to say aim for paint that’s similar to the thickness of blood.
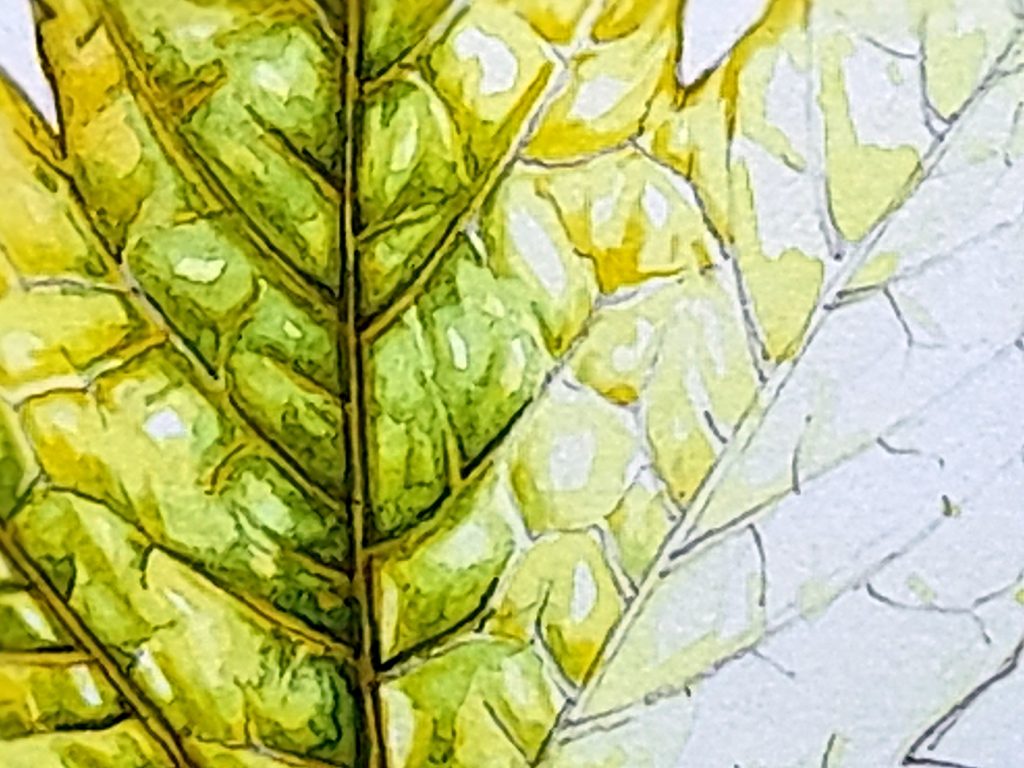
Looking for darker areas, which mostly lie alongside the veins, plot in your darkest areas of yellow. These can be hard to see and it’s worth extrapolating. Use the areas of highest contrast on the leaf as a guide to where your shadows will lie. If shadows fall below a vein and are darker to the left of a portion of leaf blade, then this may well be the pattern across that whole side of the leaf.
Paint in these areas across the leaf. Be sure to concentrate the whole time and paint what you see rather than what you assume is there.
Softening the edges of the base layer
Once the yellow is dry, I dilute it into a lighter yellow with lots of clean water. This makes the colour paler. With watercolour, you always lighten colours by diluting them rather than muddying them by adding white.
Taking my brush I gently work around the edges of the yellow shapes. This softens them. It’s vital to leave plenty of white as the white of the page acts as your highlights. Once you’ve covered an area of white paper with paint it’s impossible to lift that colour off, nor can you paint anything on top of it to get it good and white again. Err on the side of caution, you can always make things darker at a later stage.
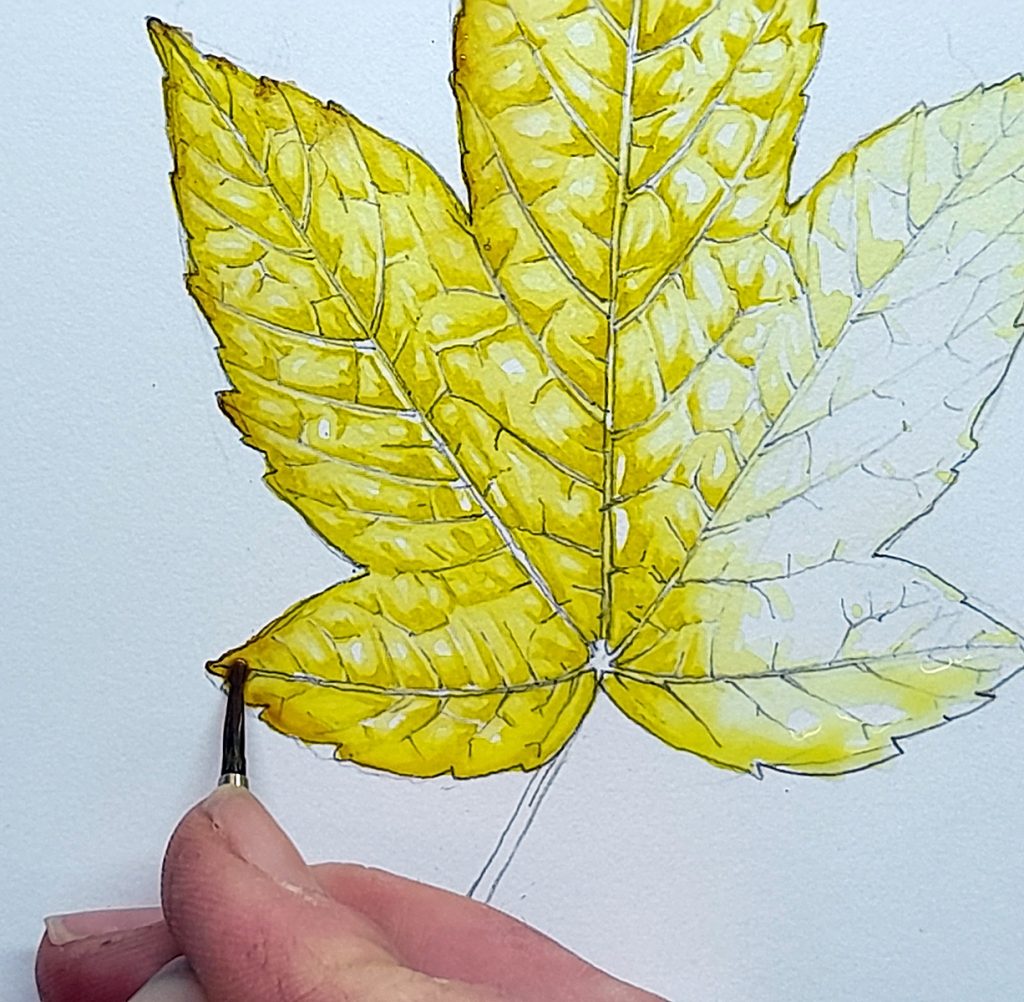
Adding a yellow background to the leaf
Once these layers are dry, we can add yellow to the surrounding spaces. I speed up the drying process by using an electric fan heater, or a hair dryer.
A top layer of bright yellow is applied, over what I’ve just painted and most of the rest of the leaf. This mix is not very watery, but not as thick as the initial yellow. I apply it to the perimeters of the Sycamore leaf and the edges of the veins. While it’s still wet I add water to the rest of the leaf and allow the yellow to bleed into these regions, albeit in a paler form. Again, it’s vital to leave some areas of white and in fact ion this case it’s at this stage that I swallowed up too much of the white of the paper.
I also mix up a brown, Vandyke and Yellow ochre, and put some of this on the edges of the teeth of the leaf. Again, I allow this to dry fully before going further.
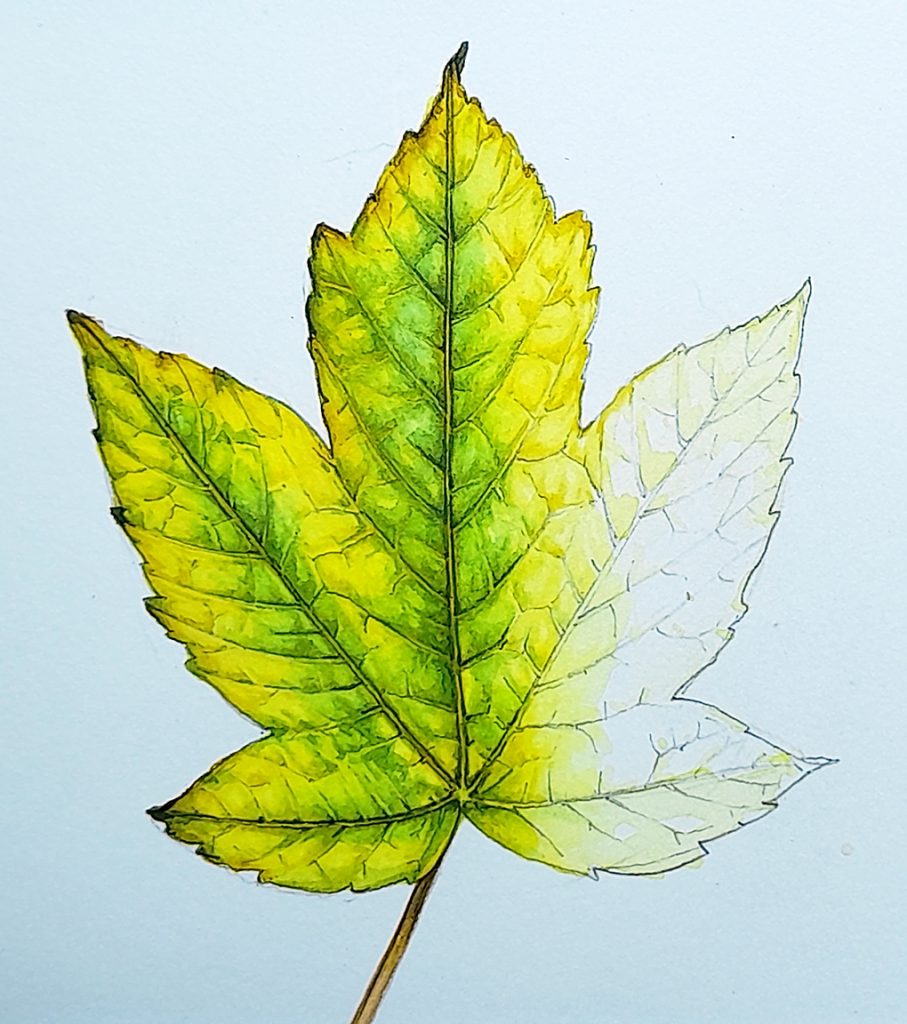
Greens
This Sycamore leaf has big areas of green remaining, and I want to add these. I repeat the steps I used to apply the yellow, looking all the time at my leaf to make certain I’m painting what I see rather than what I think might be there. Adding areas of dark, and then softening them with a more dilute mix; I plot in the greens. The paint mix in this case is Winsor and Newton Sap green, and yellow ochre, mixed with some Daniel Smith Spring green. I always mix my greens, I’m yet to find a pre-mixed one which is close to the true colour of leaves.
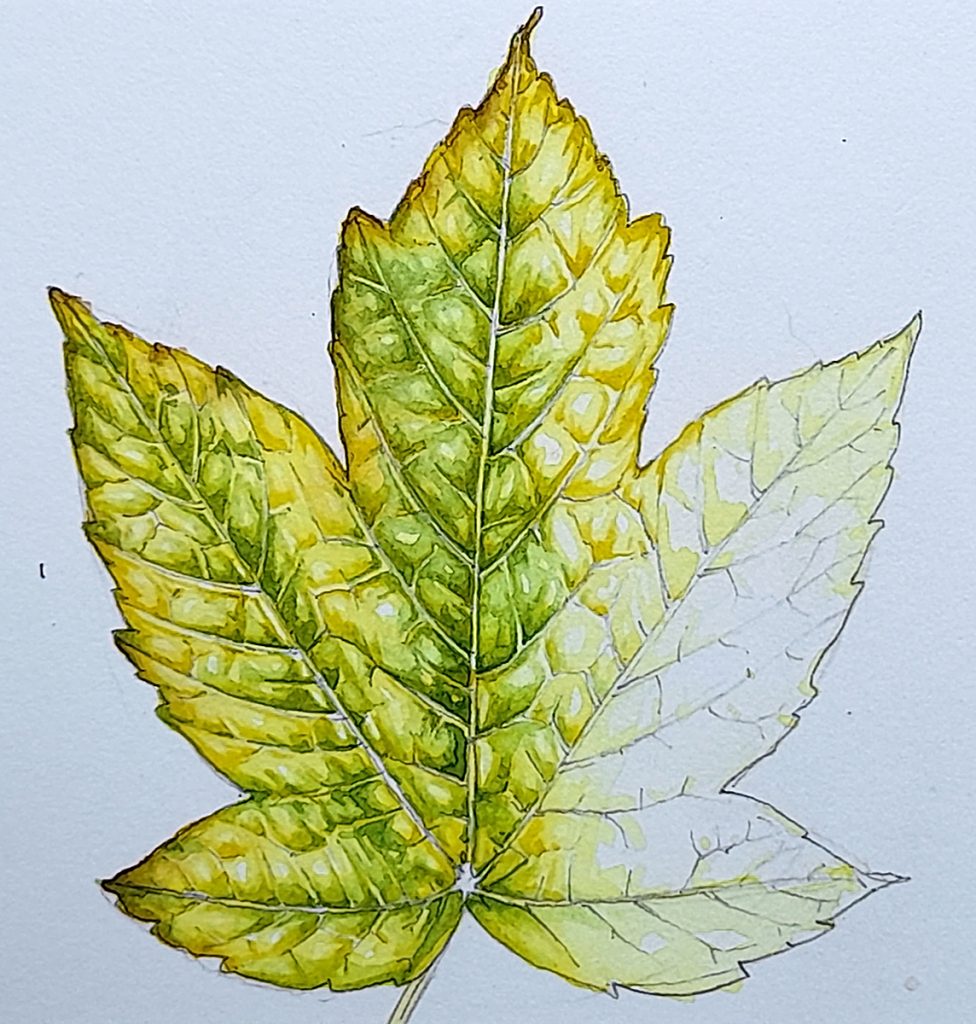
Working into the Green areas
This leaf is proving a headache, and I hope that adding some darker areas to the green patches will help. I mix a darker green, adding brown and a touch of purple to the mix. Where the green touches the edges of the veins and the shadow is deepest, I pick out these darks. It’s rather nerve-wracking as if you go too dark, the whole illustration is compromised.
Delineating the veins and leaf margins
To satisfy the eye, the edges of a leaf need to be crisp. I use a yellowish brown for this, mixing Yellow ochre, Vandyke brown, and purple. I pop the paint on the edges of the Sycamore leaf, then dilute it and pull a paler tint back into the leaf body. This means there’s a gradation between the leaf and the edge, and it helps the illustration look more natural.
I also put some of this colour over the veins. I am not delighted with the result, although I know I’m applying the right techniques. Something extra that unifies the leaf is required.
A unifying Yellow top-wash
I go and have a cup of tea, and when I return I decide to whack a bright yellow wash over the whole thing. It has to be said that this isn’t something I normally do, but I was feeling dissatisfied with the way the illustration was going.
I mix a medium consistency yellow colour, mostly Cadmium yellow. Using quite a wet brush and working fast, I cover the entire leaf in this yellow. Immediately it feels better, and is glowing a bit more.
I get a little carried away and mix up a tint of green and repeat the top wash. It helps, but in doing this I lose more of those precious highlights.
Don’t overwork it!
I’ve reached a point where it’s ok. If I go on adding layers over the entire leaf, then I’ll swallow up all my highlights and the entire illustration will become muddy and dull.
This is a tough decision, when to stop trying to redeem a painting. If you get it wrong you end up with something you can’t fix. Settling for something you know is decent is sometimes the best you can hope for. I decide to wait for the paint to dry and to mix up browns for the leaf spots.
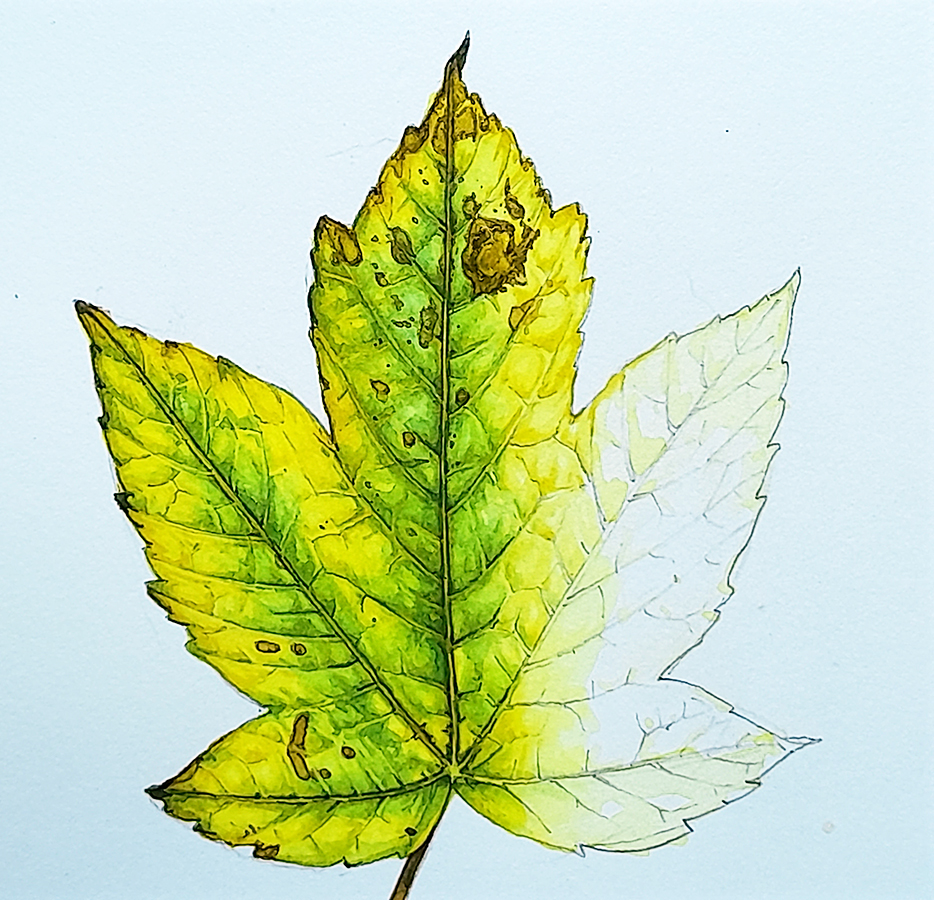
Leaf spots and detail
This is always the most fun, adding detail. I mix up a dark brown, using lots of Cobalt blue and purple with a dark green and the Vandyke brown. The paint is quite thick, and I make sure my brush has a sharp point as I’ll be picking out details.
Sycamore leaves often have these black spots, which are known as Tar Spots. They don’t seem to do the tree any damage, and are a result of a parasitic fungal infection. The pathogen is one Rhytisma acerinum
Illustrating these diseased areas requires the same level of concentration as painting the leaf itself. They’re not the same colour throughout, and there are distinctive lines on some of the bark patches. Not all the browned regions of the leaf are a result of Tar spot. Some come from stress, and some are developing as autumn progresses.
I delineate the edges of the Tar spots with a sharp brush tip. Once dry, I use a wet mix of a yellower brown, and allow the paint to dry and add its own edges to those I’ve illustrated.
With the tip of the brush I add the tiny speckles and spots that populate the leaf.
Final touches
I notice that there are tiny holes at the centre of some of these brown spots, and pick them out with Permanent White gouache. This paint is also useful for covering up mistakes, and I use it quite thickly.
Finished!
The sketchbook illustration is done. It’s not quite as good as I want it to be, but it’s serviceable
![]()
This leaf was illustrated as I painted it, on film, and I think that trying to paint and explain myself at the same time inevitably has some effect on my work. However, as a sketchbook study of a Sycamore leaf on the turn, it’s good enough. It’s one detail of a sheet of information on the Sycamore I’m completing for FOR Sweden, who have commissioned another batch of invasive species studies. For more of my Sketchbook illustrations, check out my online gallery, or see which of the originals are available to buy.
If you’d like to see the film (be warned, it’s an hour long!) feel free to take a look:
There’s also an accompanying blog which discusses how I drew up the leaf This too has a film of the process.