

Botanical Illustration of Red Clover- step by step
This botanical illustration of Red clover Trifolium pratense was completed recently for the Field Studies Council who are producing a leaflet on identifying plants and wild flowers of the wayside and hedgerows. You’ll see the same basic approach is taken with all my step by step blogs; it’s only the details and colours that very.
Gathering reference
First step with any sciart botanical illustration is to get good reference. Not only do I know where a local patch of red clover is growing, so I can gather leaves to work from, but I also back this up with good reference books like HarperCollins Guide to Wild Flowers by David Streeter, Streeter and Garrard’s The Wild Flowers of the British Isles, and the immaculate line drawings of Stella Ross-Craig (I finally have a full set of her drawings of British wild flowers!). These are the main visual reference books I refer to for any botanical illustration job. As this commission came in during winter, it means I can get the flowers right despite not being able to get my hands on any living ref.
I also consulted my trusty sketchbook notes, which have visual and written info on all the wild flowers I look at, and bits of leaf and dried flower heads glued in.
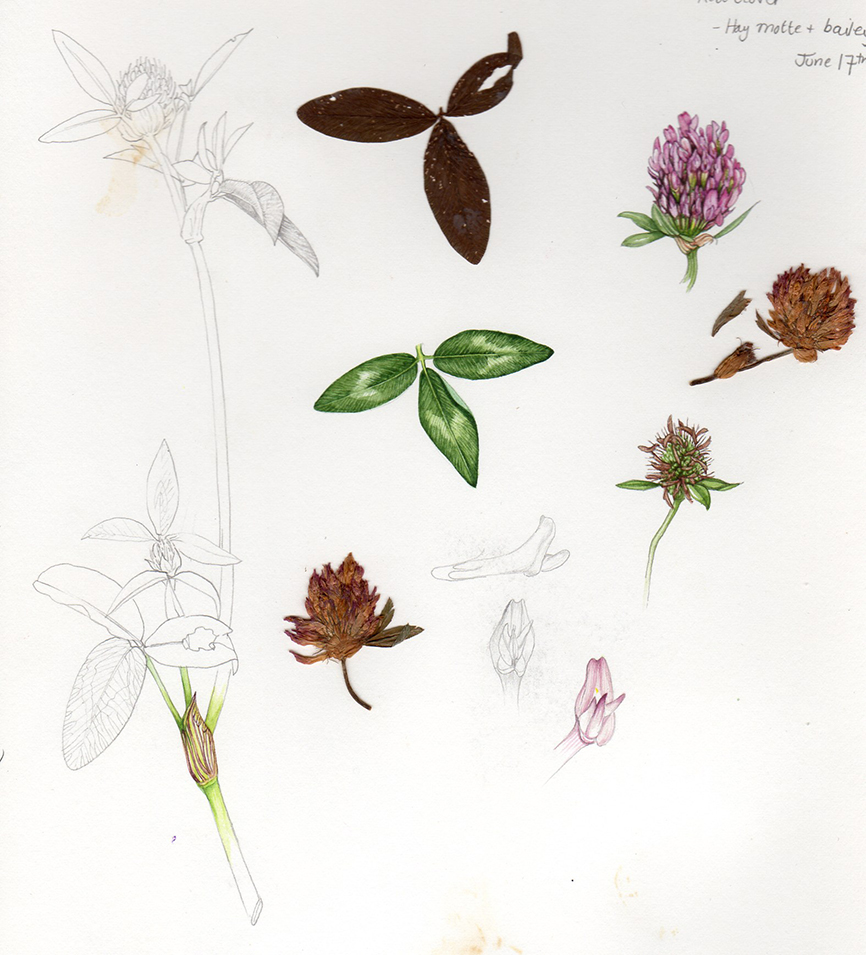
Sketchbook study of Red clover
Pencil rough
A pencil rough is the next step, I prefer mechanical pencils as you can sharpen the lead by snapping it on the page, and thus regain a graphite point without pausing in your drawing. This one’s done with a Pentel P205, H lead, 0.5mm. Rough drawings need to include all the botanical information required to identify that specific plant, and to catch the “feel” of the plant.
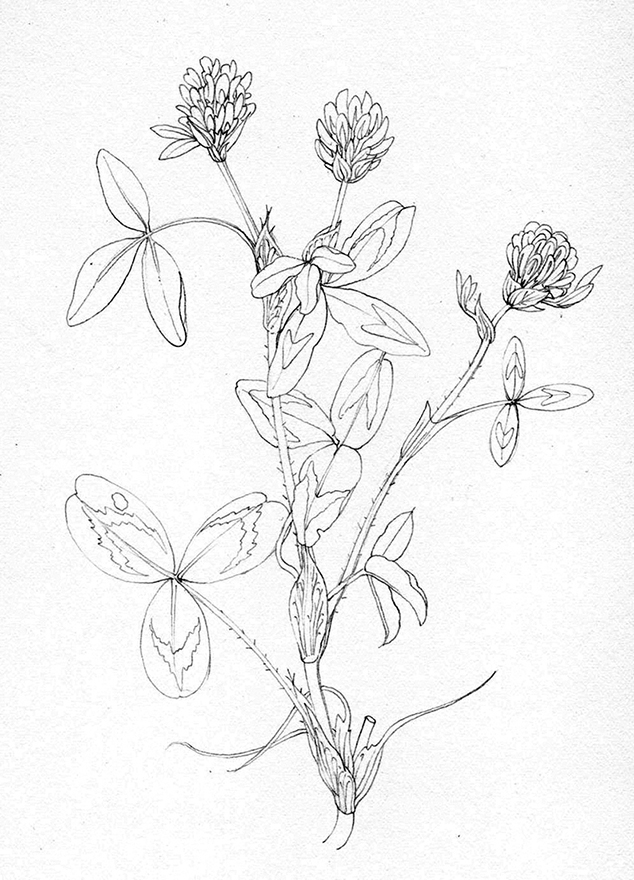
Pencil rough of Red clover
Once this gets the go-ahead from the client, I can start painting.
Starting the painting: Leaves
I drew this one up on my old stock of Fabriano Classico hot press paper (manafacturing changes mean this paper is no longer a good option for botanical illustration, but luckily I still have some stock-piled from before the changes.)
First, I plot in the darks on the leaves in watercolour. For the blueish green of Clover, I mix Sap green with some Turquoise, yellow ochre, violet lake, and cobalt blue. I tend to favour Winsor and Newton pans, and always use a Winsorand Newton Series7 paintbrush (they hold their tips like no other brush). The darks on a clover aren’t that dramatic; the leaves are comparatively flat, so it’s more a matter of giving a suggestion of the veins, and ensuring the leaflets all have some areas darker than others (generally those close to the stipule and midrib, where the leaf dents down to join these structures and shadows are cast).
![]()
Red Clover – plotting in the shadows and leaf veins on the trifoliate leaves
Painting the stem and bracts
Next, I wanted to get the bracts and the stems down. This means mixing a far yellower hue. The hue is based on a viridian light green, with plenty of winsor yellow, yellow ochre, and a touch of turquoise added. Initial painted lines are quite distinct, the paint will be thinned to a wetter and paler consistency later on. I make sure the stems are darker where they join one another or are shadowed by bracts or leaves. I also plot in the green areas within the flowering heads, and take the yellower colour out along the mid ribs of the leaves.
![]()
Red clover – plotting in the stem and bract edges, and painting in the leaf mid ribs.
Next stage is to cover each leaf with a very very pale yellowish green. It’s vital to make sure the distinctive white patches aren’t swallowed up. I also pop in the underside colour of the leaves which is a chalky blue colour. Leaving details of damage on leaves is a lot of fun, so enjoy working into the hole on the leaf. Mixing up a maroon (crimson lake, Purple, and vandyke brown), I put in the intiricate network of veins you can see on the bracts.
I also use this same mix to bulk up the darkest areas of bract. The flushed stem shadows use a similar hue. I plot in the blue and pale underside of the leaves.
Watercolour: Painting the clover florets
I paint in the darkest parts of each clover floret. I love this bit, playing with such incredible bright colours is a treat after seas of green. This magenta colour is a mix of Doctor Martin’s hydrous inks – 9H Cobalt violet with 5H Quinacridone magenta. I get a paler hue by diluting the mix with water.

Red clover – painting the florets
![]()
Red clover – Magenta areas all plotted in
Adding depth to the leaves
Now I work into the green of the leaves, to give them some bulk and colour. I do this by using the same colour I used earlier, but with a touch of yellow added, and in a far wetter, more dilute mix. I pop this over the entire leaf which helps give colour to the paler patches without swallowing them up in dark green. Make sure the leaf tips are where the wash collects to dry, this darkening of the leaf apex gives shape to the leaflets.
Red clover – working into the leaves
Finishing touches and shadows
A few more steps are involved before the illustration is complete. First, go over the flowers with an exceedingly pale pink watery wash. This stops the dinstinction between the painted areas and the white of the page from looking so stark. I also add some bright yellow to the base of each floret, where they attach to their individual bracts and to the stem. I also use the same bright yellow to pick out the midribs of the leaflets and the darker areas in the white leaf splotches. This is, in retrospect, ill-advised.
I also mix up green and yellow ochre, and add the haris to the plant.
I add shadows with a mix of winsor blue and purple lake; sometimes I mix cobalt blue and cobalt violet to the mix to soften it a little. This helps the leaflets jump out a little more.
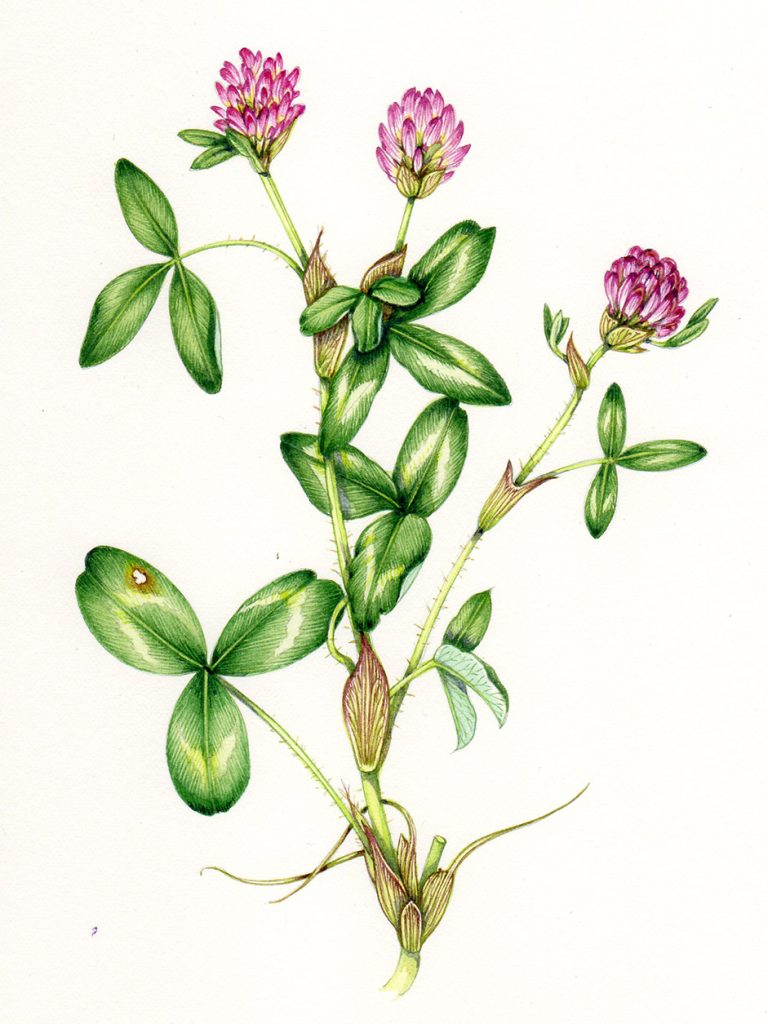
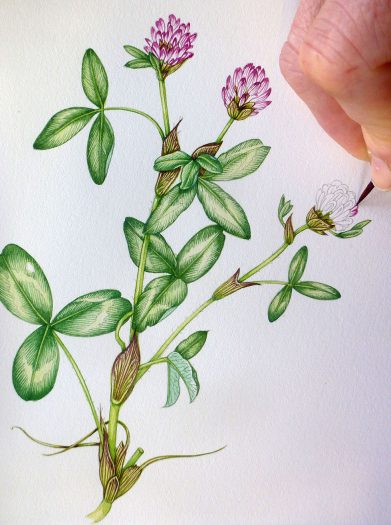
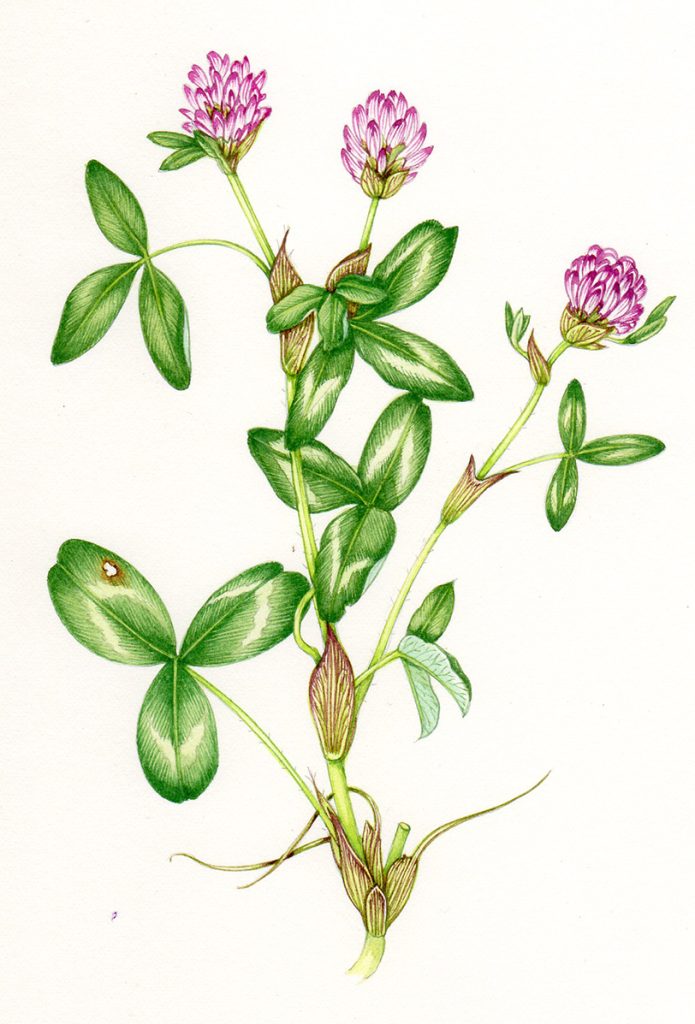
Red clover – finished!
This Red clover is a funny one, because of the simplicity of the shadows on the leaves, and the complexity of the flowers, it’s a reversal of the normal process where the leaves take a great deal longer to work up than the flower. However, I’m pleased with the finished illustration, and the fact that it took 3 hours instead of my more average 5-7 hours is an added bonus.
Such talent, thank you for sharing.
My absolute pleasure. Thanks for taking the time to leave a comment.
i needed to draw a red clover for a materia medica and ran across your step by step instruction. Thank you. It is certainly not your level of drawing, but it is much better than I had hoped to do.
Thats so good to hear, thankyou