

Step by step Sketchbook study of a quince
My botanical illustrations being done for The Cultivated Forager (follow up to The Hedgerow Handbook, also by Adele Nozedar) are, inevitably, going to take a back seat over the colder months of the winter. However, this sprig of quince was still looking fresh, and the fruit in perfect condition.
Drawing up a quince
As before, this illustration will be incomplete, a sketchbook study; a pencil habit drawing of the sprig, and then I’ll work into details so that I get to grips with colour, texture etc.
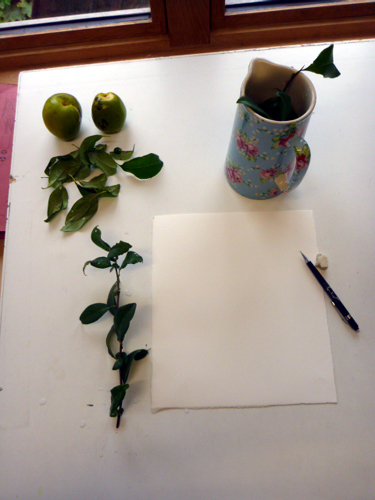
Materials
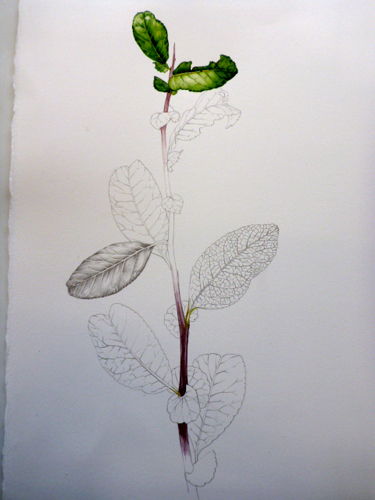
First, I get a sheet of paper (Fabriano Artistico) and a mechanical pencil (Pentel P205, or similar), and a rubber. The next step is to choose a view of the sprig which is visually pleasing, and contains the correct information for the sketch. In this case, I noticed there were some round leaves growing close to the stem, as well as the larger elliptical ones.
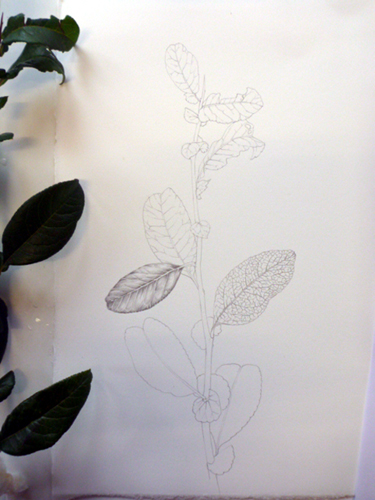
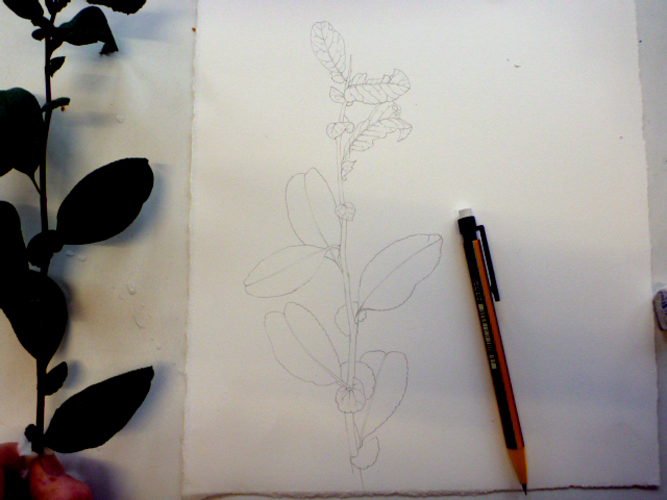
Working on the quince in pencil
I plot in some of the veins of the leaves, which helps give the leaves structure, but only do detailed observations of the network on one or two leaves. Likewise, I do a graphite tonal study to show where the light falls on the leaf folds, but only on one leaf.
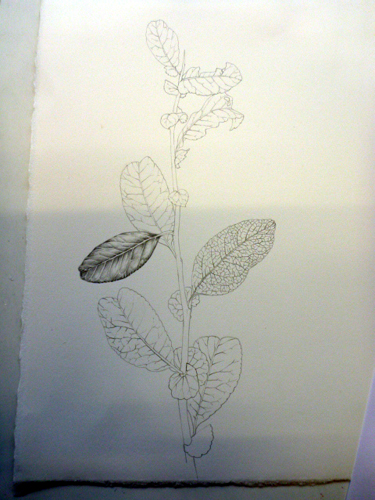
Then I work further into the darks on the tonal leaf, keeping the edges and lines sharp, and using the shadow to show the tiny dentition on the leaf margin.
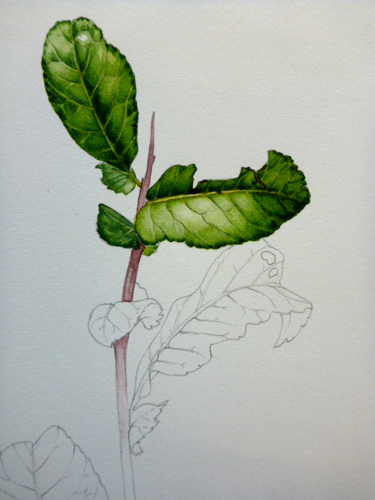
Quince sketch: Watercolour base
I then start working with the colours (Winsor & Newton are my favourites). Mixing greens is always tough; this one is sap green plus yellow ochre, plus cadmium yellow light. I apply the watercolour with a brush (series 7 by Windsor & Newton, this one’s a number 1), drawing the shapes of the areas of light and dark, and leaving the veins white, and the areas of leaf which catch the light a paler shade.
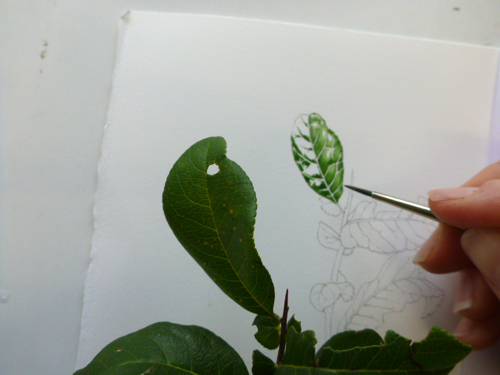
Whilst waiting for the first layer of green to dry, I move onto the stem, which is a beautiful dusty purple shade. I mix purple lake with a touch of cobalt blue, and some vandyke brown to get the shade right, and allow the paint to fade out up the stem. Then I return to work into the quince leaf.
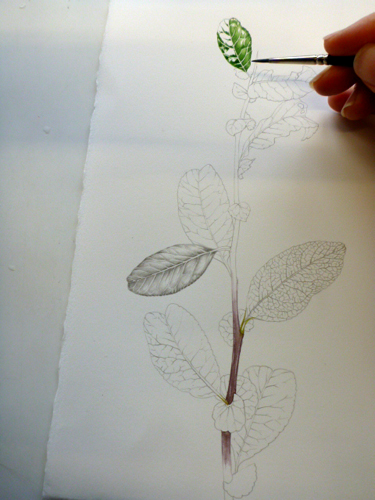
Here, the top leaf is complete; I’ve worked into the darks with ultramarine blue and vandyke brown; and covered the entire leaf with a light wash of yellow ochre which not only unifies it but also knocks off the more alarming aspects of the green. It also provides colour for the veins. I’ve worked intot he second leaf too, leaving it far paler as it catches the light at that angle far mroe than the first leaf.
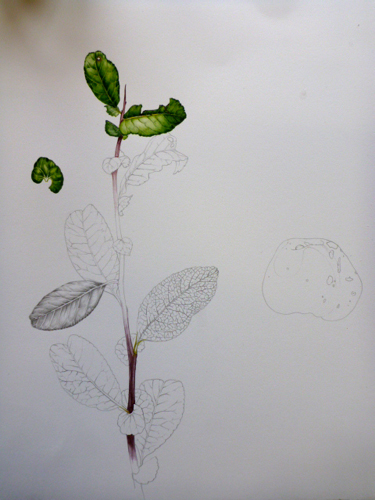
Working into the quince leaf shadows
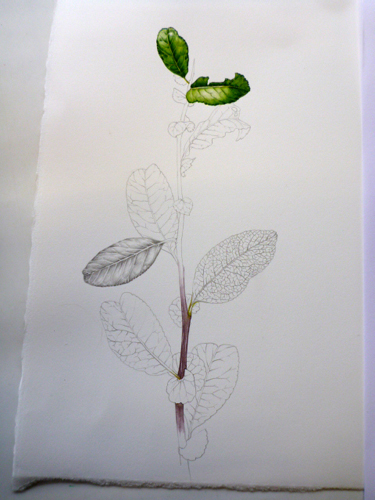
Having completed both leaves, working into the darker areas with progressively darker washes; I realise they need some structure or context, so I add the stem. This also gives me the chance to note how the twig ends, in one small spine rather than one terminal leaf. I’ve also included the little round leaves which lie closer to the stem. These interest me, so I’ll do a separate study of one on the same page a little later. I’ve also worked into the darker areas of the stem, adding more blue to the purple mix.
The image below is a close-up of the leaves.
Illustrating the quince fruit
The sample I received was posted to me, and although there were two quince fruit from the same tree in the package, I had no way of knowing how they attached. Rather than invent, I decided to illustrate the fruit separately. As mentioned earlier, I’ve removed and studied one of the asymetrical little round leaves.
Painting the quince was a challenge, and although I think the final fruit is satisfactory, I think it could definitely be improved were I to paint it again. I think the tonality is mainly at fault, and leaves the fruit seeming flat.
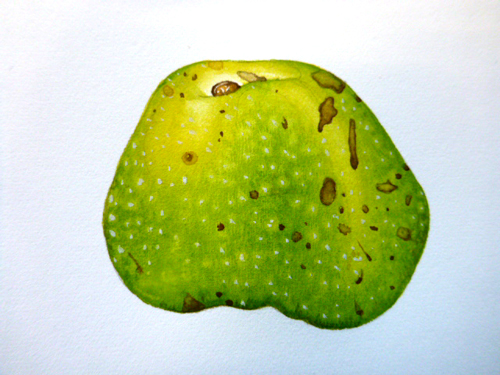
Watercolours and the quince fruit
The first step was to get the base colours down; a bright cadmium yellow (light) and an intense bright green. The fruit surface is covered with tiny dimples, and is incredibly matte. Numerous tiny brown spots sprinkle the skin, as do some larger bruises and a few scabs. I applied the paint very wet here, and once on the page added dots of bright yellow to the green area.
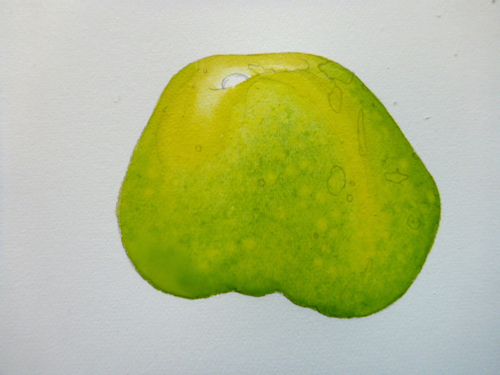
Working into the detail of the fruit
Next, once the initial wash had dried (which took AGES), I worked into the texture using a light, bright green, and lots of tiny brushstrokes. I worked around the yellow, leaving little islands which were paler, and building into the green regions between these spots. The aim is to make it clear that the quince has areas which are green, and others which are bright yellow; but to make these transitions as natural as they appear in nature. I also lifted some of the pigment from the yellow areas as they were drying, using a twist of dry tissue.

The superficial details of the quince were the most fun to do. The brown spots were just tiny dots of yellow ochre and vandyke brown. the larger bruises involved delineating the outside edge of the brown, then allowing a watery wash of the same paint to set within these borders. I also used some white gouache to add the tiny white dots that sprinkle the skin of the fruit, and added the stem which nestles in a very pale niche.
Working into the shadows of the fruit
I began to try and make the tonality work better by adding more dark to the darkest areas of green (along the fruit base), but decided against this before going too far. You can see my attempts (and why I desisted!) at the bottom of the fruit.
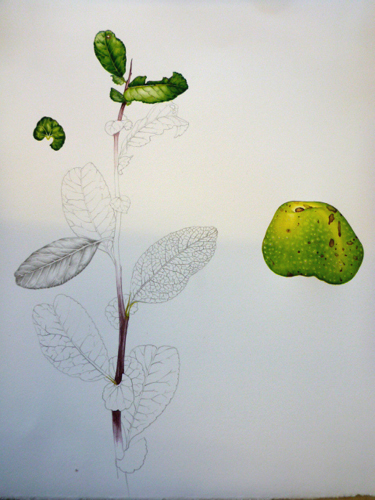
Below is the final sketchbook study. I’m pleased with the leaves, but less pleased with the quince.
Often, when doing these sketchbook studies, I find myself wishing I had longer, and the remit to complete an illustration to a finished level. This quince is a case in point. However, it must be said that the converse is also true, there are frequent occasions when I’m elated that I only have to sweat and weep over one or two leaves, rather than record the intricate details of all aspects of the plant.
I learnt from illustrating this quince that the plant is similar in some ways to the damson and the apple (which botanically is logical as they’re related); and also that the quince fruit has the most delicate and beautifully floral apple-y smell. My studio has benefited from this, and despite having finished this study three weeks ago, the hardy and fragrant little quinces remain in situ on my desk.
Here’s a video of the process:
Wow, how very helpful,I’m a novice to botanical illustration, and (very) well into retirement I’m thoroughly enjoying the journey. This was a lovely find, full of useful information, definitely one to put into my favourites bar. thanks you so much.
My absolute pleasure! Glad to be of use, and keep at it, botanical illustration is so much fun!