Botanical Illustration of an Autumn leaf
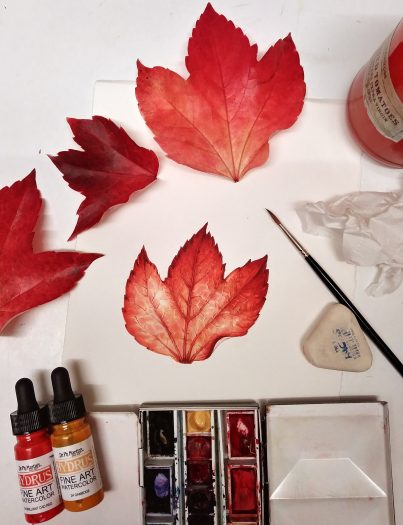
Autumn leaves are incredibly beautiful. The form of the leaf coupled with their wonderful variety of colours make them a treat for anyone to illustrate. This blog is a step by step guide to painting a brightly coloured autumn leaf, in this case a Boston Ivy Parthenocissus tricuspidata leaf.
(I’ll mention here that until I wrote this blog, I thought these were the leaves of the Virginia Creeper Parthenocissus quinquefolia. Many people I know refer to them as Virginia creeper. Apologies if I use the wrong name at any point!)
Step 1
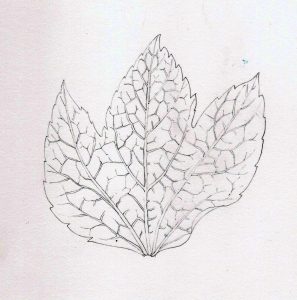
First, choose a leaf and draw it up in penci. Include as much detail as you can of the veins and cross veins. Draw straight onto watercolour paper. I use Pentel P205 mechanical pencils, and my favourite paper is hotpress Fluid 100 by Global arts. (You can buy this online in the UK from Jackson’s Art)
Step 2
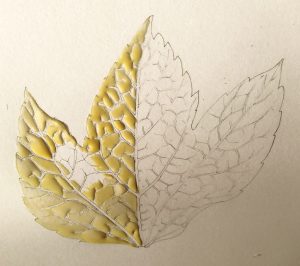
Next, mix up an extremely watery and dilute pale yellow. I tried a rather different approach for this leaf; began by working wet on wet, and liked the results. The yellows used are Winsor & Newton watercolours, I use pans. In this case it’s a mix of Cadmium yellow light and Naples yellow. I appy this mix across the whole leaf, except for the lightest lights; and ensure it is very wet.
Step 3
Next, I quickly mix up a pinkish-orange colour (also very dilute). This is made from Cadmium orange light and a touch of Alizarin crimson I add this into the existing wet layer of paint, and let the colours to bleed into each other. Throughout this process, I continue to look at the leaf itself and to try to copy the colours, The leaf margins seem to have the most vibrant hues, so I add more of the orange mix toward the edges.
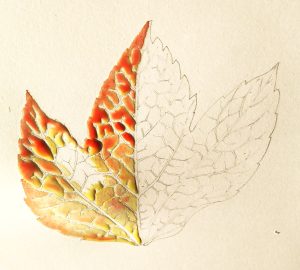
Letting the leaf dry at this point takes a while, but I use the opportunity to work on the opposite side of the leaf.
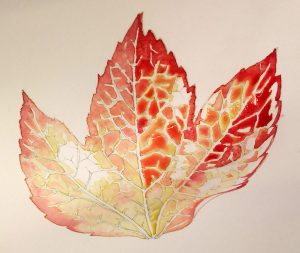
Step 4
I mix up a tint of a golden yellow next, quite dilute, and apply it to the entire leaf except for the very lightest highlights. There’s an aggravation at this point; as the washes are applied they glow beautifully…but as they dry they start to look far duller, hence the need to build up a “glow” with several layers of colour.
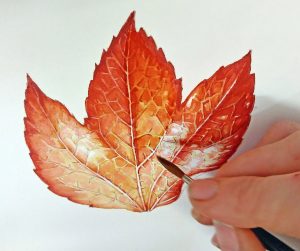
Step 5
Once the yellow wash has dried I go over it again, but this time with a more orange wash. Be sure to keep the washes pale and bright, or you risk muddying the colours and getting too dark.
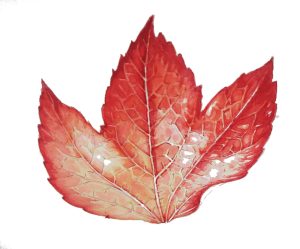
Step 6
One more of these watery washes is required, this one is needed to get the pink hue. I use Opera pink with cadmium orange dark, in a very dilute mix. Allow the wash to dry.
Pick out your darkest leaf tips with a nice, deep crimson. I mixed Alizarin crimson with a touch of purple and brown. Blend these dark areas into the rest of the leaf with your brush tip (I should have said earlier, I favour Winsor and Newton Series 7 brushes, normally a number 1).
Step 7
By now the leaf is really taking shape. However, it’s not glowing as much as I want it to. Luckily, there are some incredibly bright watercolour inks on the market, Doctor Martin’s Hydrous inks, which I use on these occasions.
I cover most of the leaf in this bright wash, and I also cover up almost all of the highlights which we’ve kept white for such a long time. Only the very brightest area of the leaf is still left as white paper. Again, when the wash is wet the leaf looks exactly as I want it to, but even as these bright paints dry they become paler.
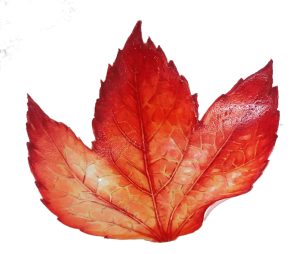
Step 8
The end is very near. I mix up some very dark reds (based on Alizarin crimson but mixing in purples, greens and browns) and pick out the darkest areas of all with this mix. Finished!
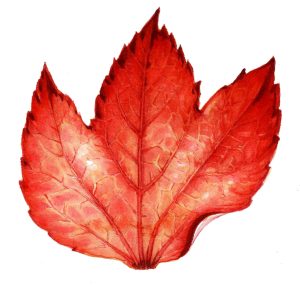
Although I’m pleased with the result, I feel that it;s far from perfect. No matter how hard you try to capture the beauty of nature, you can never quite get an illustration to fully echo the glory of your subject matter!
If you’d like to see a film of me illustrating this leaf in real time, along with my thoughts and explanations of the processes involved, please do nip over to my youtube channel and take a look.


Thank you so much for your teaching, I really appreciate each step you go through from beginning to end. I have really learned so much from you. Thank you.
Hi Angela, Im so glad to hear that it’s helpful. Thanks for such a positive comment!
Thank you for this detailed
Instruction, it is very helpful.
My pleasure, Frans