

Red Deer stag step by step
It’s been a while since I did an animal step by step blog, so I thought I’d share a quick one on illustrating this Red deer stag Cervus elaphus.
Reference
I took a decent photo of a young Red deer stag a long time ago, and based the illustration on this. The advantage of using your own photos is that you don’t infringe anyone’s copyright.
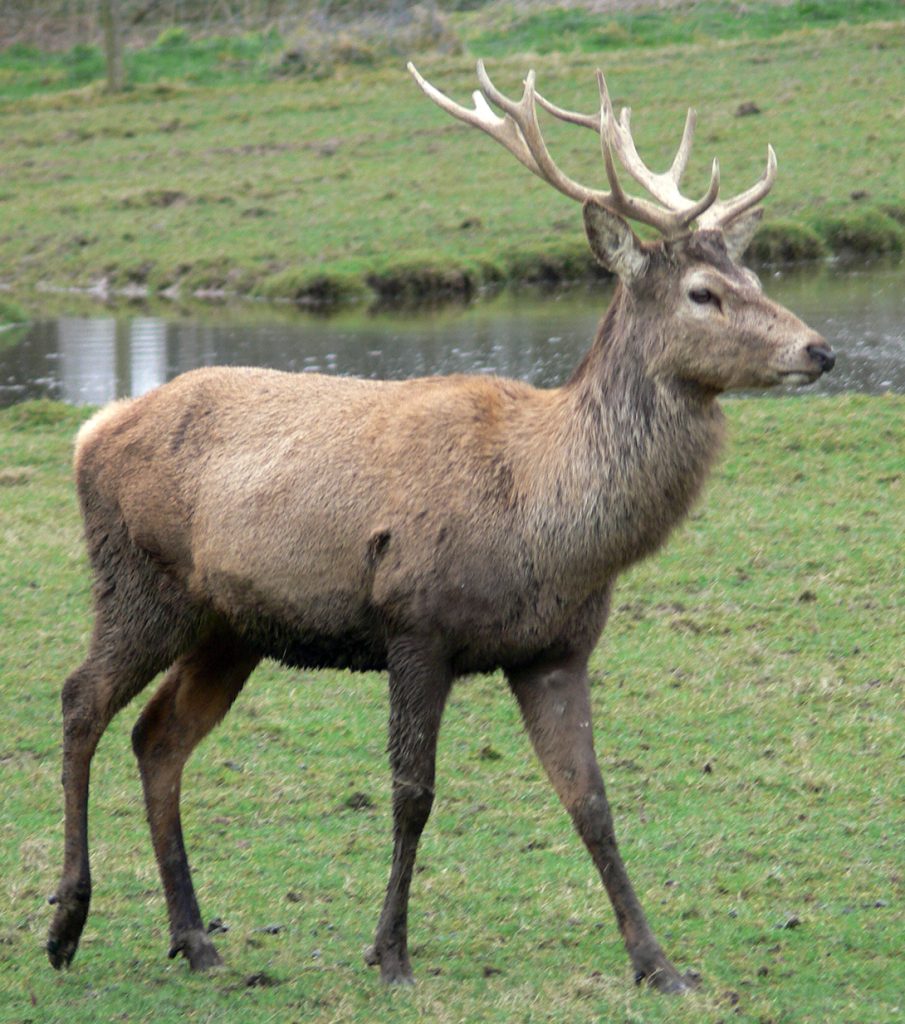
My own photo of a young male Red deer buck
However, there are various aspects that make this photo far from perfect. The “mane” at the throat is not pronounced. The colour is very washed out. I can’t see the hooves in detail. So I got some other reference from the internet that solved these problems.
Painting: Under layer
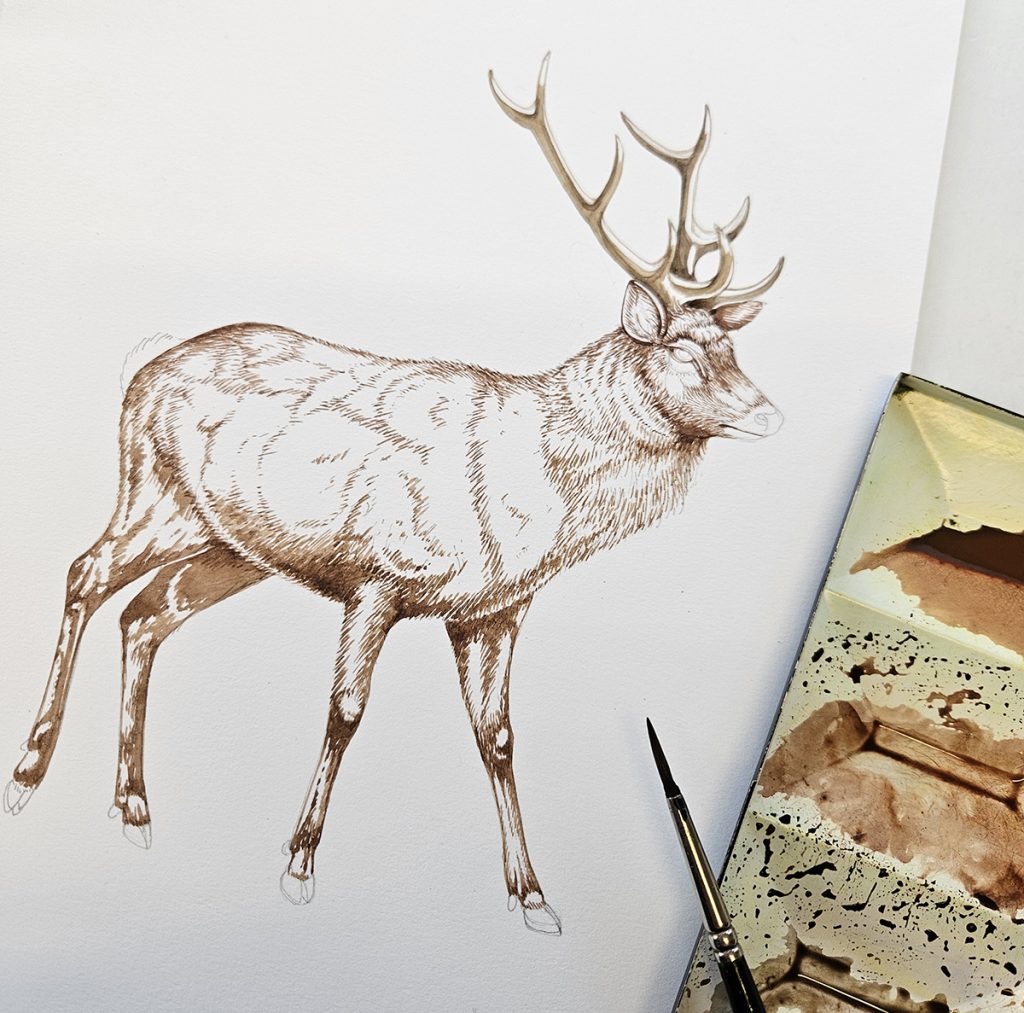
Once I’d drawn up the Stag (on Stonehenge aqua hotpress watercolour paper) I mixed Sepia with Winsor violet and Light red (all Winsor & Newton watercolour paints) and plotted in the areas of shadow, using brush marks to echo the growth pattern of the fur. These days I tend to use a Princeton Velvetouch brush (size 2), which is a synthetic. (For much more on my quest for a good synthetic paintbrush, check out my blog series.)
Initial mid tones added
My nest step was very different to what I usually do. I mixed up three watery colours, and used these to plot in the tonal differences of the deer. I normally reserve this wash for the every end of an illustration, but was curious to see what happened if I switched the timing of this wash.
The Colours were a diluted dark brown (as in the mix above), a dilute reddish brown (Sepia plus plenty of Light red), and a brown-orange (Light red with a touch of Cadmium orange.)
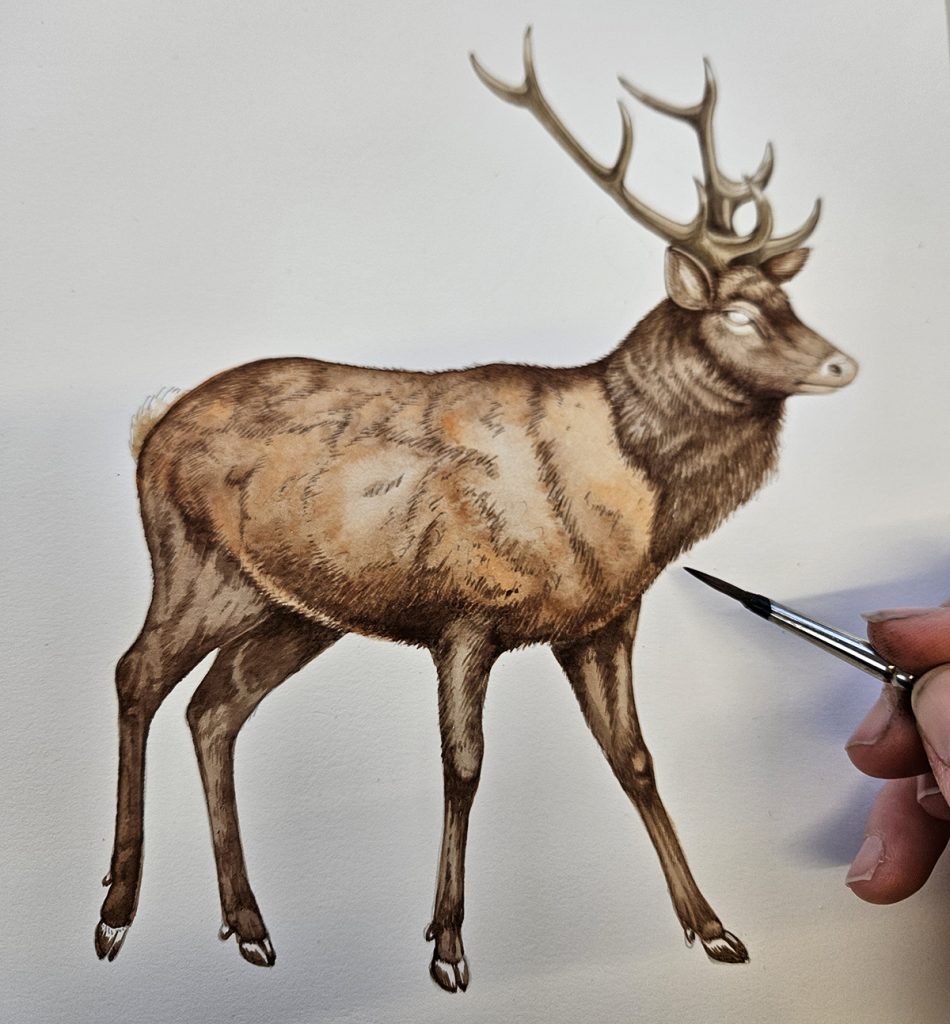
Undercoat wash added
Adding Detail
Usually, I add detail to the body first and leave the head until the end. But in the spirit of experimentation, I completed the head first. I made the eye too large, so had to come in with some white gouache. I also forgot that the pupils of deer’s eyes are lateral slits rather than round, so this had to be altered later on. The face is a darker brown than the body, so the mix was Sepia plus Winsor violet plus Winsor green (yellow hue).
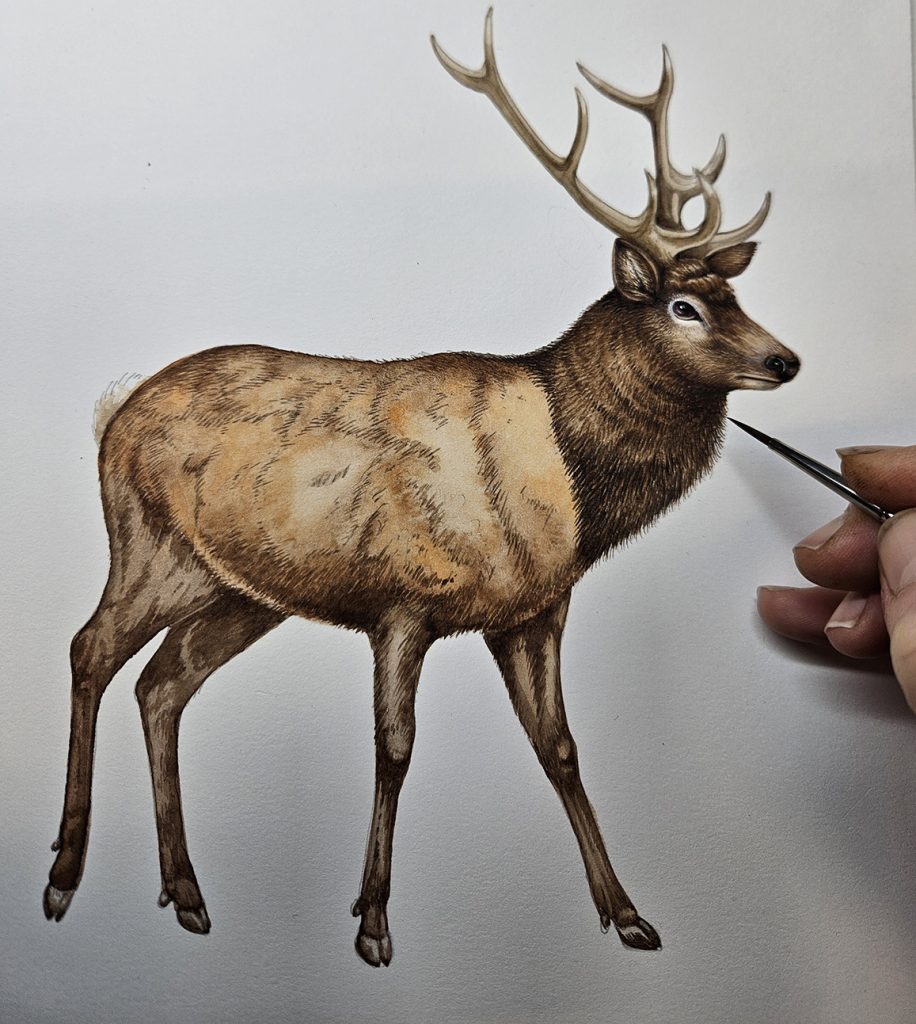
Adding detail to the neck and face of the deer
The next step takes a long time and requires plenty of patience (and something good to listen to on the radio!). Using the same three colour mixes, in a less diluted form, I build up the body colour of the stag using lots and lots of tiny brush strokes. These strokes follow the line of fur growth and give texture as well as colour.
I started with the Reddish brown mix, more or less across the entire animal. Then I added dark browns to the legs, more to the neck, to the belly and rear end. The third layer was the Brown-orange, covering up the highlights but adding a lighter brown tone to show where the light hits the animal.
Finally, I mixed a very dark brown by altering the ratios of Sepia, Winsor violet, and Winsor green. This was used to pick out and add real depth to the shadows on the neck and legs. Adding the hooves and detail to the antlers were the last steps.
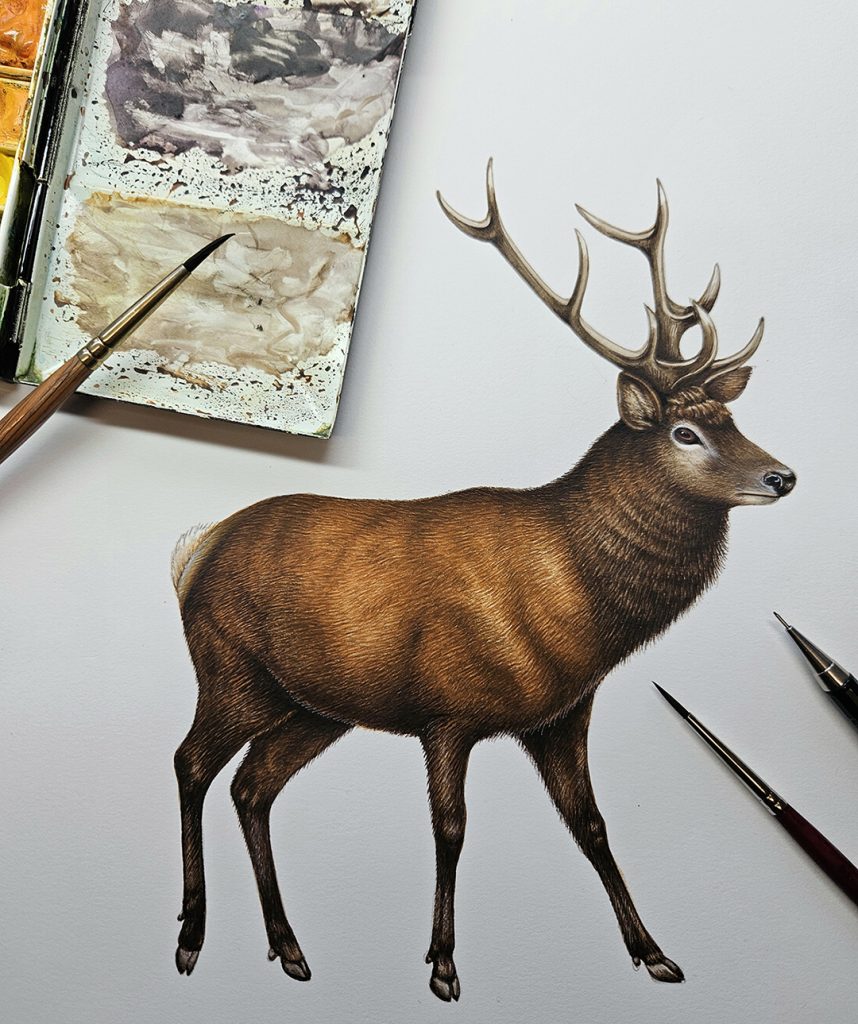
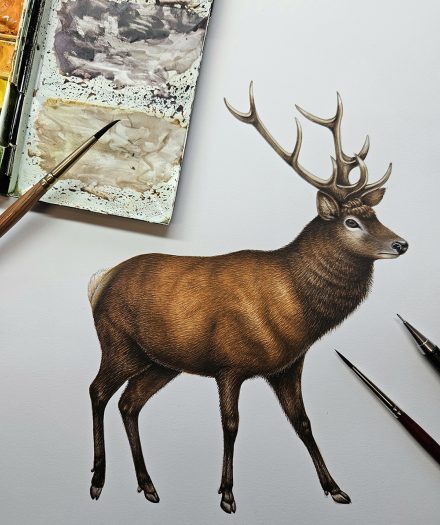
Completed illustration with paint-box and brushes
Conclusion
Switching the timing of when the loose colour wash was added was useful. it helped provide information on tone which always helps when you add the detailing. I’m quite happy with the finished illustration, although the use of white gouache on the face and rump is a bit of a shame. However, it needed to be done because I’d not got the tonal balance correct. It could have looked worse.

Completed Red deer
The main aim was to improve on the (rather poor) last Red deer I’d illustrated. And I’m glad to say this has been achieved.
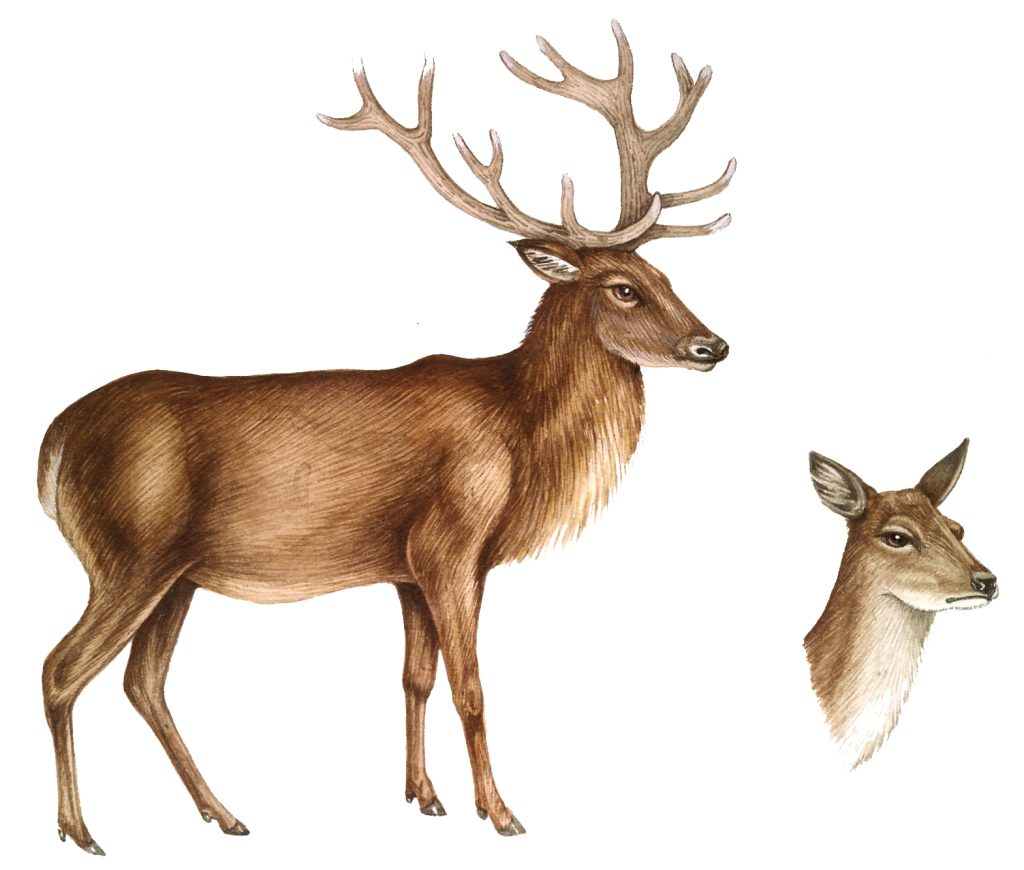
Previous illustration of Red deer
This Red Deer stag step by step is so beautiful, and I love your painting and sketching techniques. These are the best and I want you to teach us how to follow the process and make such a masterpiece.
Aww thanks! Thats lovely to hear
jia club The platform uses secure payment methods like UPI, PhonePe, and Paytm, which are familiar and trusted by Indian users. This makes transactions feel safe and convenient
jai club gaming is doing a fantastic job with content quality, and the dedication behind each video really shows.